Timer Service Configuration
In this page will be explain how to configure the Timer Service from zero to hero.
The configuration is split in two sections:
- Technical Configuration contains the configuration of the technical needs of the Service
- Console Configuration contains the configuration fConsole
Technical Configuration
The Timer Service is easy to configure, it just needs some environment variable and a dedicated CRUD with a specific structure.
Environment Variables
The timer-service allows to do operations on timers just using REST APIs, but can do actions, when an expiration occurs, using REST or KAFKA (kafka is not required).
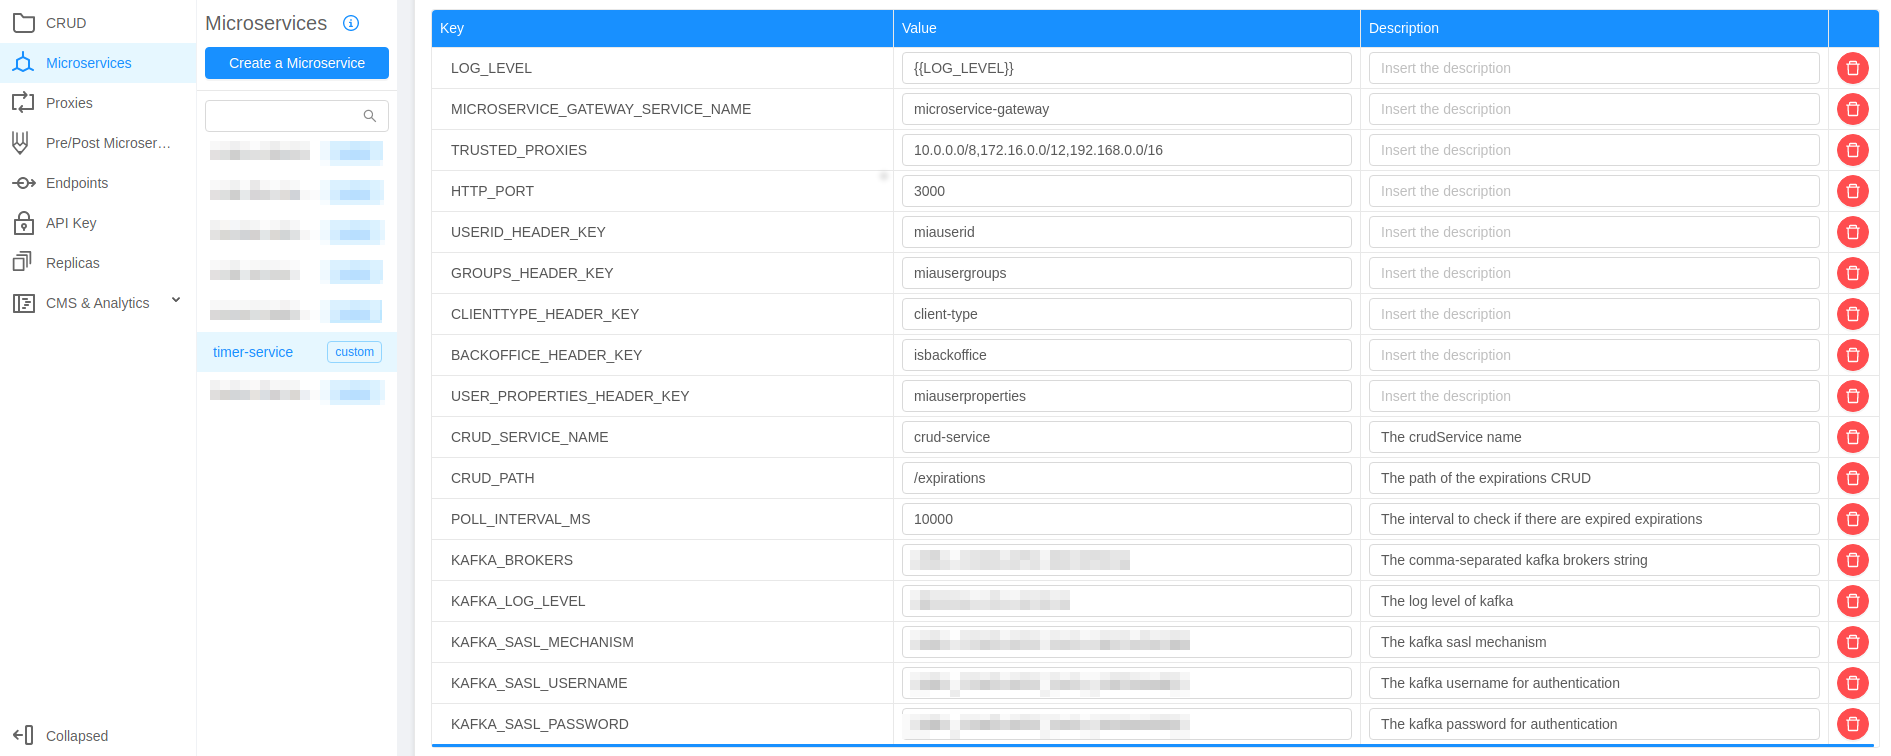
Following the environment variables needed by the Service:
- CRUD_SERVICE_NAME: the name of the CRUD Service (usually
crud-Service) - CRUD_PATH: the path to call on the CRUD (e.g.
/expirations) - POLL_INTERVAL_MS: the milliseconds to wait before do another poll; use case:
- the timer-service wakes
- the timer-service asks for pending timers
- the timer-service evaluates all timers to see if there are expired timers
- the timer-service sleeps for a duration of POLL_INTERVAL_MS
- KAFKA_BROKERS (optional): the comma separated kafka brokers list; if missing, the outputMode of type
kafkawill not work and the timer will set in error state - KAFKA_LOG_LEVEL (optional): the log level for kafka
- KAFKA_SASL_MECHANISM (optional): the SASL mechanism of kafka
- KAFKA_SASL_USERNAME (optional): the username for the kafka authentication
- KAFKA_SASL_PASSWORD (optional): the password for the kafka authentication
- MAX_FAILURE_COUNT (optional): if set, tracks on crud the failure count and implement the max retry logic
If the kafka brokers don't have authentication you can simply just pass the KAFKA_BROKERS environment variable. The authentication properties created are compliance to kafkaJs. Following an example of complete authentication properties:
{
  "ssl": true,
  "sasl": {
    "mechanism": "plain",
    "username": "username",
    "password": "password"
  }
}
Dedicated CRUD
Following the CRUD structure needed by the timer-service to work:
-
payload: the payload that will be send when the timer expires as:
- body if the
outputModeis of type rest - message value if the
outputModeis of type kafka
- body if the
-
startDate: the start date of the timer (type date)
-
expirationIntervalMs: the milliseconds, from the startDate, of the timer duration (a timer expires at startDate + expirationIntervalMs)
-
applicantService: a string that represent who set the timer (e.g. a microservice)
-
outputMode: an Object with the data to send the action when the expiration occurs
-
expirationDate: the date of the expiration, created by the Service (type date)
-
failureCount: number for tracking the failure count (used only with MAX_FAILURE_COUNT)
-
expirationStatus: an Object that represents the status of an expirations and has the following structure:
{"id": 1,"description": "description: 0 -> pending; 1 -> expired; 2 -> aborted; 3 -> error"}
Console Configuration
To configure a Timer Service on the Console follow the instructions:
-
open the Console and choose the project
-
create the dedicated CRUD by following the instructions above, the result will be as the following one:

-
create the microservice:
-
go to the microservices section
-
click on Create a Microservice
-
click on Docker Image Name

-
set the name and description as you prefer
-
insert the timer Service image name into the Docker Image Name field, or:
nexus.mia-platform.eu/core/timer-service:2.1.2 -
click on the Create button
-
add the environment variables by following the instructions above; the result should be like the following:
-