REST API for CRUD on data
A REST API is an application programming interface that conforms to the constraints of REST architectural style, and allows for interactions with RESTful web services. REST APIs allow clients (like mobile, web and other applications) to read, write, and edit the data of a system (like servers, databases, and many others) hiding the implementation details of the system itself.
In this tutorial we will see how to use Mia-Platform Console to configure and expose outside the project a REST API to perform CRUD operations (Create, Read, Update, Delete) on a data collection.
What We’ll Build
In this tutorial we will create a CRUD collection rappresenting generic products and expose it through REST API. More specifically, we will:
- Set up a CRUD Service;
- Create the products CURD collection;
- Add fields to the collection;
- Expose the CRUD via REST API;
- Test the API through API Portal.
Prerequisites
In order to start the tutorial you need:
- A URL to connect to a MongoDB Database.
You can connect to any MongoDB instance. If your are using Mia-Platform Console in PaaS, you can request a MongoDB Database managed by Mia-Platform by opening a proper Service Request. Before opening a Service Request, check if a MongoDB Database was already provided for you or your team during Company creation or Project creation phases.
Better to have:
- Some familiarity with API and REST concepts.
If you have already done the previous tutorial, you can skip the rest of the section and directly start the tutorial.
Before starting, we will assume that, you already have a clean project in Mia-Platform Console. In order to know how to create a project on Mia-Platform Console, read this guide.
The project must:
- Be integrated with a deploy pipeline;
- Have an ingress route with
api-gatewayasservice; - Have an API Gateway or a Envoy API Gateway in your project;
- Have a properly configured API Portal and Swagger Aggregator.
If your are using a Mia-Platform Console in PaaS and the project has been created using the "Mia-Platform Basic Project Template", the project already satisfies conditions 1 and 2.
Create CRUD Service
The first step is to create the CRUD Service plugin, its purpose is to abstract Data Collections allowing developers to expose CRUD APIs over the database in an easy, scalable, and secure way. In order to do it, from the Design area of the project, we must:
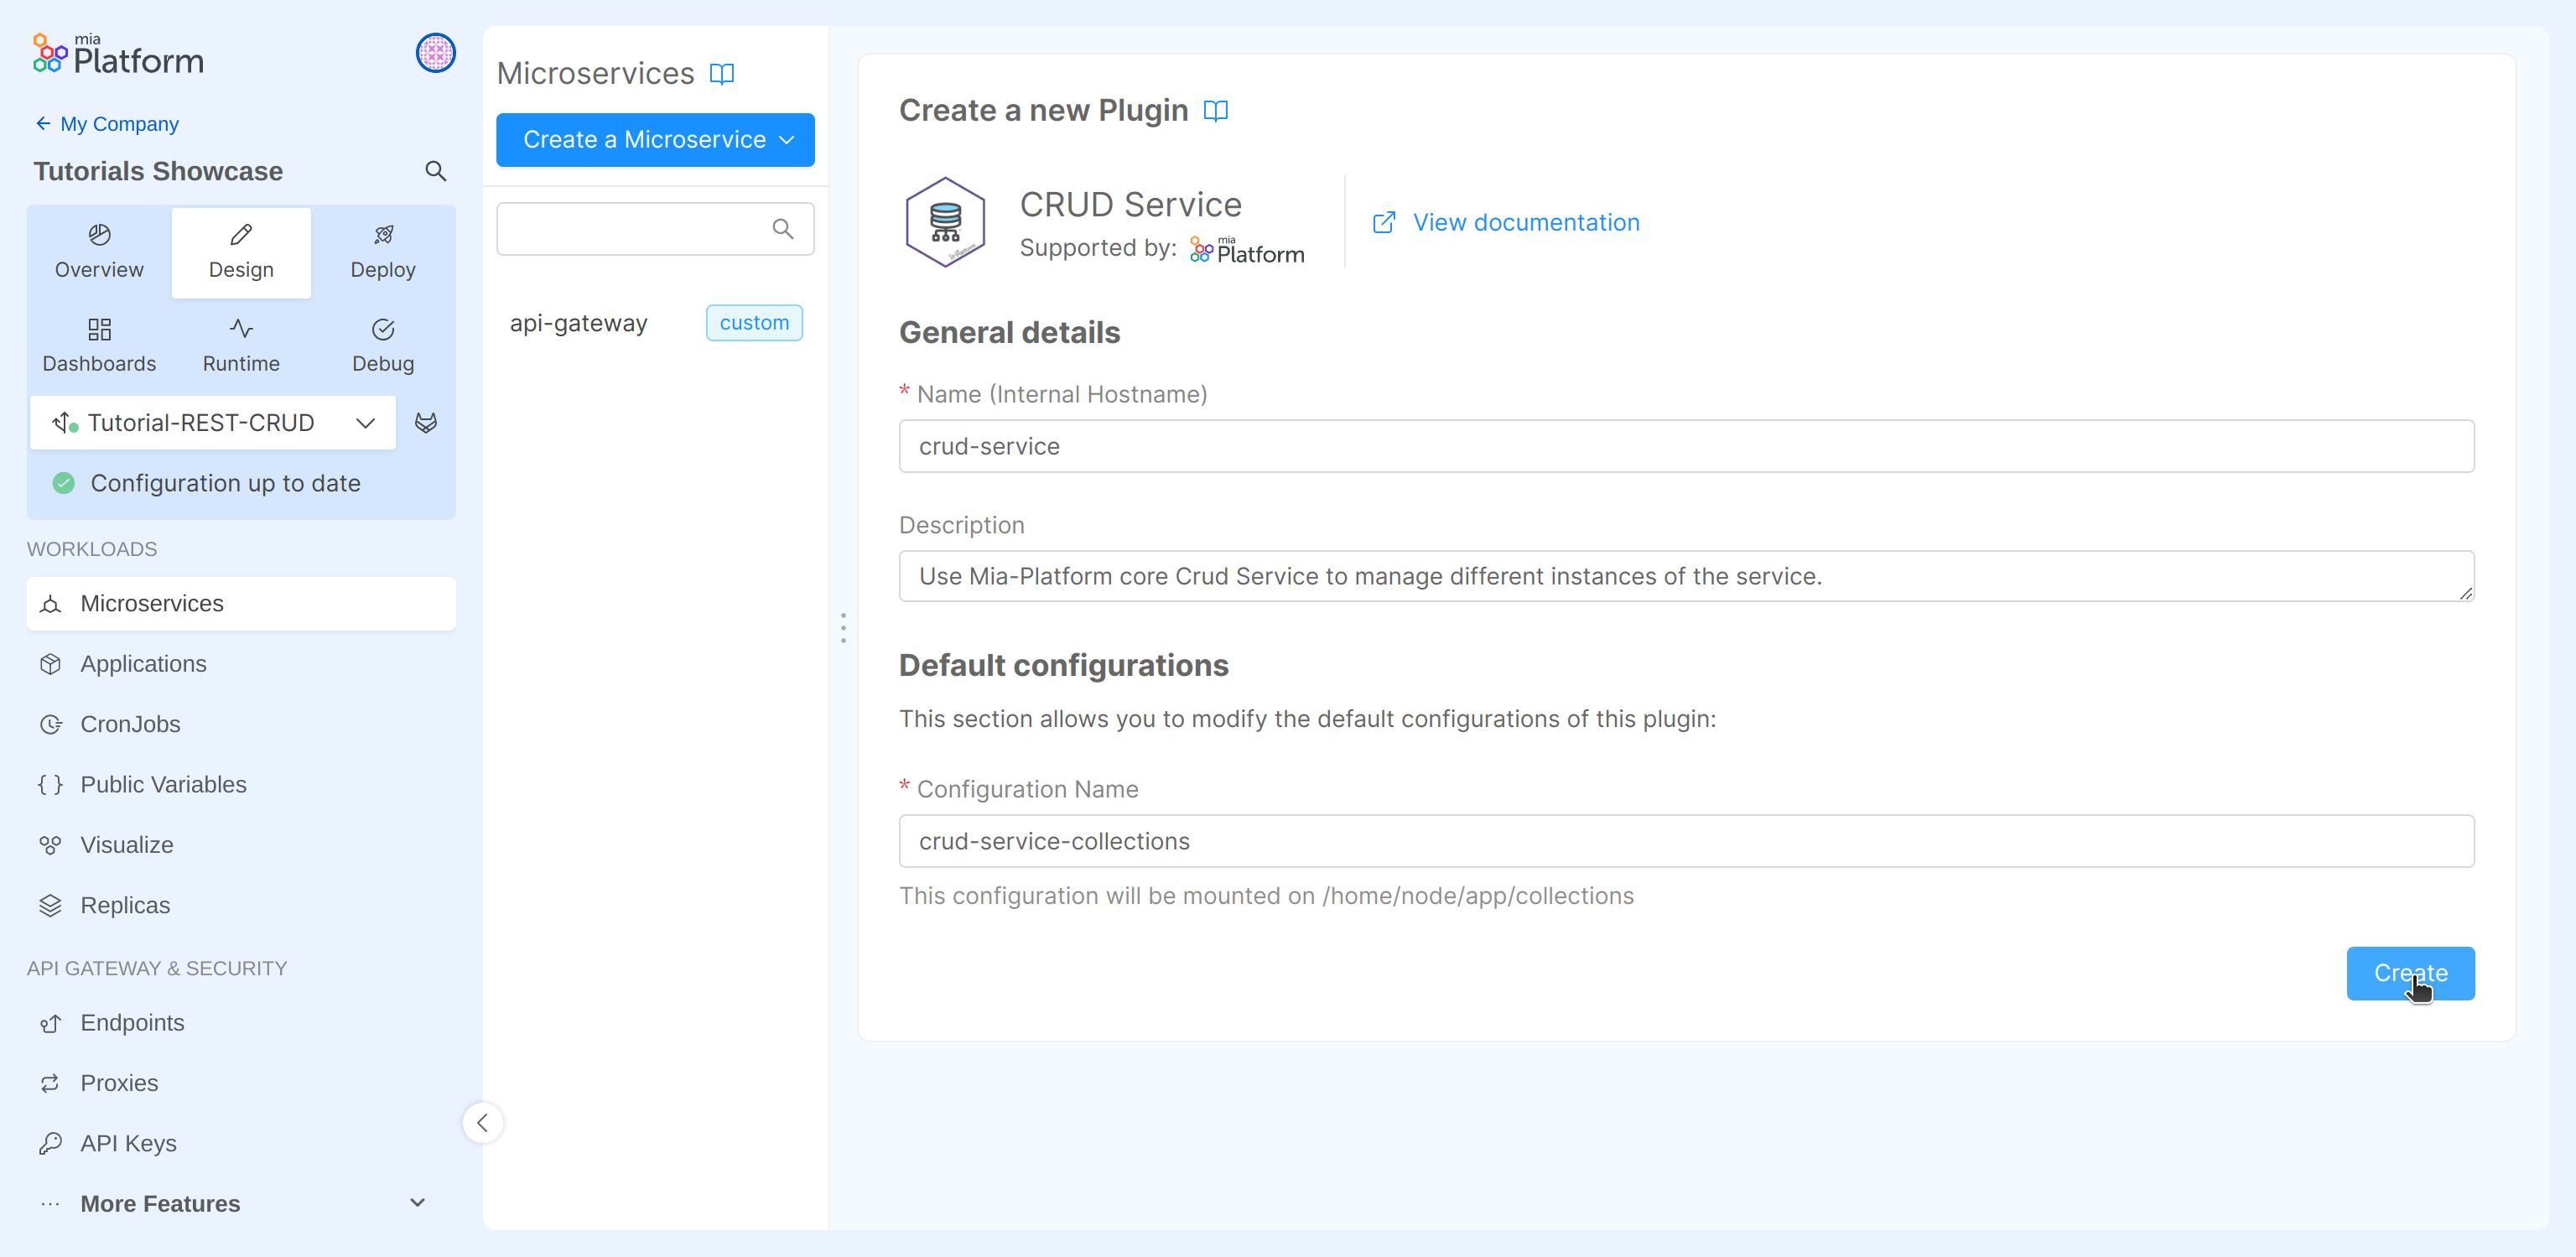
- From the sidebar, go to the Microservices section;
- Click on the Create a Microservice button;
- In the dropdown menu, select From Marketplace option;
- Type
CRUD Servicein the search bar; - Select the "CRUD Service" card from the list of results;
- Click on the Create button applying the default fields;
- Save the changes. You don't know how to do it? Take a look at Mia-Platform handbook!
Create a new CRUD collection
After creating the CRUD Service you can create a new CRUD collection that contains all the information about the products of a library. To do so, you can take advantage of the UI for the CRUD service configuration provided by Mia-Platform Console. Using the sidebar, you must move into the MongoDB CRUD section of the project.
In the left area of this section you can find the button "Create new CRUD" and the list of all collection of the project. In our case this list is empty since we started from scratch.
To create the "products" collection:
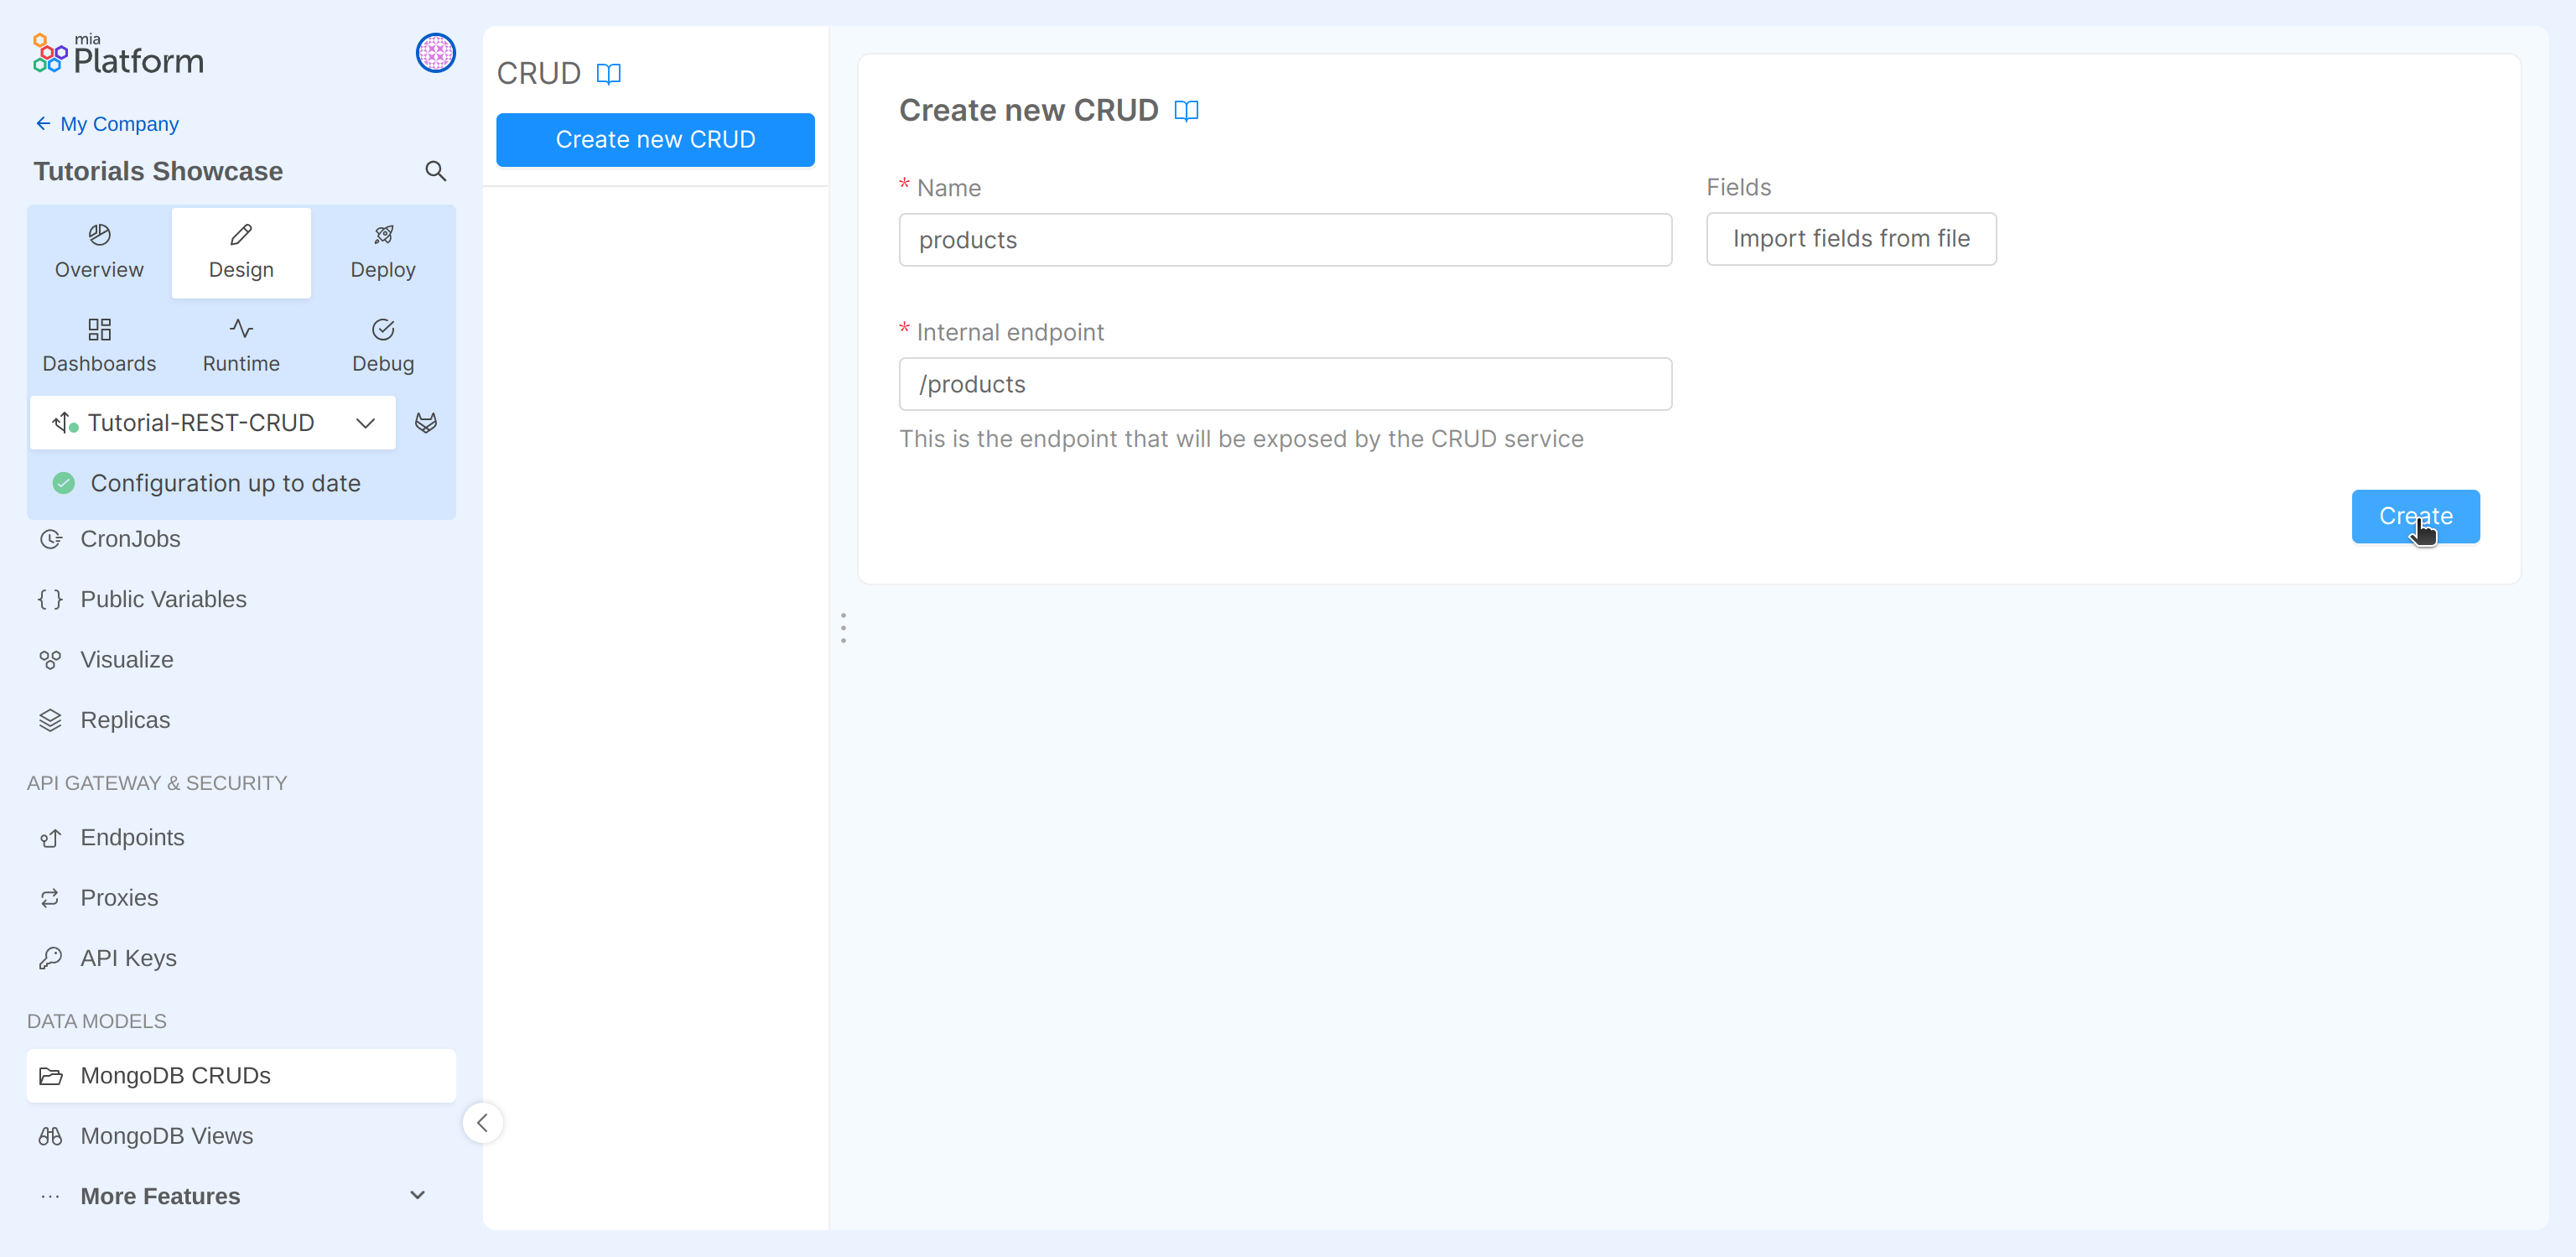
- Select "Create new CRUD";
- Fill the input:
- Name: it is the CRUD collection name, in this case
products; - Internal Endpoint: it is the endpoint exposed by the CRUD Service, by default it is the same as the name, but it can be changed. In this case we can use
/products;
- Name: it is the CRUD collection name, in this case
- Click on the Create button.
- Save the changes.
CRUD collection configuration
Once you have created a collection it is time to configure its schema. As you will notice the Mia-Platform Console has already created some default fields that can not be changed. These fields are necessary for the proper functioning of the CRUD collection:
| Field | Type | Required | Nullable | Description |
|---|---|---|---|---|
| _id | ObjectId | Yes | No | The document id |
| creatorId | String | Yes | No | The creator id |
| createdAt | Date | Yes | No | The creation date |
| updaterId | String | Yes | No | The updater id |
| updatedAt | Date | Yes | No | The update date |
| __STATE__ | String | Yes | No | The state |
Moreover, you can notice that:
- in the Indexes section, an index on the
_idfield and one on thecreatedAtfield has been created - in the Internal Endpoints,
/productsendpoint has been created with default__STATE__set asPUBLIC.
Since the default __STATE__ is PUBLIC, newly created items will have PUBLIC state by default (i.e. when an explicit __STATE__ value is not provided in the request)
At this point, we can modify the DB schema by creating the required properties of your CRUD collection, in this case the one about the products. To do so, you can choose between 2 options:
- Manually adding the properties;
- Importing the properties from a JSON file.
Option 1: Manually add CRUD collection fields
In order to create the fields manually, you must click on the Add field button.
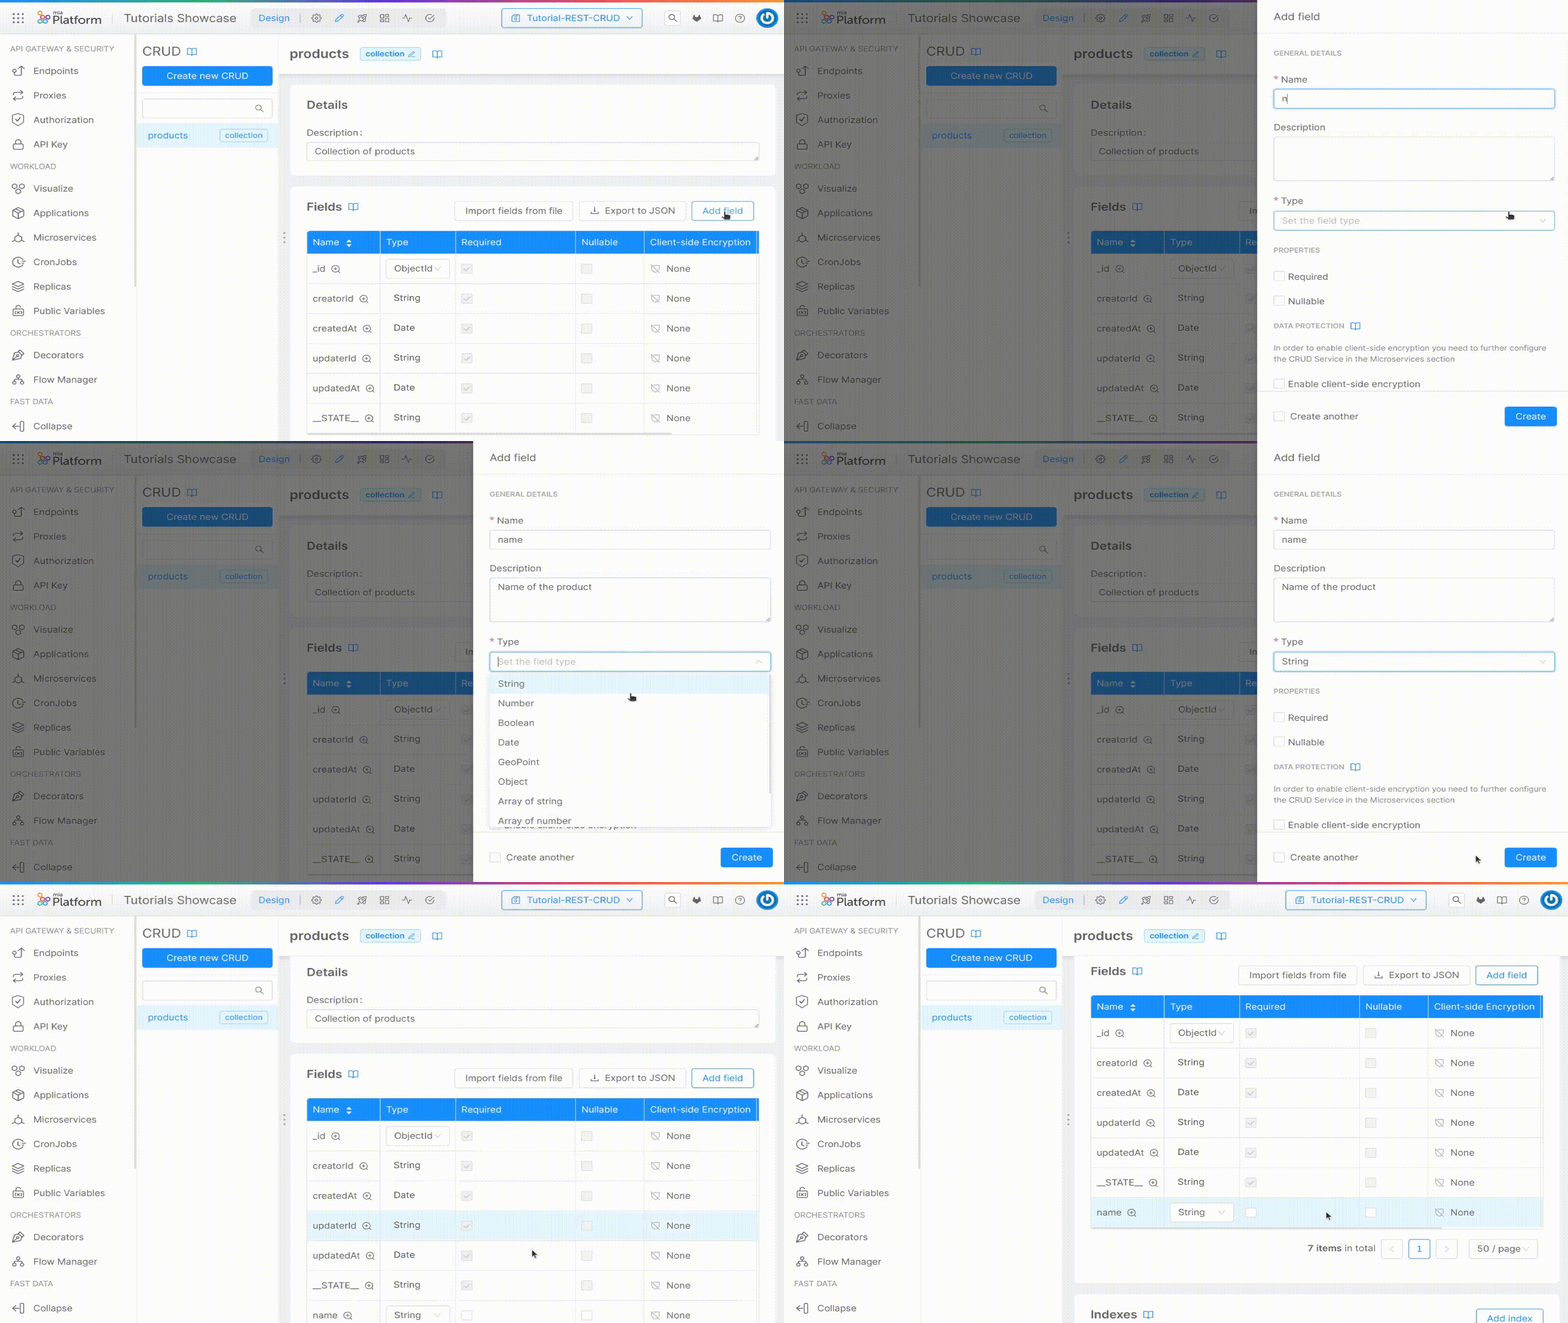
In this interface you can add:
- Name (required): the name of the field;
- Description: the description of the field;
- Type (required): the type of the field. Accepted values are:
- String, Number, Boolean, Date, GeoPoint, Object, Array of String, Array of Number, Array of Object, or ObjectId;
- Required: if the field is required;
- Nullable: if the field is nullable;
- Client-side Encryption: if the field use the client-side encryption;
- Allow search on encrypted field: if the encrypted field is searchable;
- Sensitivity: the GDPR sensitivity. Accepted values are:
- Unclassified, Public, Confidential, Secret, Top Secret;
- GDPR Description: the GDPR description
At bottom of the drawer you can select "create Another" to create another field after creating the one in progress. By selecting this option the drawer will not disappear after confirming the creation of the field, so that you can immediately proceed with the configuration of the new one.
Once you have filled in all the needed properties you can create the field by clicking on the "Create" button.
For this example we will create the following fields:
| Name | Type | Required | Nullable | Description |
|---|---|---|---|---|
| name | String | Yes | false | Name of the product |
| description | String | No | false | Description of the product |
| price | Number | Yes | false | Price of the product |
| image | Object | No | false | Image of the product |
| stock | Number | No | false | How many products are in stock |
After adding these fields, you can read the properties in the CRUD page:
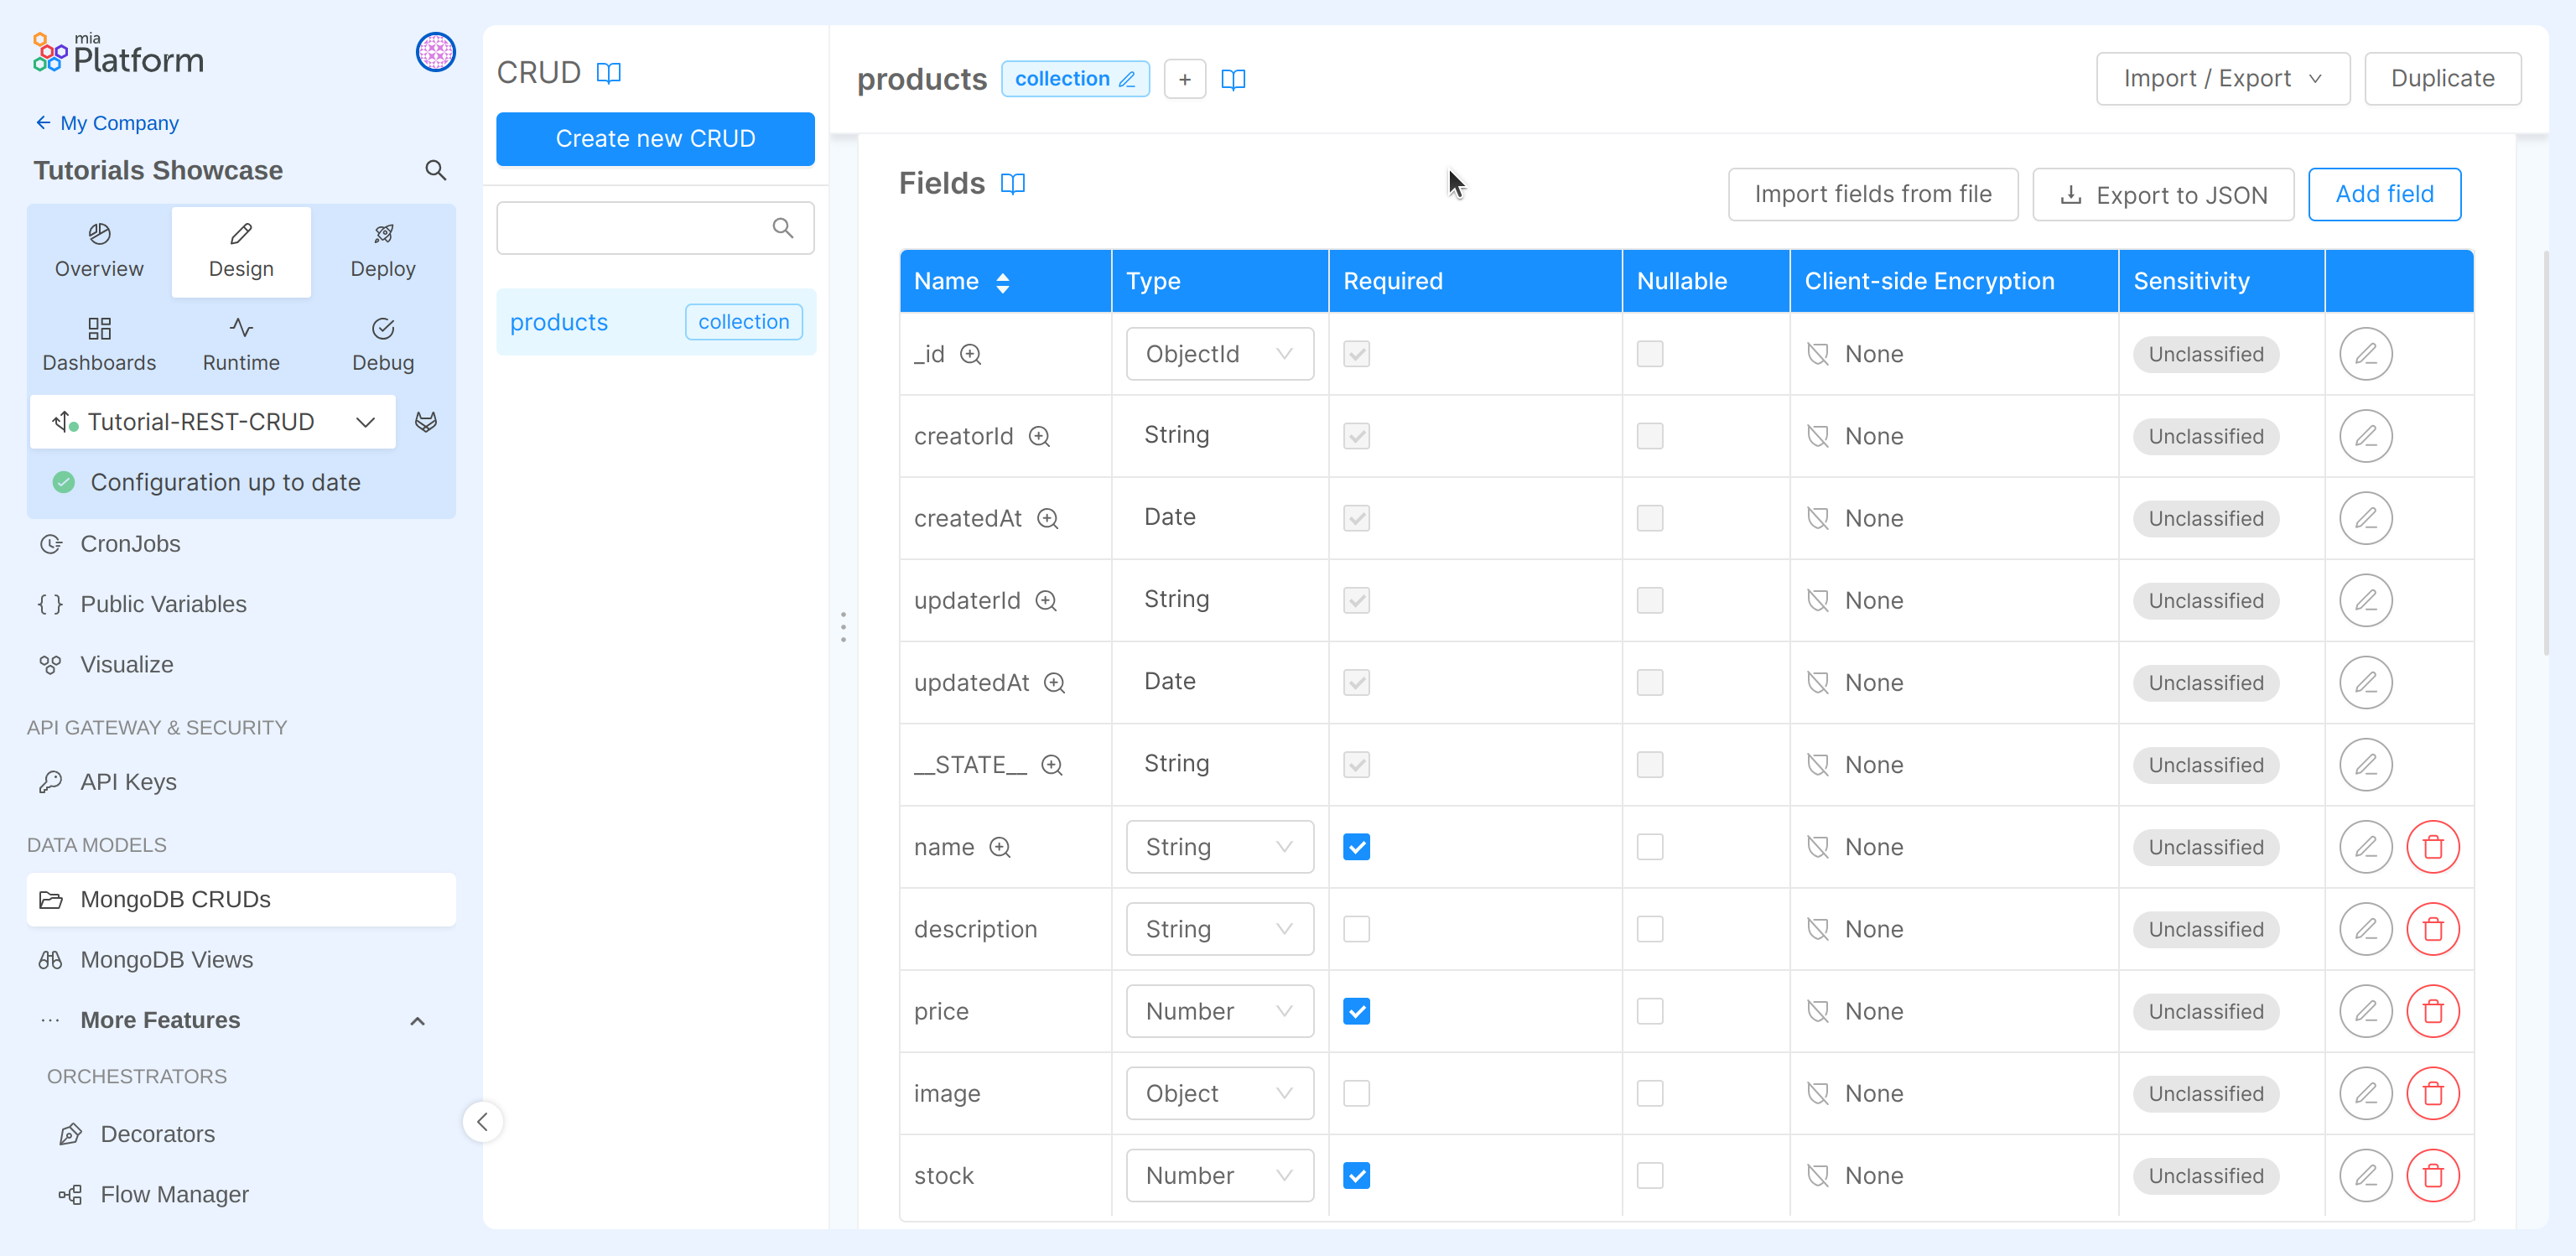
Once you have created all the fields, remember to save the changes!
You can use the "Export to JSON" button to download the current CRUD schema for future imports!
Option 2: Import CRUD collection
You can add fields from a JSON file compliant to the the schema required by the CRUD service. For this example, we will use the file that you can download here. If you prefer, you can create a new JSON file containing the following schema:
Click to see the tutorial schema:
In order to import the fields from a file, we must:
- Click on the "Import fields from file" button;
- In the dialog box, select the file you want to use.
Once you have created all the fields, remember to save the changes!
You can import fields during the creation phase of a new CRUD Collection, by clicking on the "Import fields from file" button, as you can see in the image.
Expose the CRUD using an endpoint
In order to make CRUD operations on the newly created collection available from outside the project, we will now add an endpoint.
If you don't know how to do it take a look at the first tutorial
The parameters to set for the endpoint are the following ones:
- Base path:
/products - Type: in the dropdown menu select "CRUD"
- CRUD Base Path: in the dropdown menu select
/products
Our configuration is ready. You can save and deploy it in a runtime environment! You don't know how to do it? Take a look at Mia-Platform handbook!
Try CRUD endpoints with API Portal
You can now go to the API portal: from your Project Overview, click on the "Go to Documentation" link of the environment you have deployed in. Under the products tag, you can see the list of endpoints that will allow us to read, write, edit, and delete the information on your CRUD collection.
You can perform some insertions using POST call and then try to read the data using the GET request.
Remember that, by default, the GET API will only return data having PUBLIC as STATE.
Note that the configuration we implemented was done in such a way that elements are created by default with PUBLIC state.
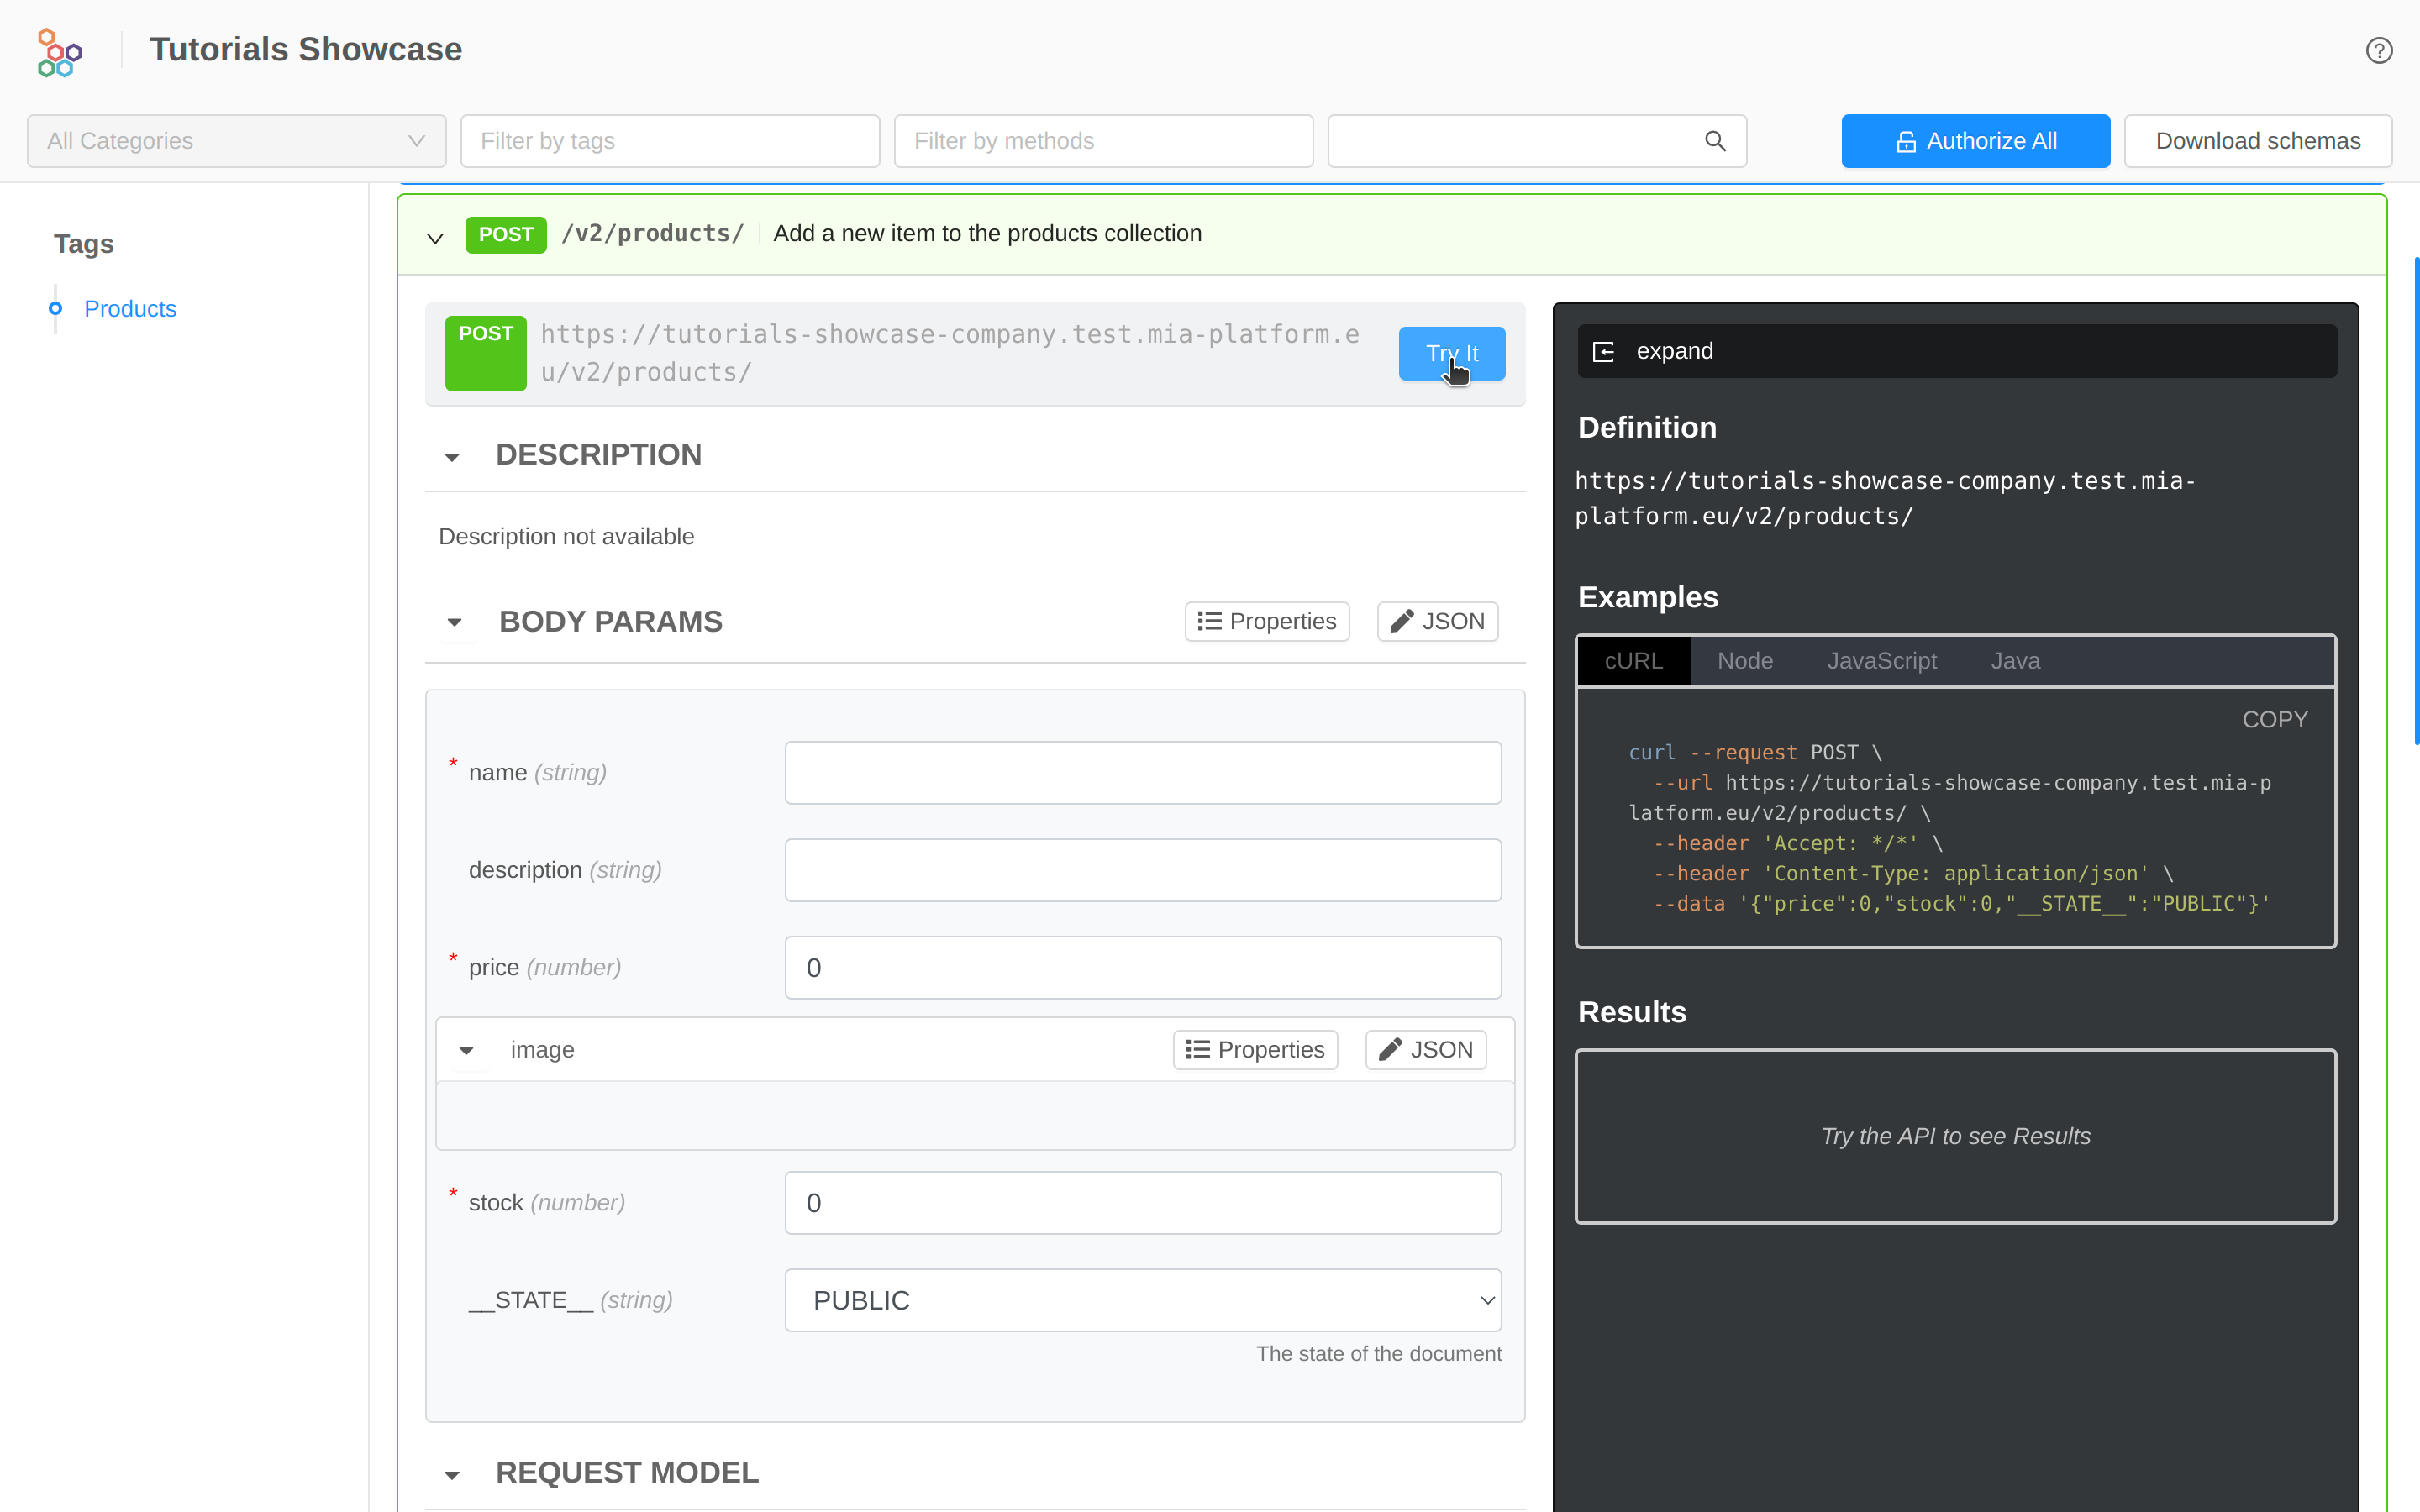
Here you can find an overview of the API Portal:
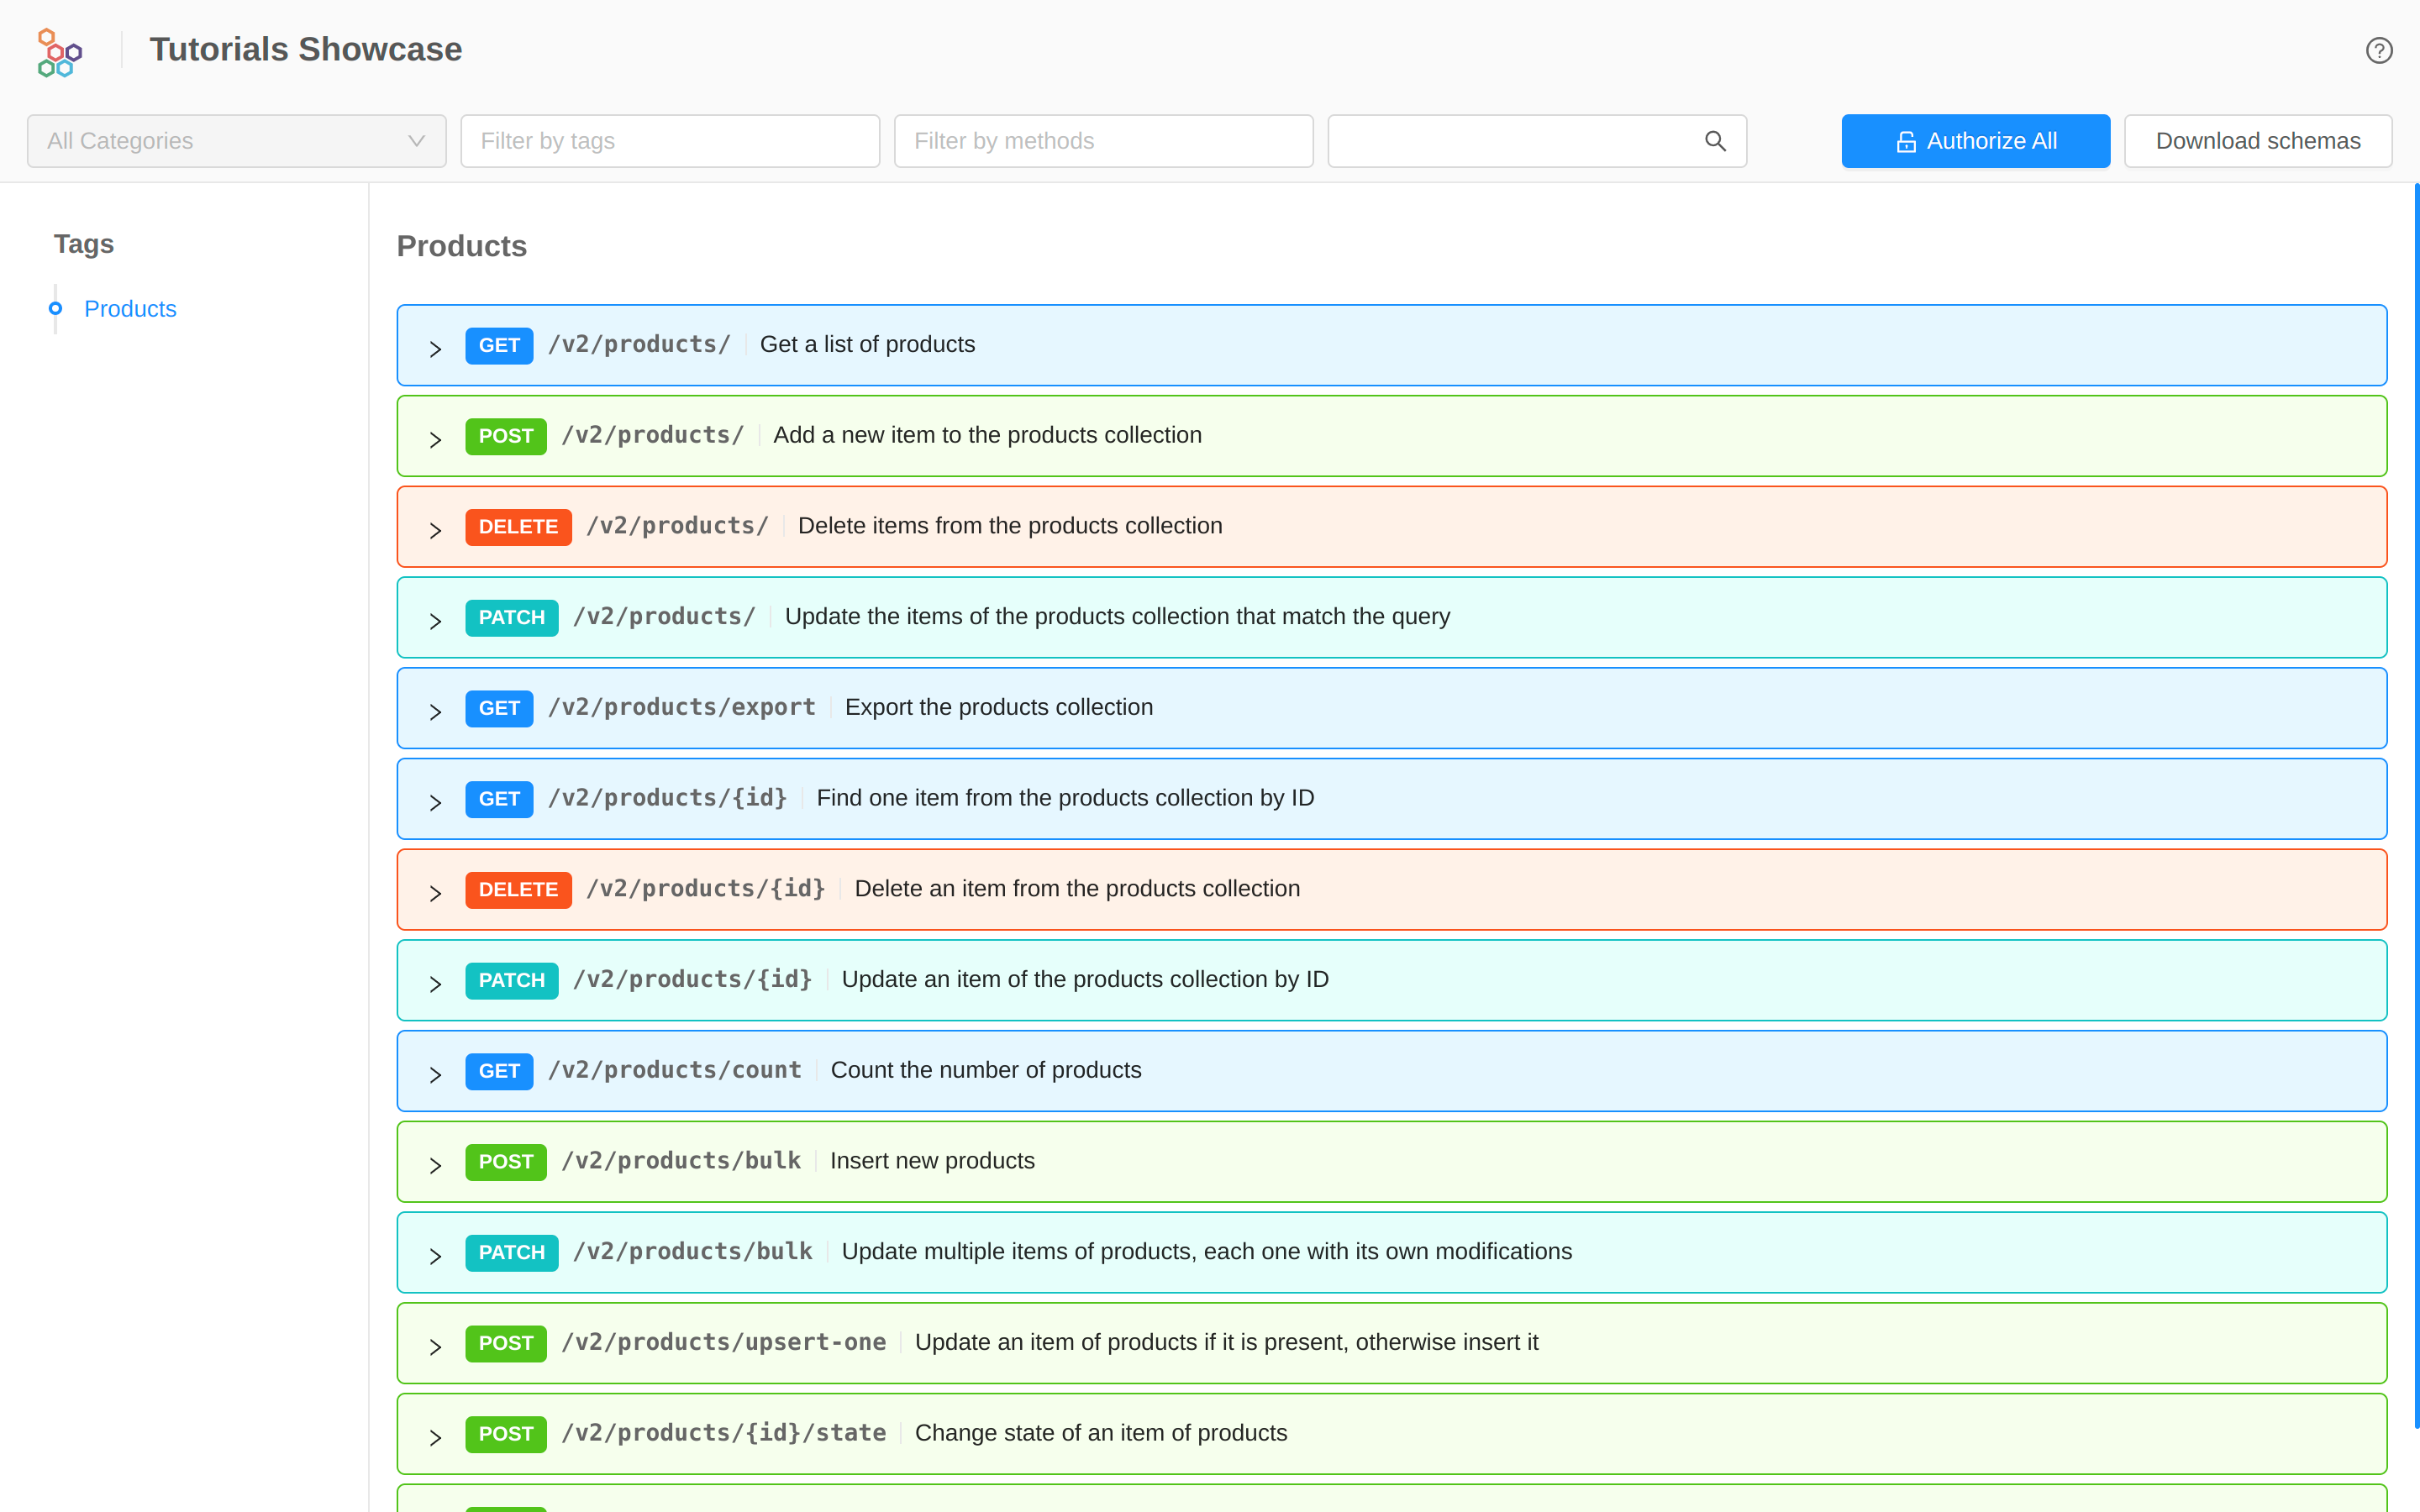
By expanding a method, you will find everything you need to make an call. In this case, for example, the POST call:
