Create your extension
Following this tutorial you will learn how to add the Backoffice as an extension within a Project, in order to consult it directly from the Console.
Prerequisites
This guide requires that you have:
- A Company on which you are Company Owner. Its identifier should be used each time there is the
my-tenant-idoccurrence. - The Company has a project reachable externally, otherwise create one by referring to this guide.
- The
Microfrontend Composer Toolkitapplication created and exposed to view the Backoffice frontend. Follow this section of the guide to do so. - The response from the Backoffice endpoint can be embedded within an iframe. See this link for more information.
- Miactl tool installed consulting the guide on this link
1. Register Backoffice Extension
Once that all requisites are satisfied, you can register the Backoffice as an extension using the following command:
miactl extensions apply --endpoint https://<my-console-domain>/ --company-id my-tenant-id -f ./<relative-path>/my-extension.json
where in the file my-extension.json there are the info to register:
{
  "name": "Integrated Backoffice",
  "description": "Extension to integrate Backoffice on Console",
  "entry": "https://<my-domain>/mfe-application/home",
  "type": "iframe",
  "destination": {
    "id": "project",
    "path": "/backoffice"
  },
  "activationContexts": [
    "project"
  ],
  "iconName": "PiProjectorScreenChartLight",
  "menu": {
    "id": "backoffice-route",
    "labelIntl": {
      "en": "Integrated Backoffice",
      "it": "Backoffice integrato"
    }
  },
  "category": {
    "id": "my-menu-group",
    "labelIntl": {
      "en": "My Menu Group",
      "it": "Il mio gruppo menu"
    }
  }
}
You can limit extension visibility based on Console User Capabilities; for instance, if you want to show your extension only to users who can deploy a project, you can configure the permissions key defined in this way:
{
  "permissions": ["console.company.project.environment.deploy.trigger"]
}
You can find out available capabilities in the Identity and access management page.
These registered routes are rendered as a menu item with label Integrated Backoffice that is attached to a category menu group with label My menu group. If you do not want to create new menu group, you can
- define the
category.idvalue using an existing menu groups corresponding to the chosen location applied asdestination.id(e.g.runtimefor the project location). In this case thecategory.labelIntlandcategory.ordershould be undefined. - not define the
categoryfield, so that the menu item will not be attached on any menu group
Response on success
Successfully applied extension with id `my-extension-id`
Edit the registered extension
If you need to correct or modify your newly registered extension, you can do so using the same miactl command and specifing the extension ID with the proper flag:
miactl extensions apply --endpoint https://<my-console-domain>/ --company-id my-tenant-id -f ./<relative-path>/my-extension.json --extension-id my-extension-id
See the complete example
The my-extension.json file should always contains all the extension info, both those to edit and both those that are already registered:
{
  "name": "Integrated Backoffice",
  "description": "Extension to integrate Backoffice on Console",
  "entry": "https://<my-domain>/mfe-application/home",
  "type": "iframe",
  "destination": {
    "id": "project",
    "path": "/backoffice"
  },
  "activationContexts": [
    "project"
  ],
  "iconName": "PiProjectorScreenChartLight",
  "menu": {
    "id": "backoffice-route,",
    "labelIntl": {
      "en": "Edited Integrated Backoffice",
      "it": "Backoffice Integrato Modificato"
    }
  },
  "category": {
    "id": "my-menu-group,",
    "labelIntl": {
      "en": "My Menu Group",
      "it": "Il mio gruppo menu"
    }
  }
}
Response on success:
Successfully applied extension with id `my-extension-id`
In this example, the labelIntl of the menu item has been modified.
2. Check that the new extension is registered
You can use the list and get commands to verify that the registration is done correctly:
List command
miactl extensions list --endpoint https://<my-console-domain>/ --company-id my-tenant-id
Get command
miactl extensions get --endpoint https://<my-console-domain>/ --company-id my-tenant-id --extension-id my-extension-id
where the list command returns all the registered extensions on the company my-tenant-id, instead the get command returns only the requested extension with all its info.
3. Activate the extension
After registering you can proceed with its activation on a project using the activate command:
miactl extensions activate --endpoint https://<my-console-domain>/ --company-id my-tenant-id --project-id my-project-id --extension-id my-extension-id
Response on success
Successfully activated extension `my-extension-id` for project: `my-project-id`
The extension can be activated on any projects inside the Company my-tenant-id changing the project ID in the miactl context.
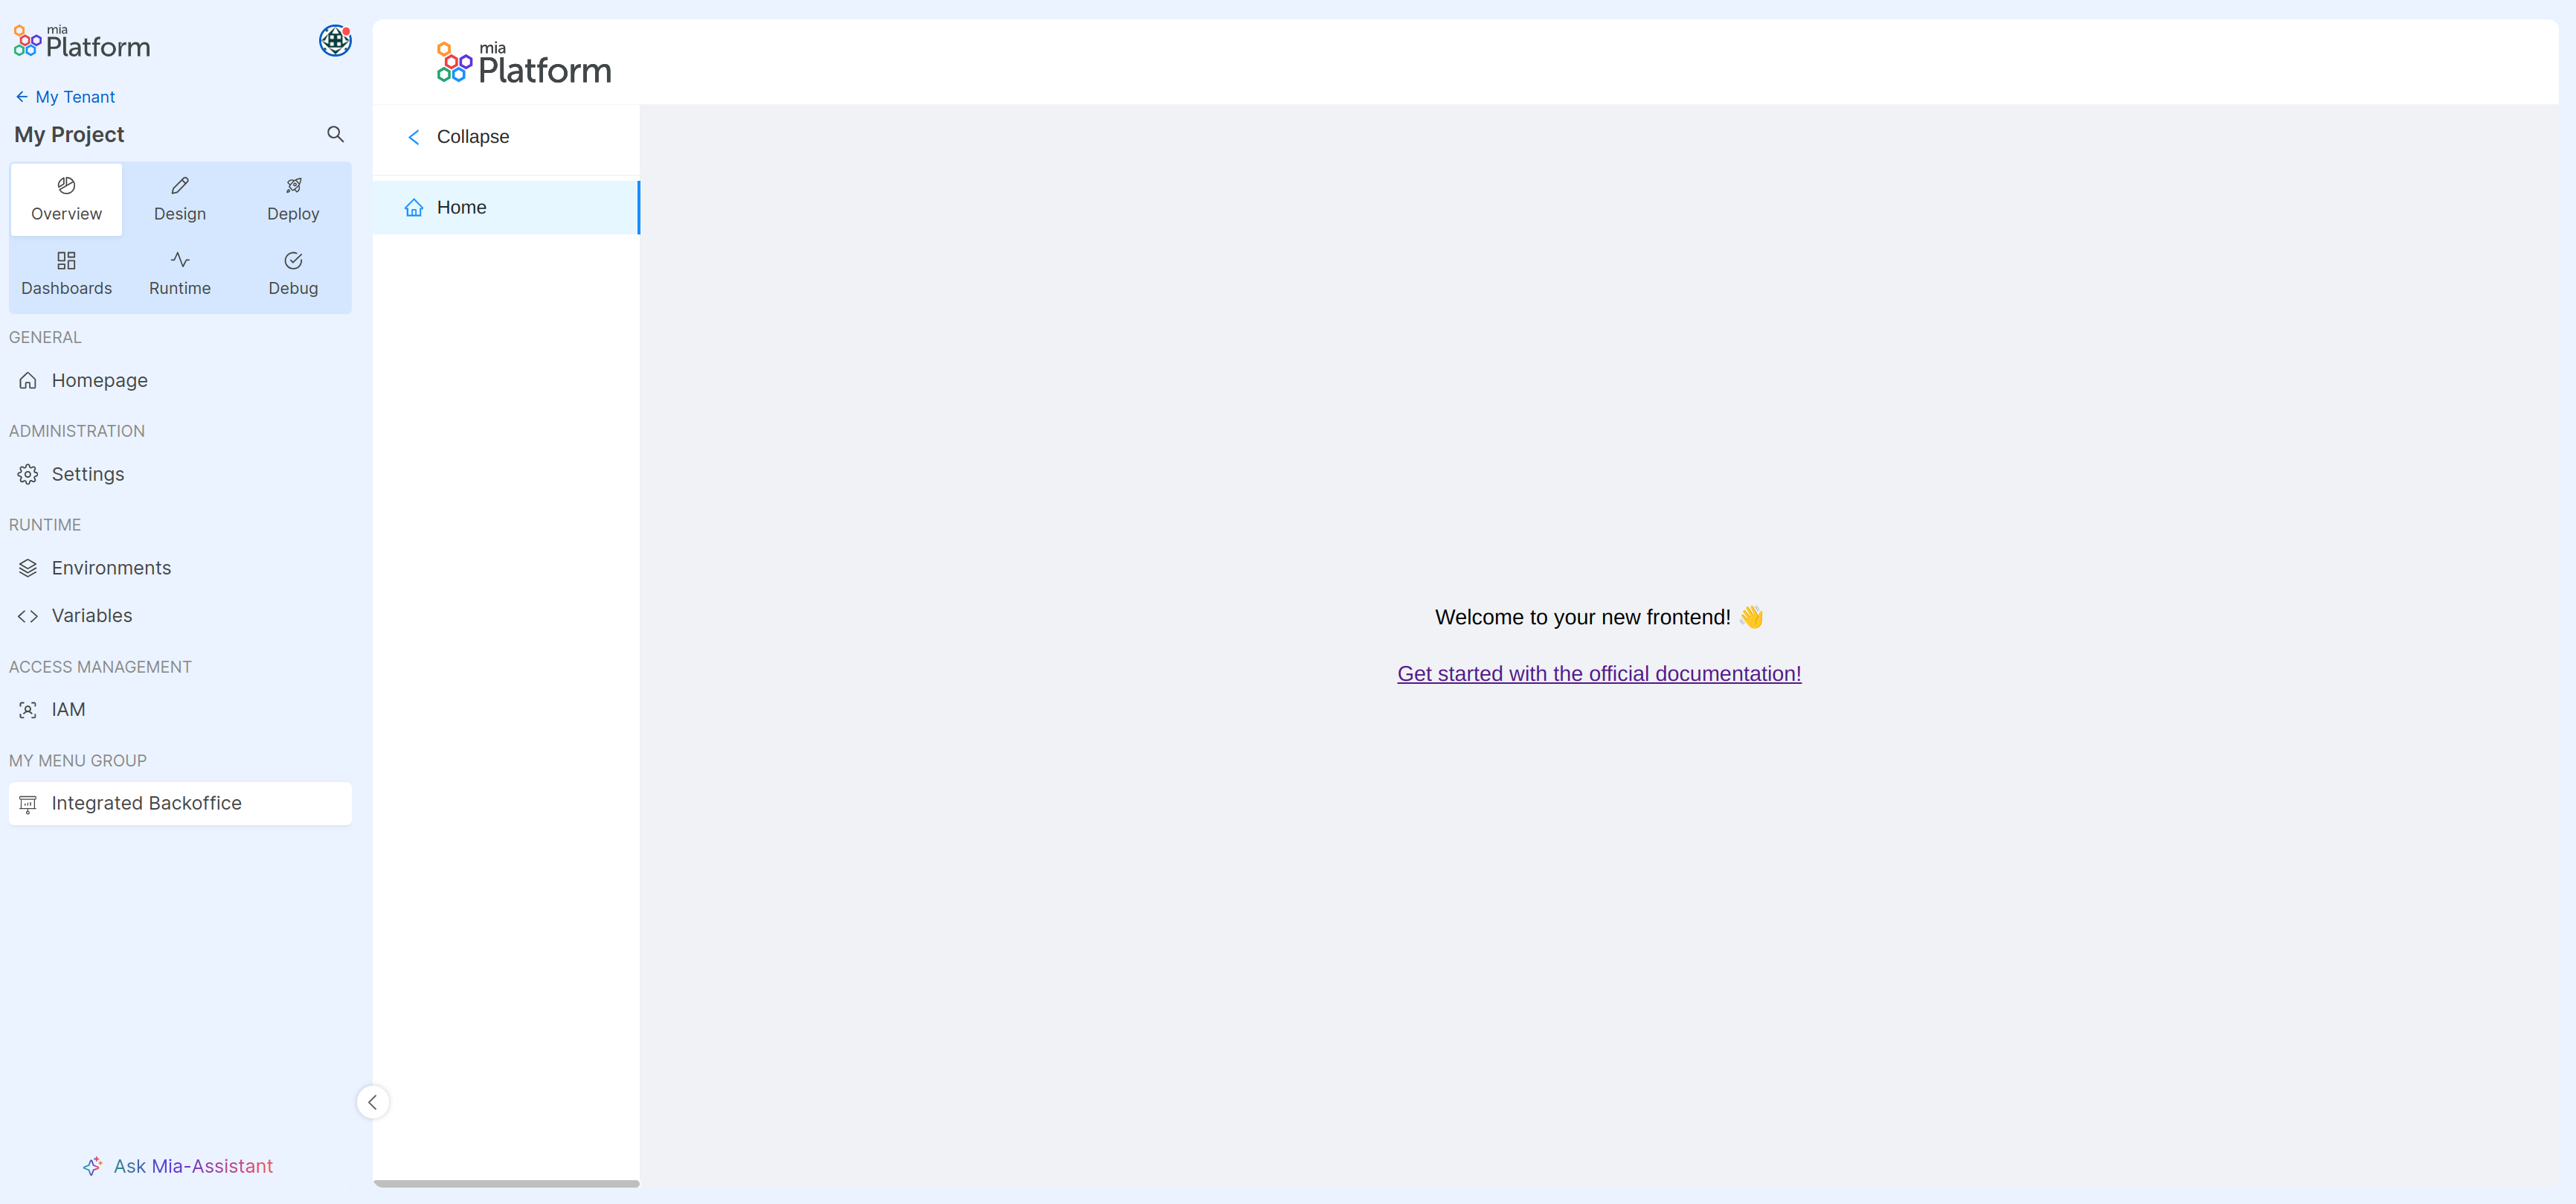
4. Enjoy the final result
Once that the new extension is correctly registered and activated, the final result should be similar to this:
5. Deactivate the Backoffice extension
To restore the initial state of the Console, you can deactivate the new extension using the deactivate command:
miactl extensions deactivate --endpoint https://<my-console-domain>/ --company-id my-tenant-id --project-id my-project-id --extension-id my-extension-id
Response on success
Successfully deactivated extension `my-extension-id` for project: `my-project-id`
Now, the extension should no longer be visible in the Console.
6. Remove definitely the Backoffice extension
To perform a complete cleanup and remove the newly registered extension, you can use the delete command:
miactl extensions delete --endpoint https://<my-console-domain>/ --company-id my-tenant-id --extension-id my-extension-id
Response on success
Successfully deleted extension from Company
You can repeat step 2 to verify that the extension has been successfully removed.