Manage Providers
Mia-Platform Console allows authorized users to manage providers.
More specifically, authorized users can:
- Add a new connection to a Provider;
- Edit the connection to a Provider;
- Set a default provider for a Company.
The providers management can be done at the Company level, through the "Providers" section.
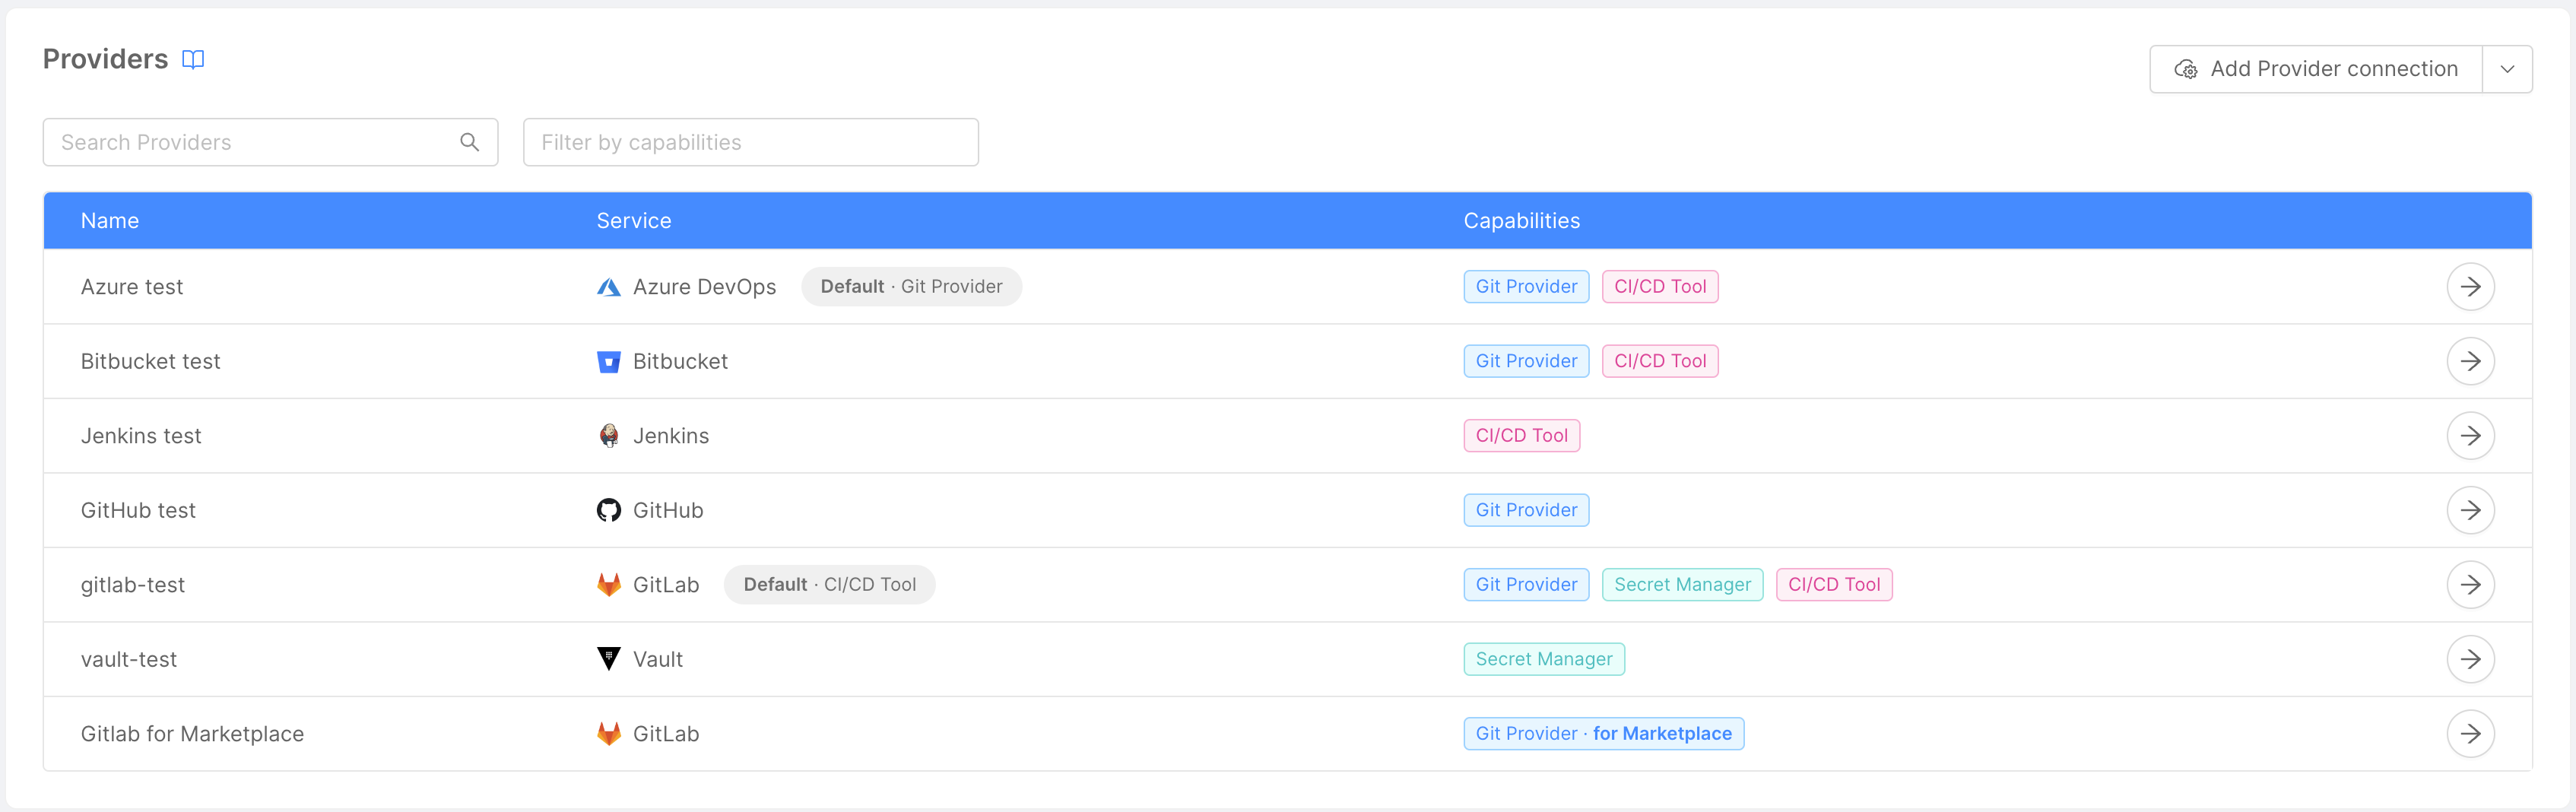
Here (assuming you already have some providers connected) you can see a table containing some information about the providers connected to the Console:
- Name: provider name, assigned by the user while connecting the provider to the Console;
- Capabilities: provider capabilities (Git Provider, Secret Manager, CI/CD Tool);
- Service: external reference service on which the provider relies to provide its capabilities (e.g. Azure, GitHub, Jenkins).
You can filter data based on provider name or service through the search bar at the top of the table, while the bar next to it allows you to filter by one or more capabilities.
Connect a Provider
You can connect a Provider by clicking on the "Add Provider connection" or "Add Marketplace Provider connection" button, located in the page's top right corner.

For more specific details on how to connect a Provider for Marketplace, please refer to the dedicated guide.
After clicking the button a modal will show up, and, through a few steps, you will be asked to enter some information related to the Provider.
Step 1: Provider Services
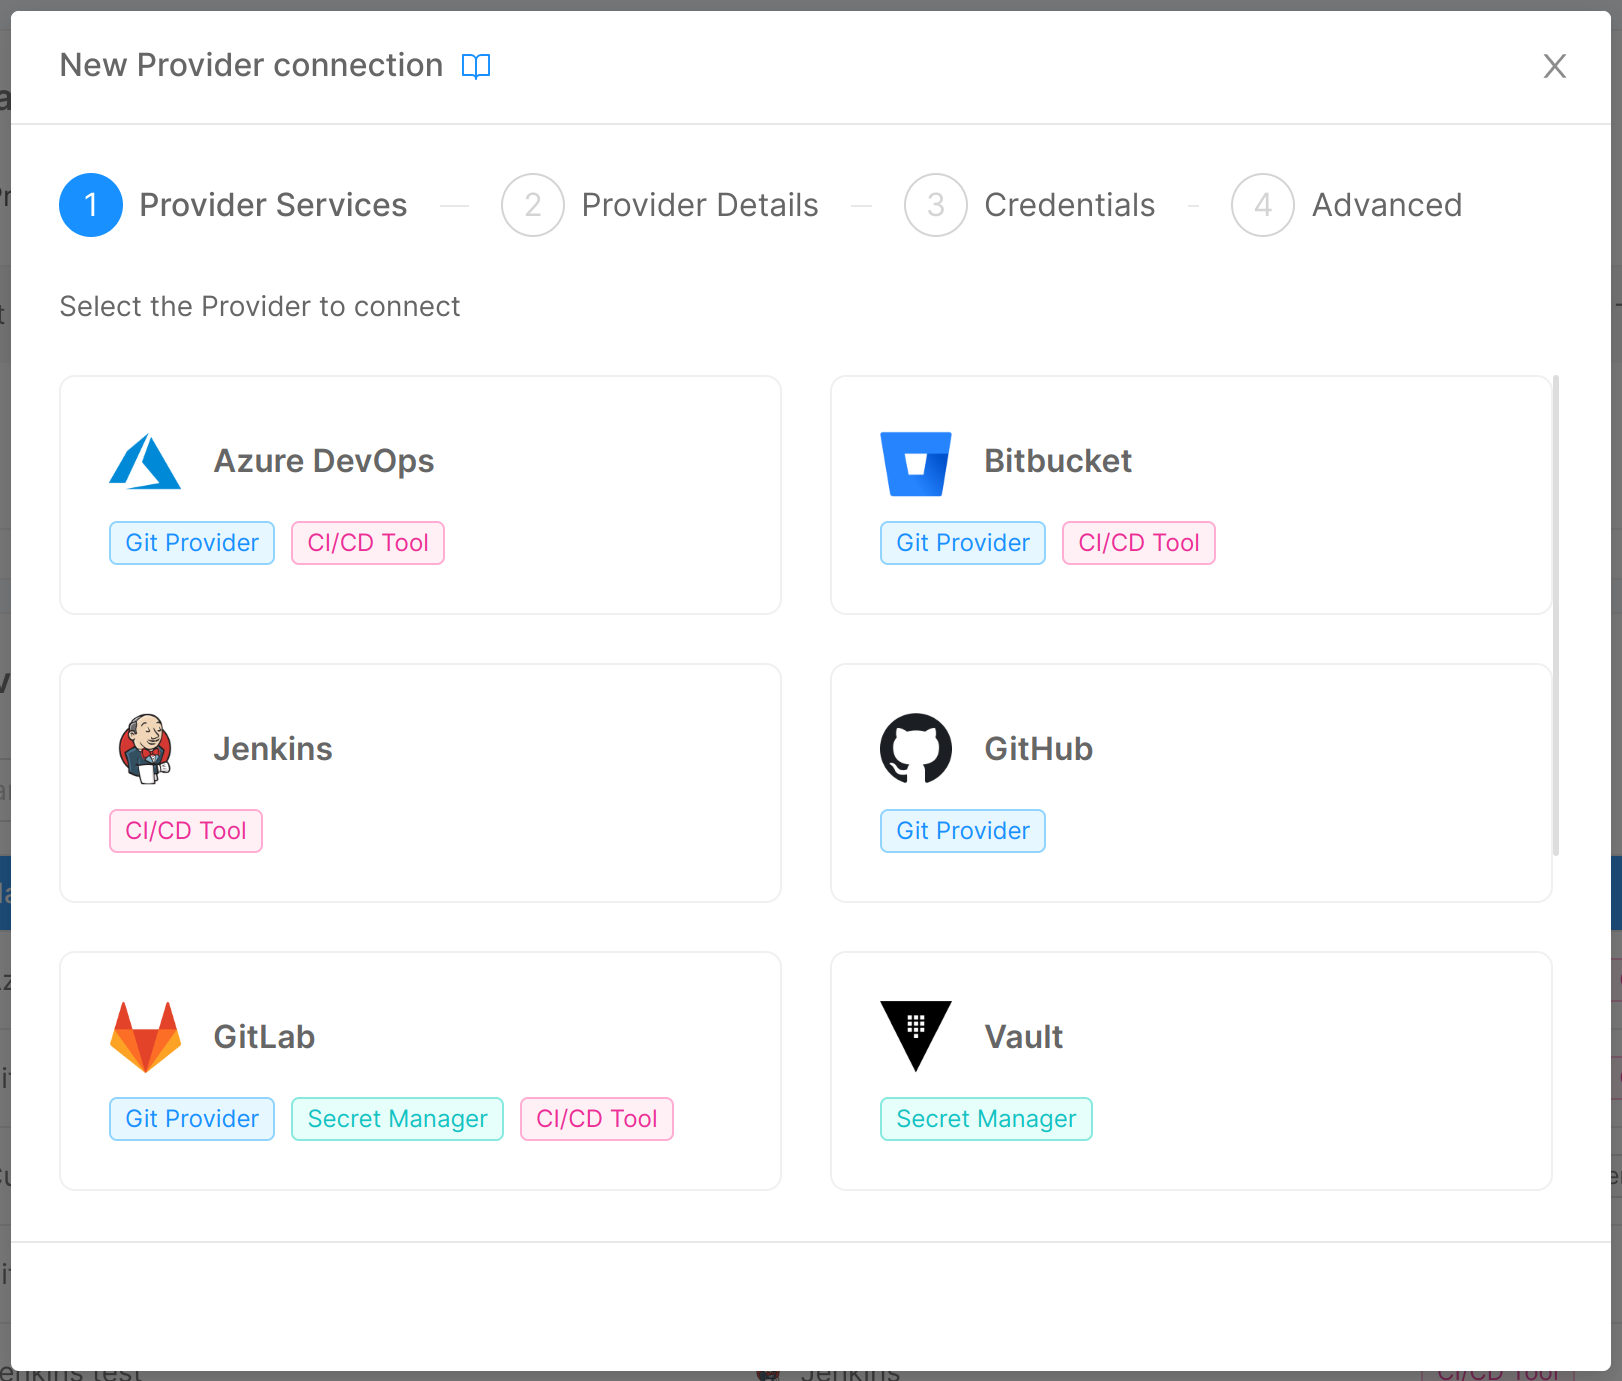
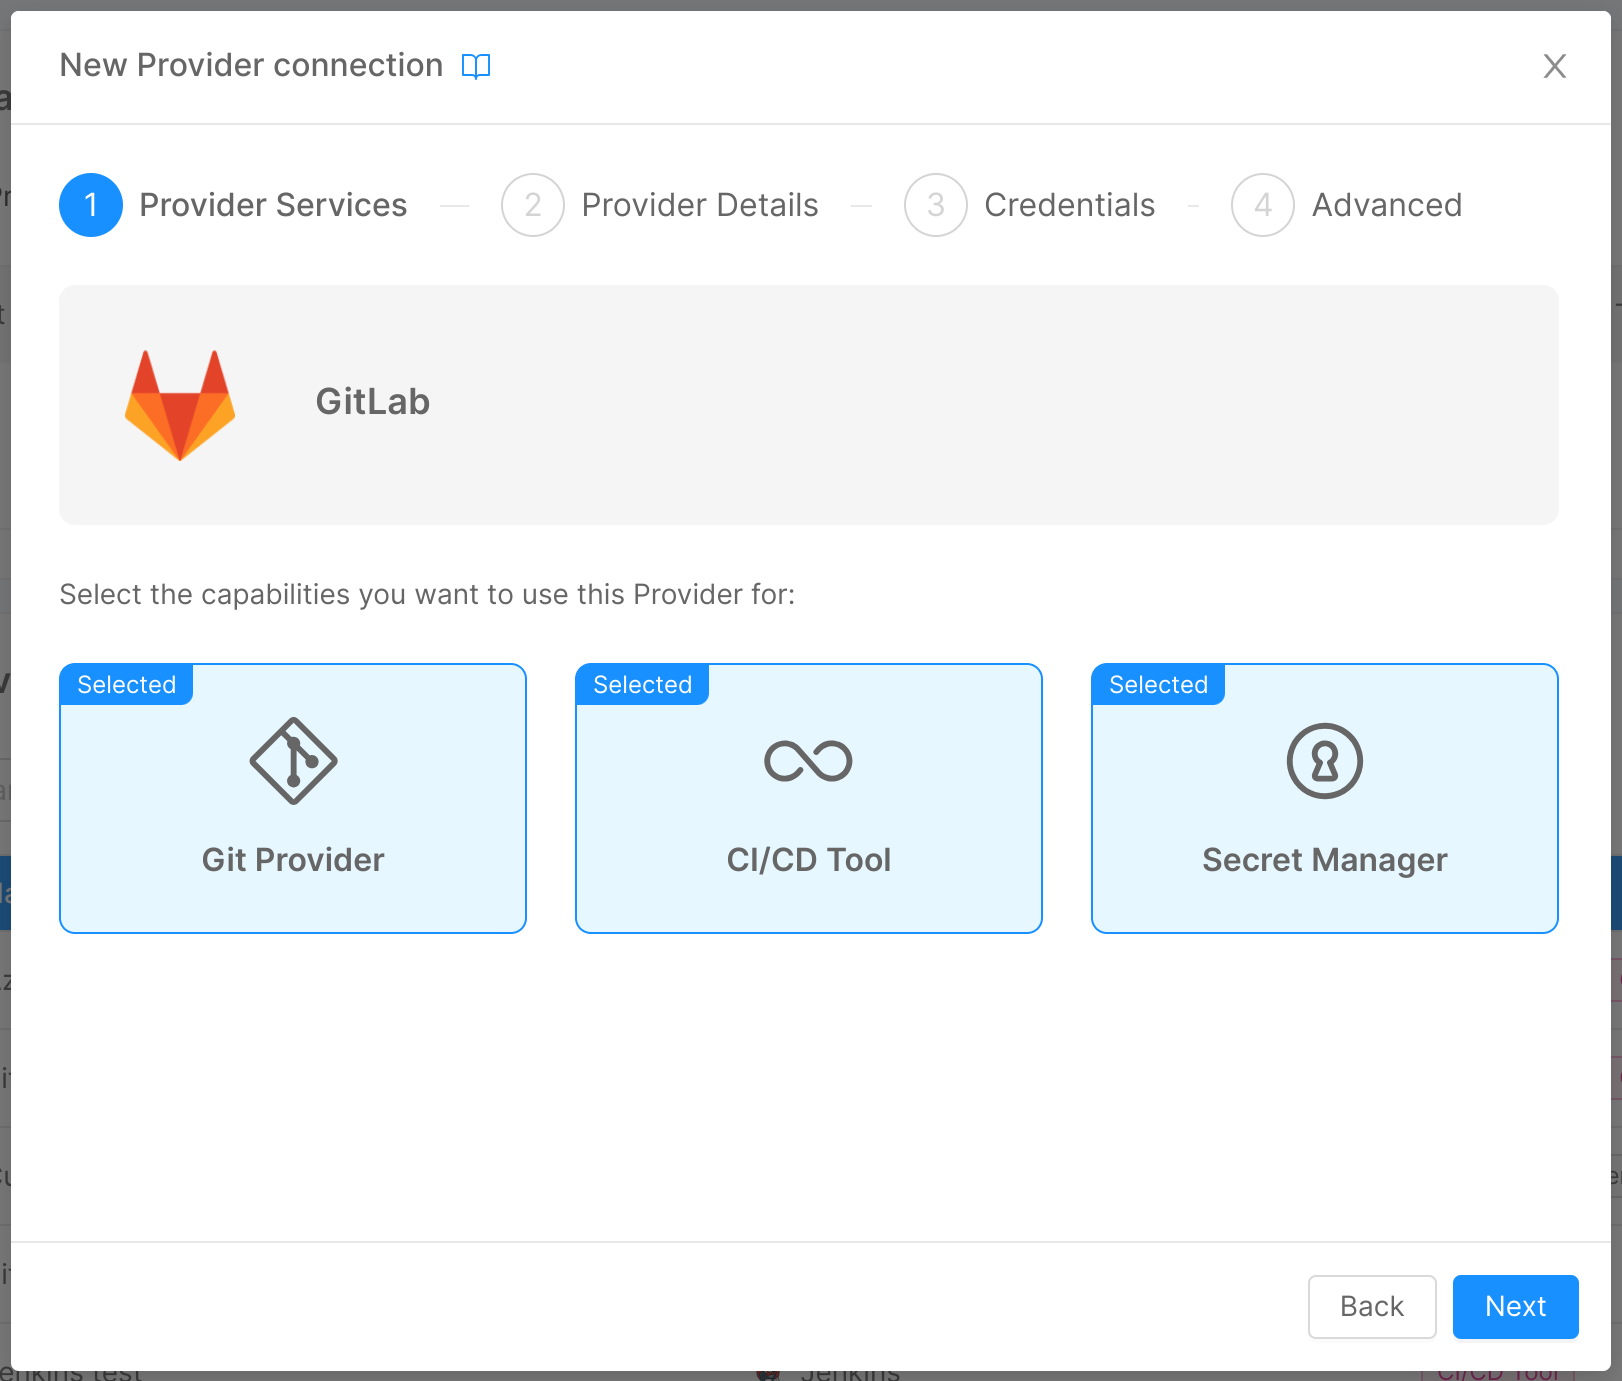
In this step, you are required to choose the specific provider you want to use among the ones supported by the Console and, for the chosen provider, the capabilities you want to use it for ("Git Provider", "Secret Manager", "CI/CD Tool").
If the provider offers only one capability, clicking on it will lead directly to step 2 and the capability will be selected by default.
Step 2: Provider Details
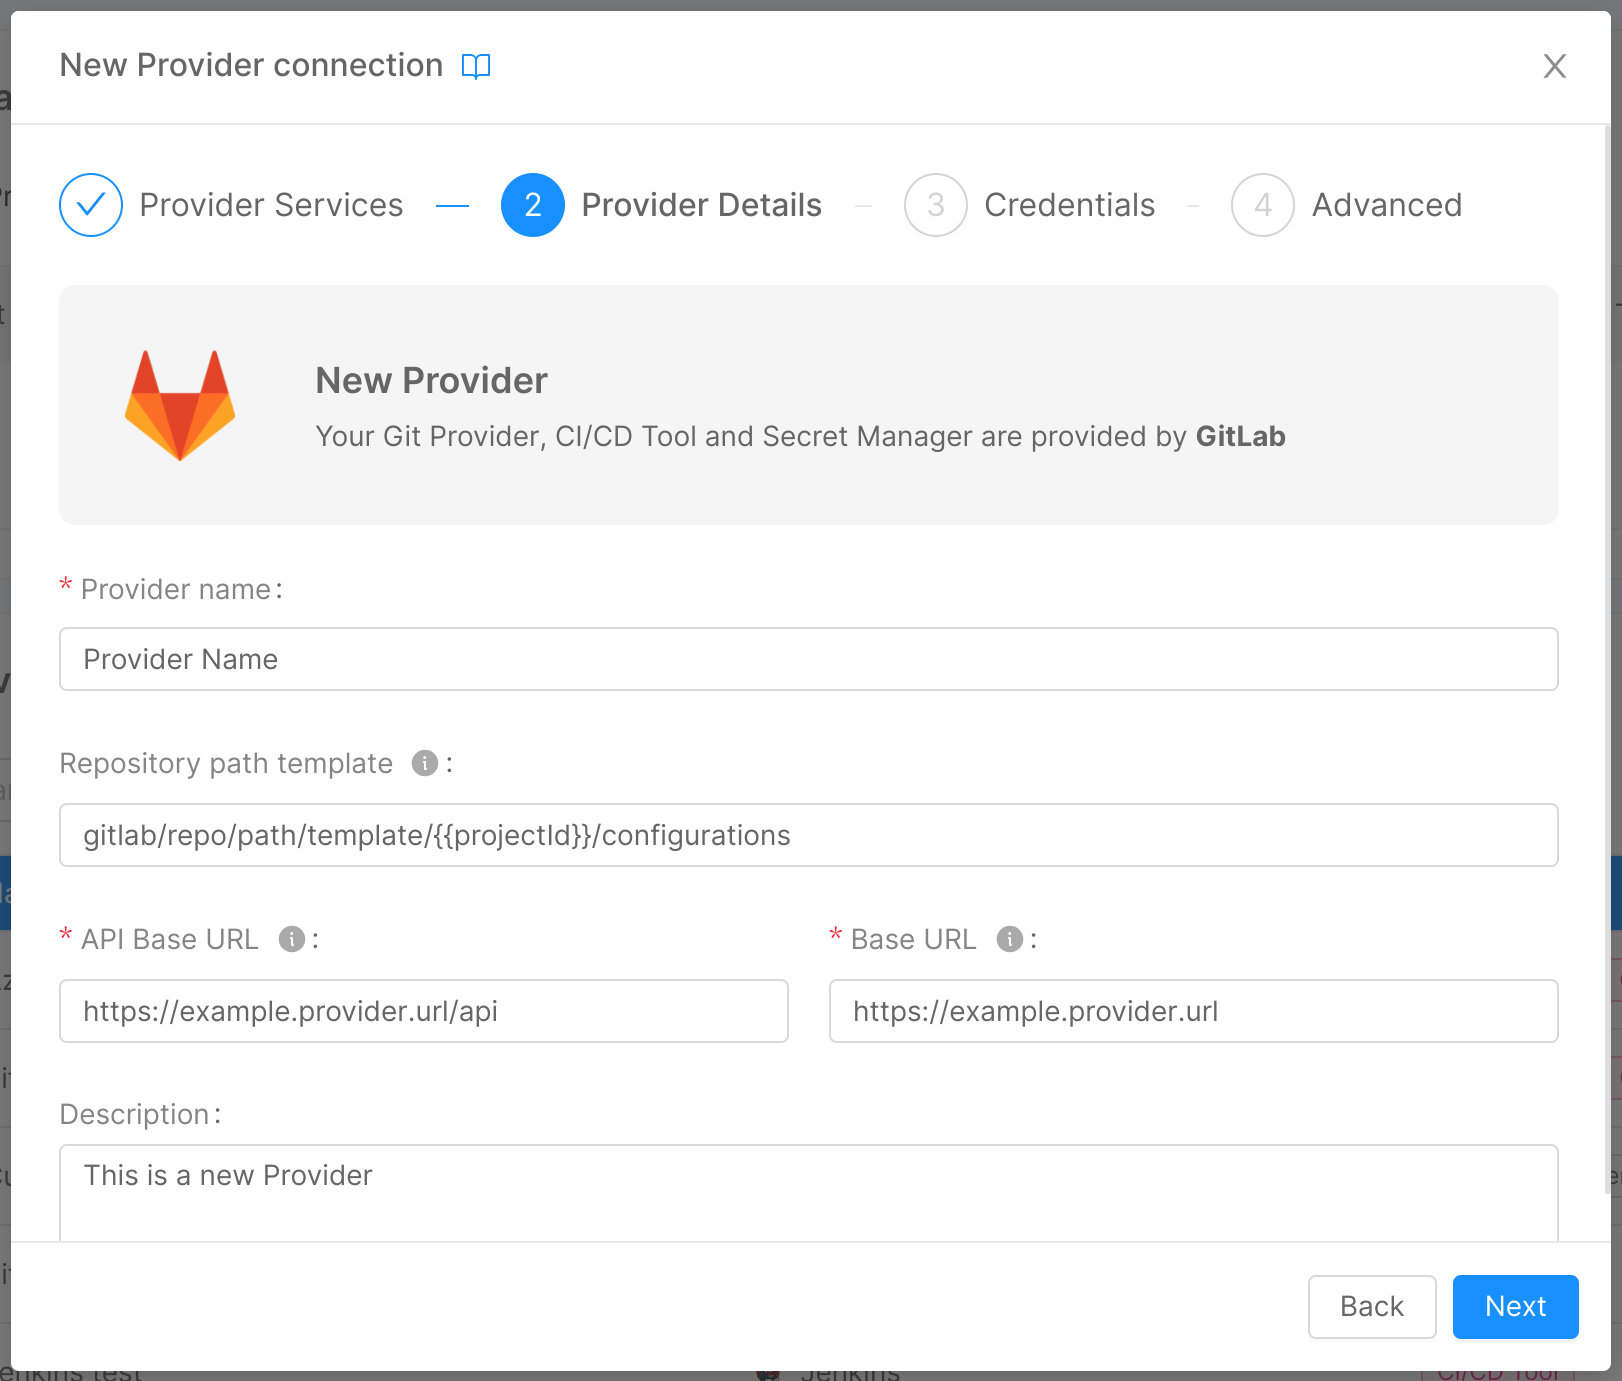
In this step, you can insert some general details about your provider:
- Provider name (required): a human-readable name for the provider;
- API Base URL (required): the reference endpoint URL for calls to the provider APIs;
- Base URL (required): the reference endpoint URL for the provider;
- Description: a brief description of the provider.
If in Step 1 the Git Provider capability has been selected, two additional fields will appear in this step. The first one is the Repository path template. This field controls where Project repositories, created using this provider, will be located, and can also contain a special interpolation variable {{projectId}} that will be replaced with the actual Project identifier during the Project creation phase.
The Repository path template field identifies the path where your project configuration repository will be created. It must follow the hierarchical structure of each Git Provider so it will be different for different providers. More information about how to configure it for the specific provider in the table below.
The second additional field is the Default visibility for repositories. In this field you can select the default visibility for the repositories created in such Git Provider, by choosing among Internal, Public or Private visibility. This choice will be inherited in the Project creation flow, when selecting the Git Provider.
Below, some examples on the data to set for the supported provider types:
- GitHub
- GitLab
- Bitbucket DataCenter
- Bitbucket Cloud
- Azure DevOps
- Hashicorp Vault
- Jenkins
- Azure Key Vault
- API Base URL:
https://api.github.com - Base URL:
https://github.com - Repository path template:
<your-organization-name>/{projectId}/configurations
If your organization name contains spaces like Mia-Platform Organization you can find the right organization name to use in the Repository path template in the organization's url:
https://github.com/organizations/<your-organization-name>/ that in the case of Mia-Platform Organization will be https://github.com/organizations/Mia-Platform-Organization/
- API Base URL:
https://gitlab-test.com/api - Base URL:
https://gitlab-test.com - Repository path template:
<your-root-group>/<your-subgroup-1>/.../<your-subgroup-n>/{projectId}/configurations
- API Base URL:
https://bitbucket-test.com - Base URL:
https://bitbucket-test.com
- API Base URL:
https://api.bitbucket.org/2.0 - Base URL:
https://bitbucket.org - Repository path template:
<your-workspace-name>/{projectId}-configurations
In Bitbucket Cloud, repositories are organized under workspaces. The workspace name is the unique identifier of your team or personal Bitbucket Cloud account and can be found in the URL of your repositories: https://bitbucket.org/<workspace-name>/.
- API Base URL:
https://dev.azure.com - Base URL:
https://dev.azure.com
There are two different possibilities: use an already existent Azure DevOps Project with multiple Console Project inside it or create an Azure DevOps Project for each Console Project. If a project is found in Azure Devops it will used, otherwise a new project will be created.
A single Azure DevOps Project with multiple configurations repository
- Repository path template:
azure-devops-organization/project-name/_git/{{projectId}}-configurations
Where azure-devops-organization is the Azure DevOps organization name and project-name is the Azure DevOps project name.
A single Azure DevOps Project with multiple configurations repository
- Repository path template:
azure-devops-organization/{{projectId}}/_git/configurations
Where azure-devops-organization is the Azure DevOps organization name and project-name is the Azure DevOps project name.
- API Base URL:
https://vault.example.com/ - Base URL:
https://vault.example.com/
- API Base URL:
https://jenkins.example.com/ - Base URL:
https://jenkins.example.com/
If you need to use Jenkins with folder, you can specify the folder path in the API Base URL.
This means that each folder should be a different provider.
Example of an API Base URL with a folder called 'folder-name': https://jenkins.example.com/job/folder-name
- API Base URL:
https://your-vault-instance.vault.azure.net/ - Base URL:
https://your-vault-instance.vault.azure.net/
Step 3: Credentials
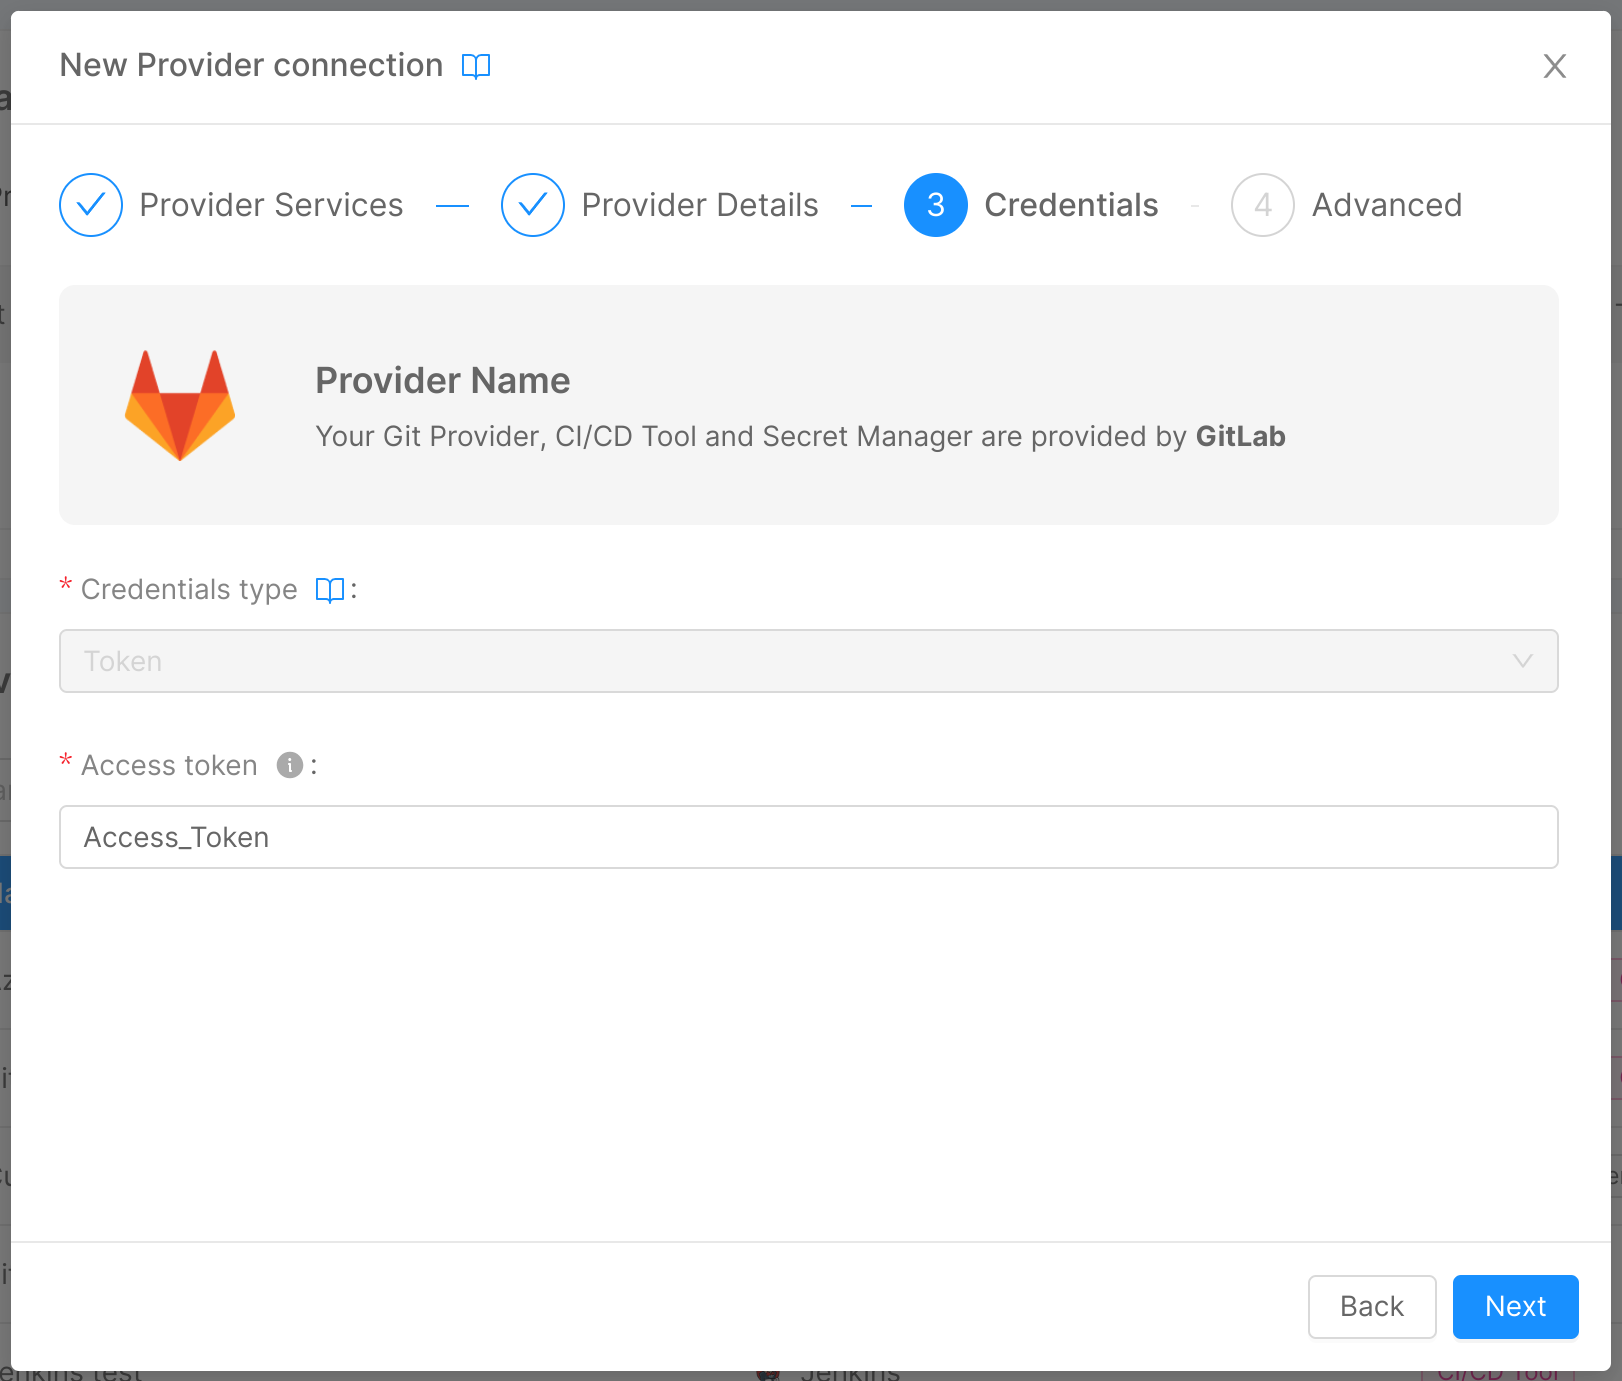
In this step, you are required to insert information about the authentication method to the provider, so that the Console has the necessary permissions to perform all read/write operations on it:
- Credentials type (required): The type of credentials used to authenticate requests to the provider. It can be one of "Token," "M2M," and "OAuth2".
Depending on the credentials type, the other information to be entered will be:
- Token
- M2M
- Client credentials
- Client credentials certificate
- GitHub App
For credentials of the type "Token":
- Access token (required): The token that allows the Console to authenticate against the APIs of the provider (temporary credentials).
For credentials of the type "M2M":
- Token (required): The token that allows the Console to authenticate against the APIs of the provider (long-lived credentials);
- Access token URL (required): The reference authorization endpoint URL that, to requests that include the authentication token, responds by generating temporary credentials.
For credentials of the type "Client credentials":
- Access token URL (required): The reference authorization endpoint URL that, to requests that include client ID and client secret, responds by generating temporary credentials;
- Client ID (required): Public client identifier;
- Client secret (required): The shared secret, known only to the client and the authorization server.
- Scope: An optional scope to restrict the generated token permissions
You can see more documentation to this link: Client Credentials Grant
For credentials of the type "Client credentials certificate":
- Access token URL (required): The reference authorization endpoint URL that, to requests that include client ID and client secret, responds by generating temporary credentials;
- Client ID (required): public client identifier. It is used to create the client assertion;
- Certificate Thumbprint (required): The thumbprint of the client certificate. It is used to create the client assertion;
- Private key (required): The PEM-encoded private key whose certificate has been registered against the authorization service. It is used to create the client assertion;
- Scope: An optional scope to restrict the generated token permissions
You can see more documentation to this link: Client Credentials Grant
For credentials of the type "Github App":
- App ID (required): The unique identifier of the Github app. This information can be obtained through API calls to the provider (
GET https://api.github.com/app) or in the provider's organization app settings from the website. - Installation ID (required): The unique identifier of the installation. This information can be obtained through API calls to the provider (
GET https://api.github.com/app/installations) or in the provider organization installation settings at the end of the browser URL from the website. - Private key (required): The PEM-encoded private key associated with the GitHub App. This key is generated and downloaded from the GitHub website during the private key creation process.
You can see more documentation to this link: Github App
All credentials data are stored in an encrypted MongoDB collection. For more information about MongoDB encryption, take a look at the dedicated documentation page.
Credentials entered at this stage, for security reasons, will never again be shown to the user, who will be able to replace them with new ones but not visualize them again.
Supported credential types
Depending on the provider selected in step 1, the types of credentials supported will change. The following table shows the credential types supported by each provider:
| Credentials Type | Providers |
|---|---|
| Token | GitLab, GitHub, Bitbucket DataCenter, Bitbucket Cloud, Azure DevOps, Vault, Jenkins, Azure Key Vault |
| M2M | Vault |
| Client Credentials | Azure Key Vault, Azure DevOps, Jenkins |
| Client Credentials Certificate | Azure Key Vault, Azure DevOps |
| Github App | Github |
Caution Assign the right scope to your credentials
Make sure, when generating credentials on the respective provider sites, to assign them a scope so that they have the necessary permissions for all read and write operations performed through the Console.
| Provider Credential Type | Permission level |
|---|---|
| Gitlab Token | api |
| Bitbucket DataCenter Token | project admin, repository admin |
| Bitbucket Cloud Token | workspace member with admin access |
| GitHub Token | admin |
| Github App | all repository read and write permission |
| Jenkins Token | |
| Jenkins Client Credentials | |
| Vault Token | |
| Vault M2M | |
| Azure DevOps Token | full access |
| Azure DevOps Client Credentials | full access |
| Azure DevOps Credentials Certificate | full access |
| Azure Key Vault Token | full access |
| Azure Key Vault Client Credentials | full access |
| Azure Key Vault Client Credentials Certificate | full access |
Below, for the M2M and OAuth2 providers, some example configurations:
- Hashicorp Vault m2m
- Jenkins Client Credentials
- Access Token URL:
https://vault.example.com/v1/auth/kubenetes/login - Access Token: the access token
With the correct host to the Hashicorp Vault instance.
It is possible to
- Client ID: client identifier
- Client Secret: the shared client secret
- Access Token URL: "https://jenkins.example.com/oauth2/login"
With the correct host to the Jenkins instance.
Step 4: Advanced
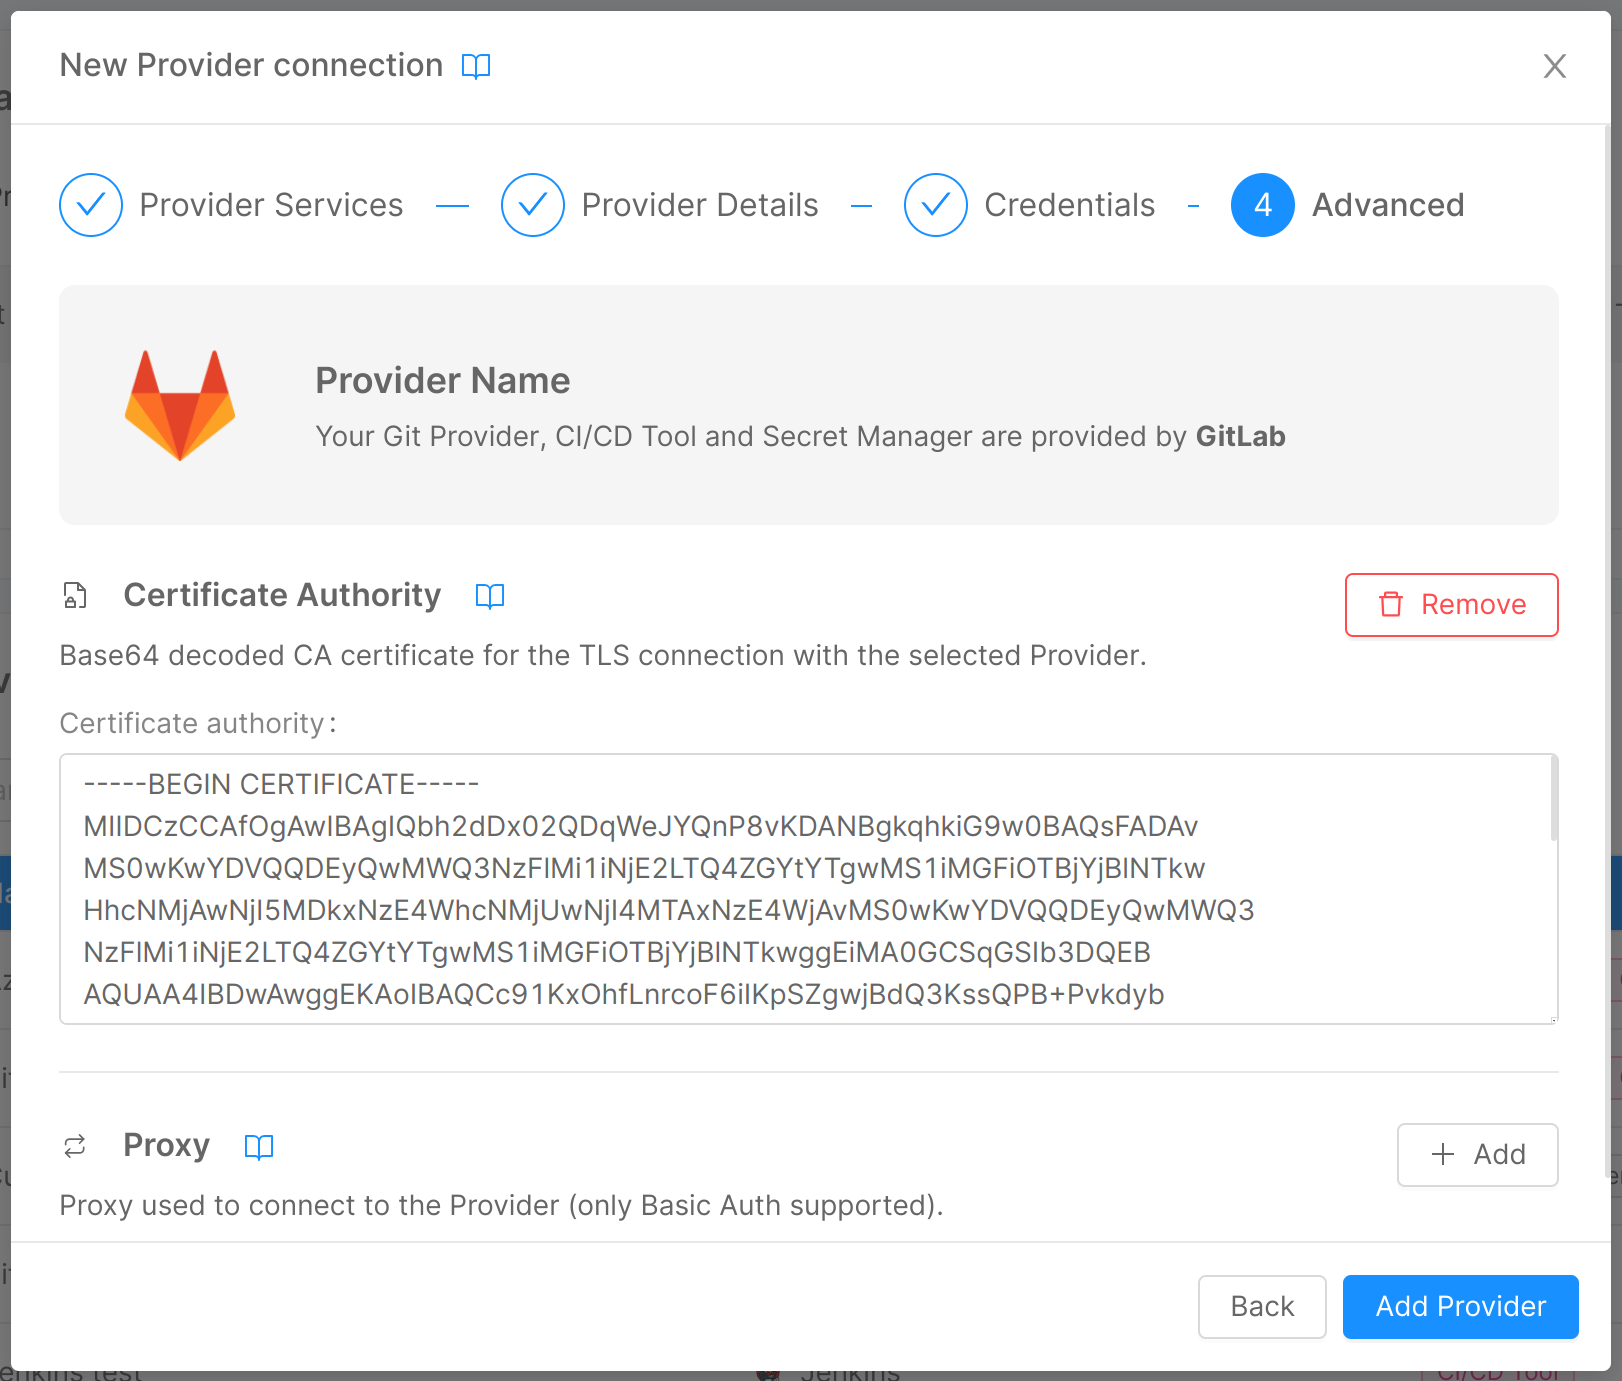
In this step, you can enter some optional advanced information through two expandable forms:
Certificate Authority
If you have set up verification of a CA for the connection to your provider, here you can enter it through the homonymous field:
- Certificate authority: base64 decoded CA certificate for the TLS connection with the provider.
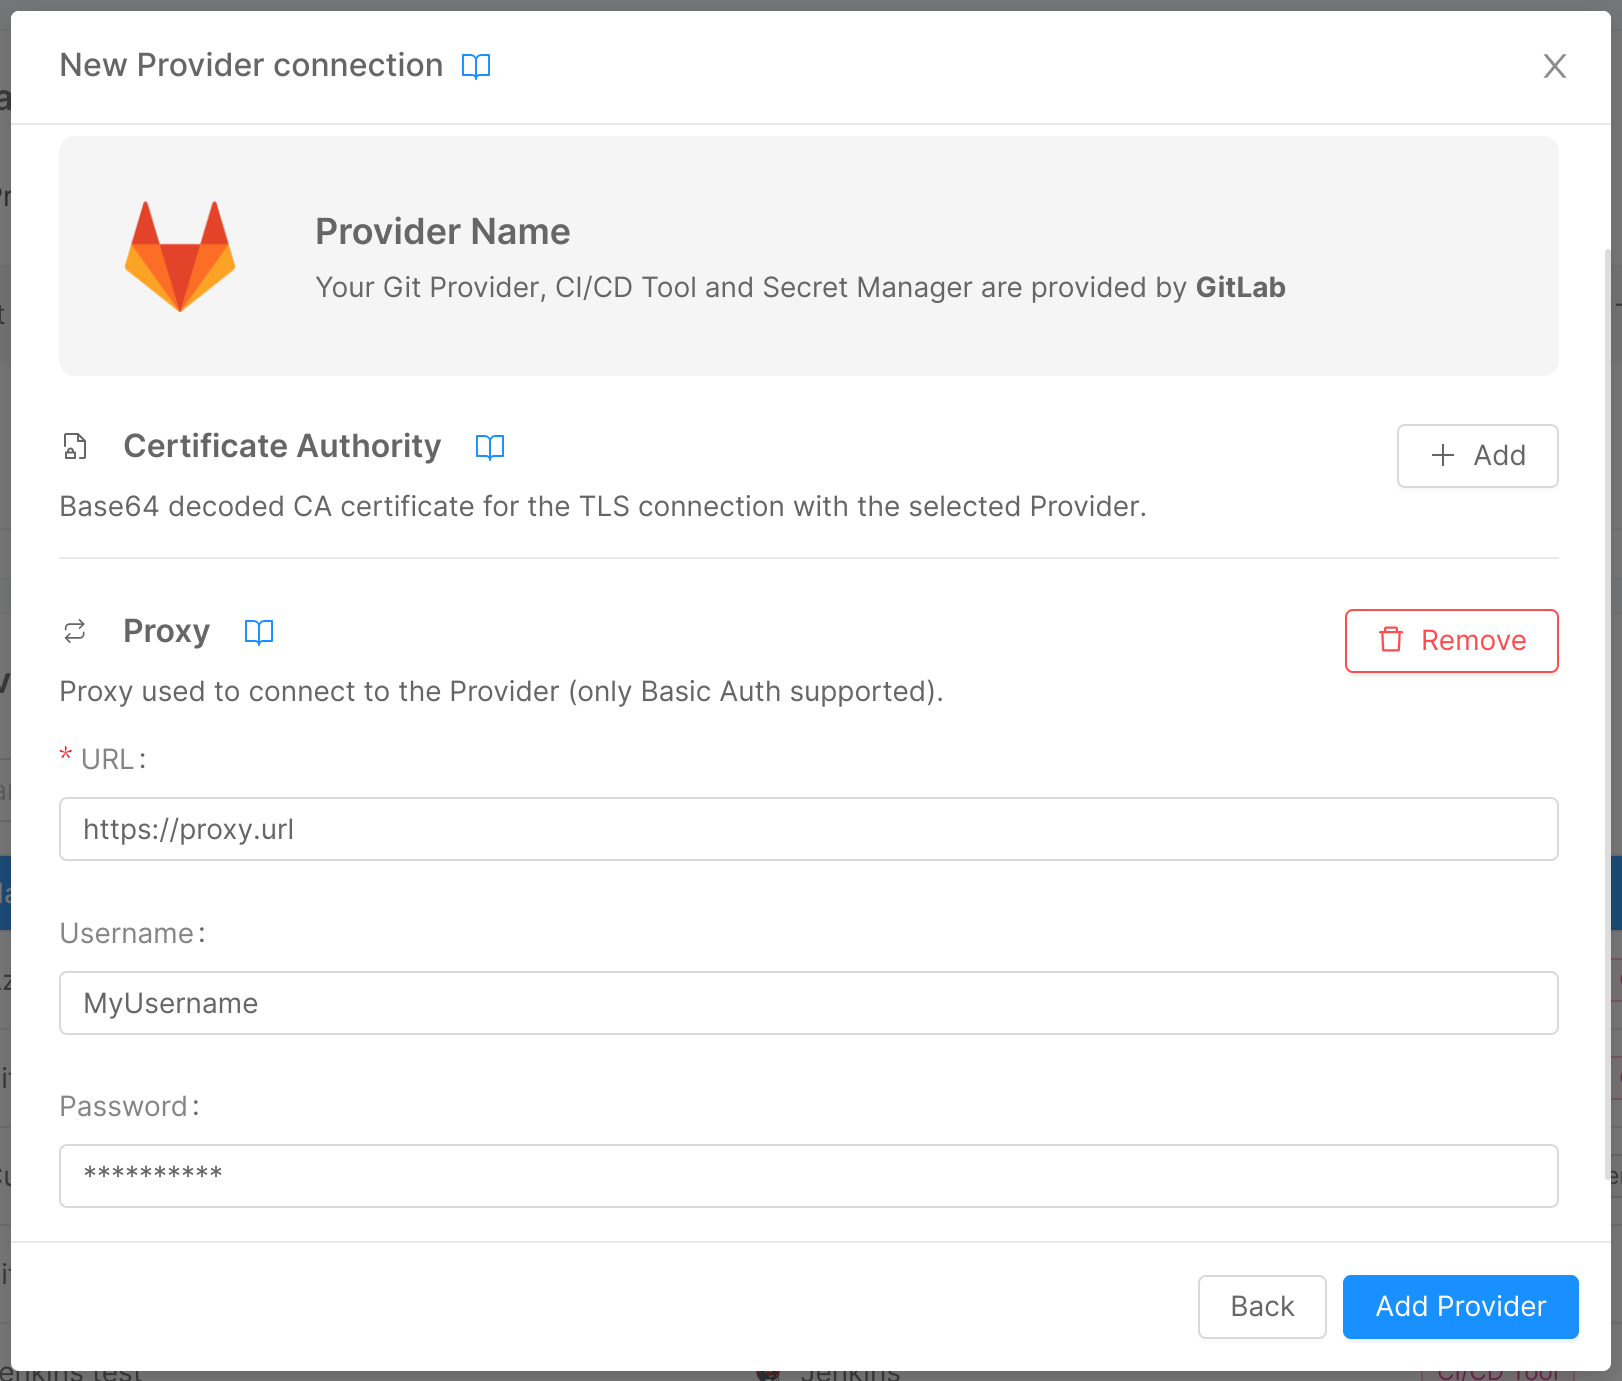
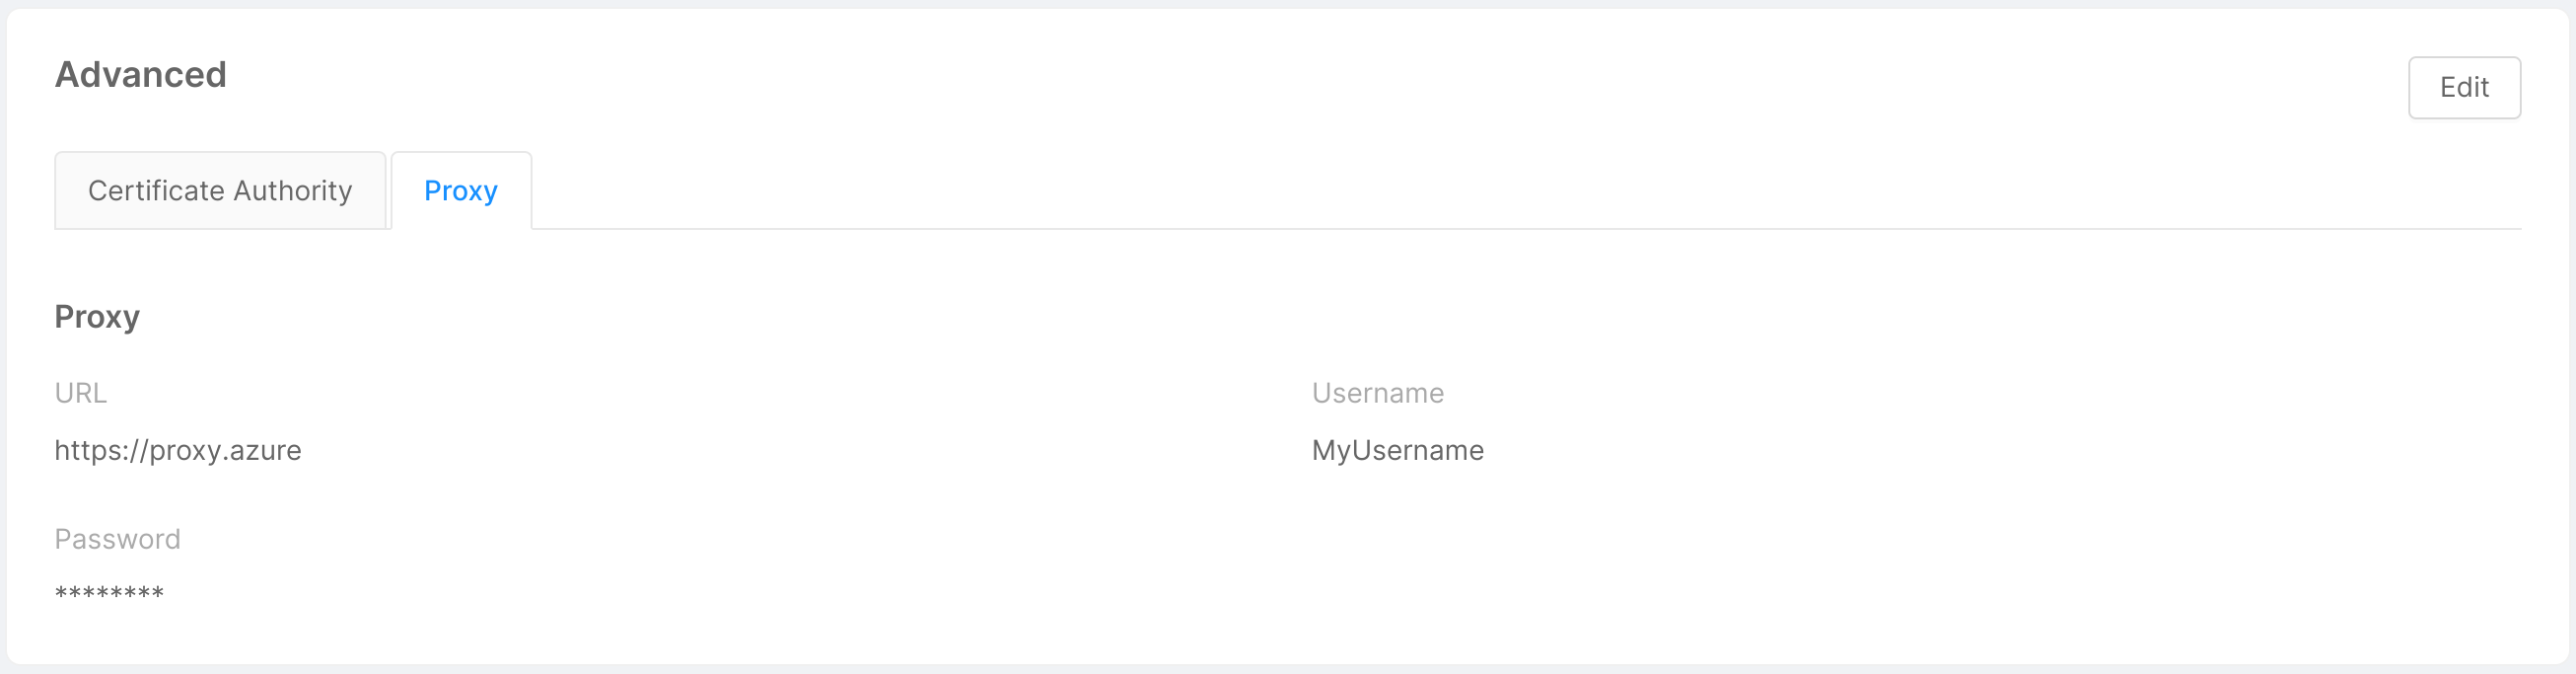
Proxy
If the Console needs to use a proxy to forward calls to the provider, here you can enter the information needed for the connection:
- URL: the URL used to connect to the proxy, which indicates where the proxy is exposed;
- Username: the username used in connection requests to the proxy for basic authentication;
- Password: the password used in connection requests to the proxy for basic authentication. This property will be safely encrypted.
By clicking on "Add provider", the connection to the provider will be set, and it will appear as a new entry in the table.
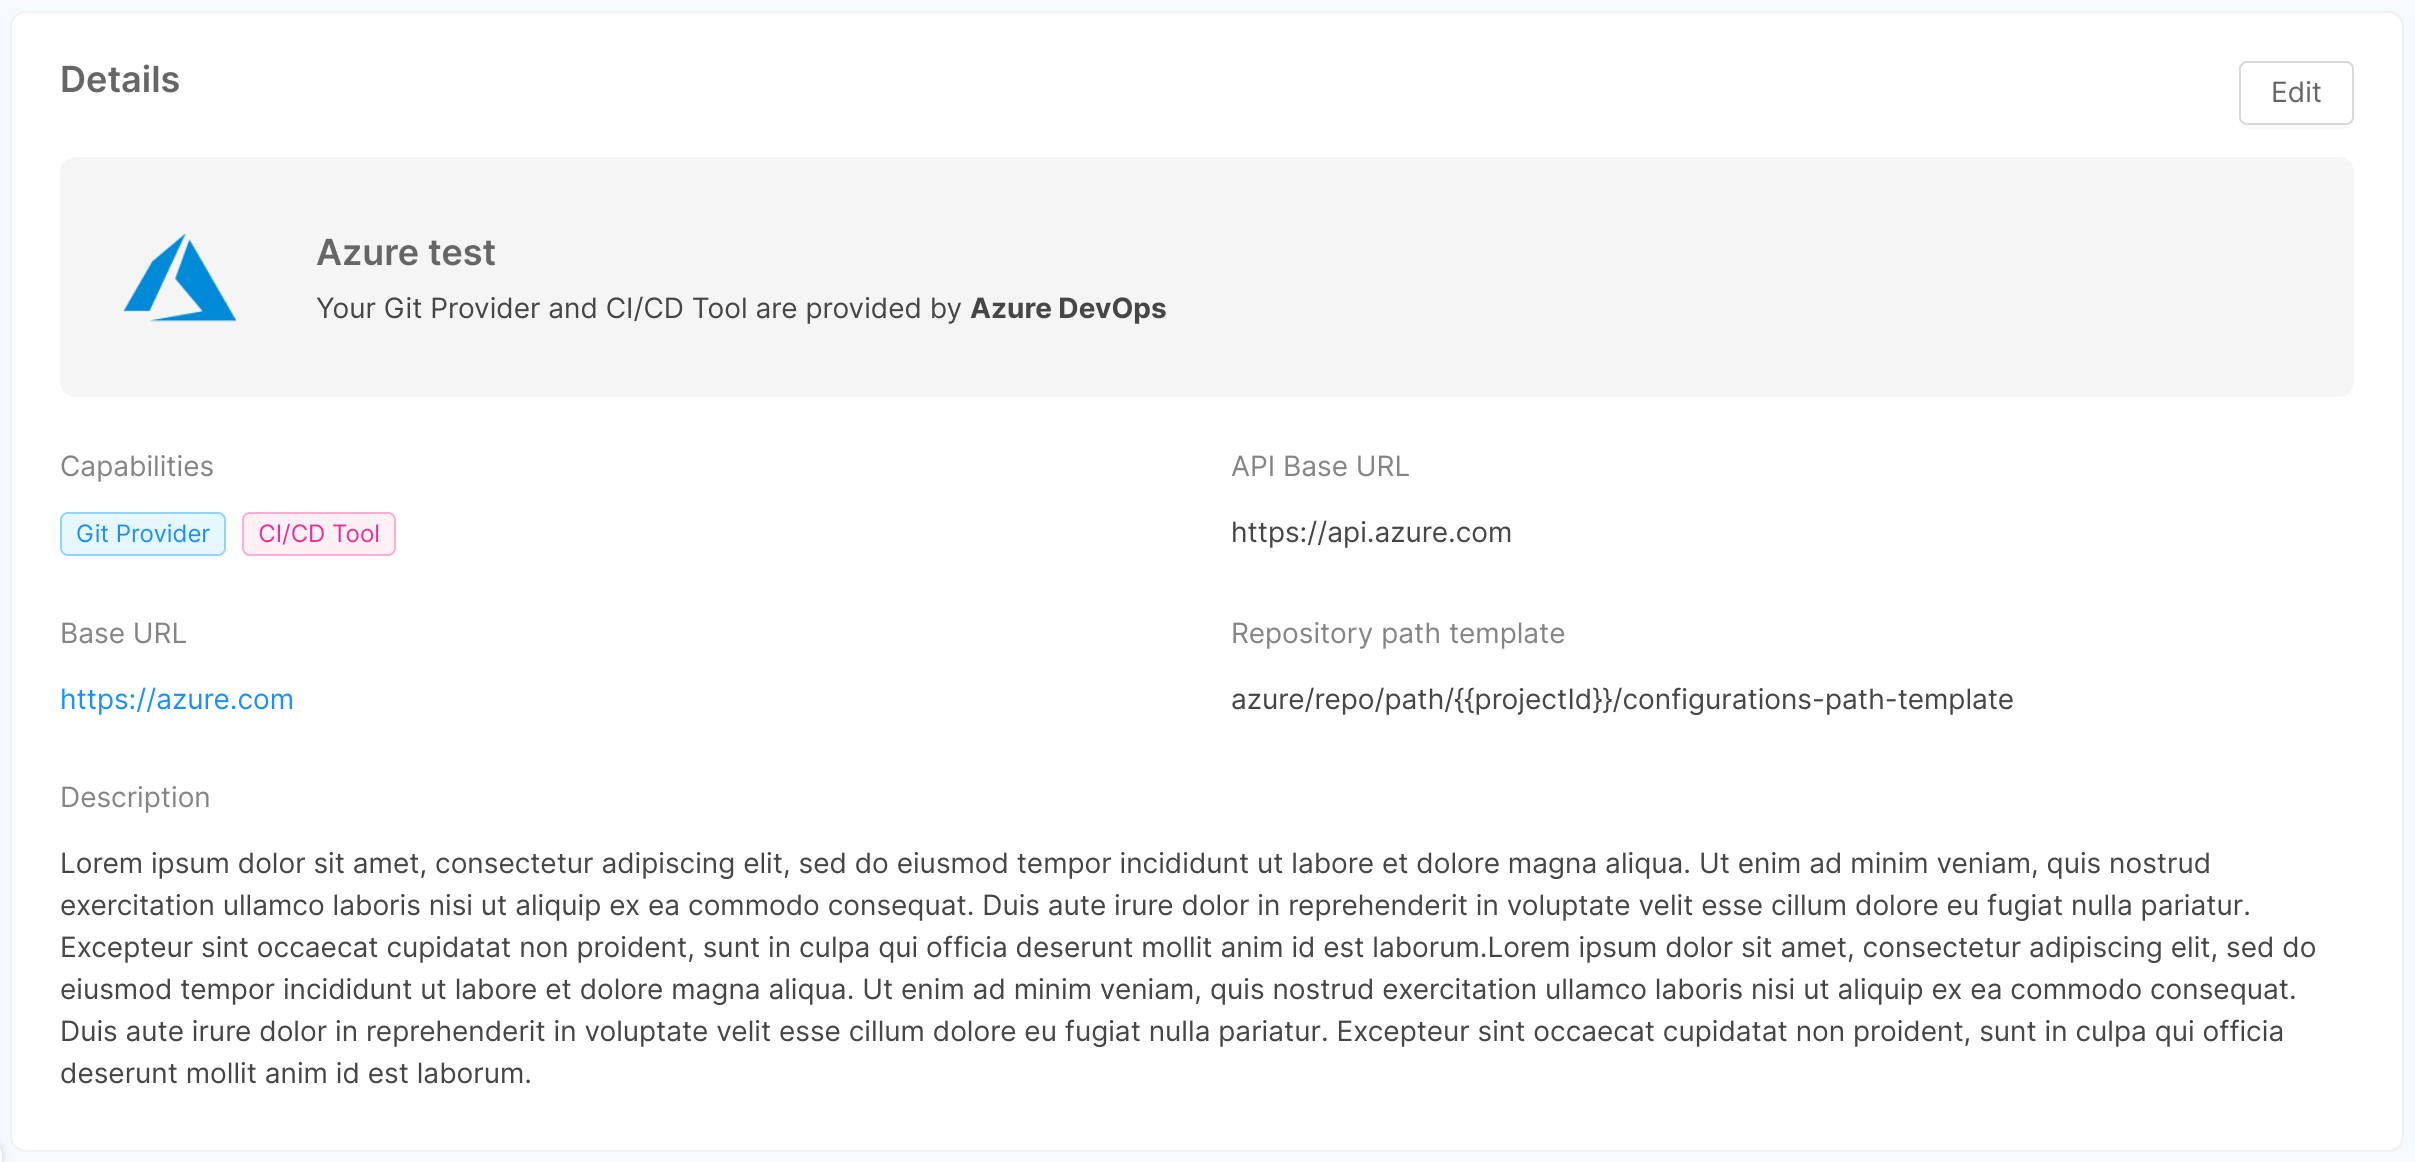
View Provider Information
By clicking on the arrow button located in the rightmost column of a provider entry in the table, a new page will show up, displaying information about the specific provider through 3 cards:
- Details: this card shows the information inserted by the user in step 2 of connecting the provider to the Console (and, in addition, the specific provider and selected capabilities), and allows to modify this information through the "Edit" button in the top right corner, as further explained below.
- Credentials: this card shows the credentials type chosen by the user in step 3 of connecting the provider to the Console, and allows to replace the credentials information through the "Change credentials" button in the top right corner, as further explained below.

- Advanced: this card shows the optional information inserted by the user in step 4 of connecting the provider to the Console through 2 tabs - "Certificate Authority" and "Proxy" - and allows to modify (or eventually add) this information through the "Edit" button in the top right corner, as further explained below.
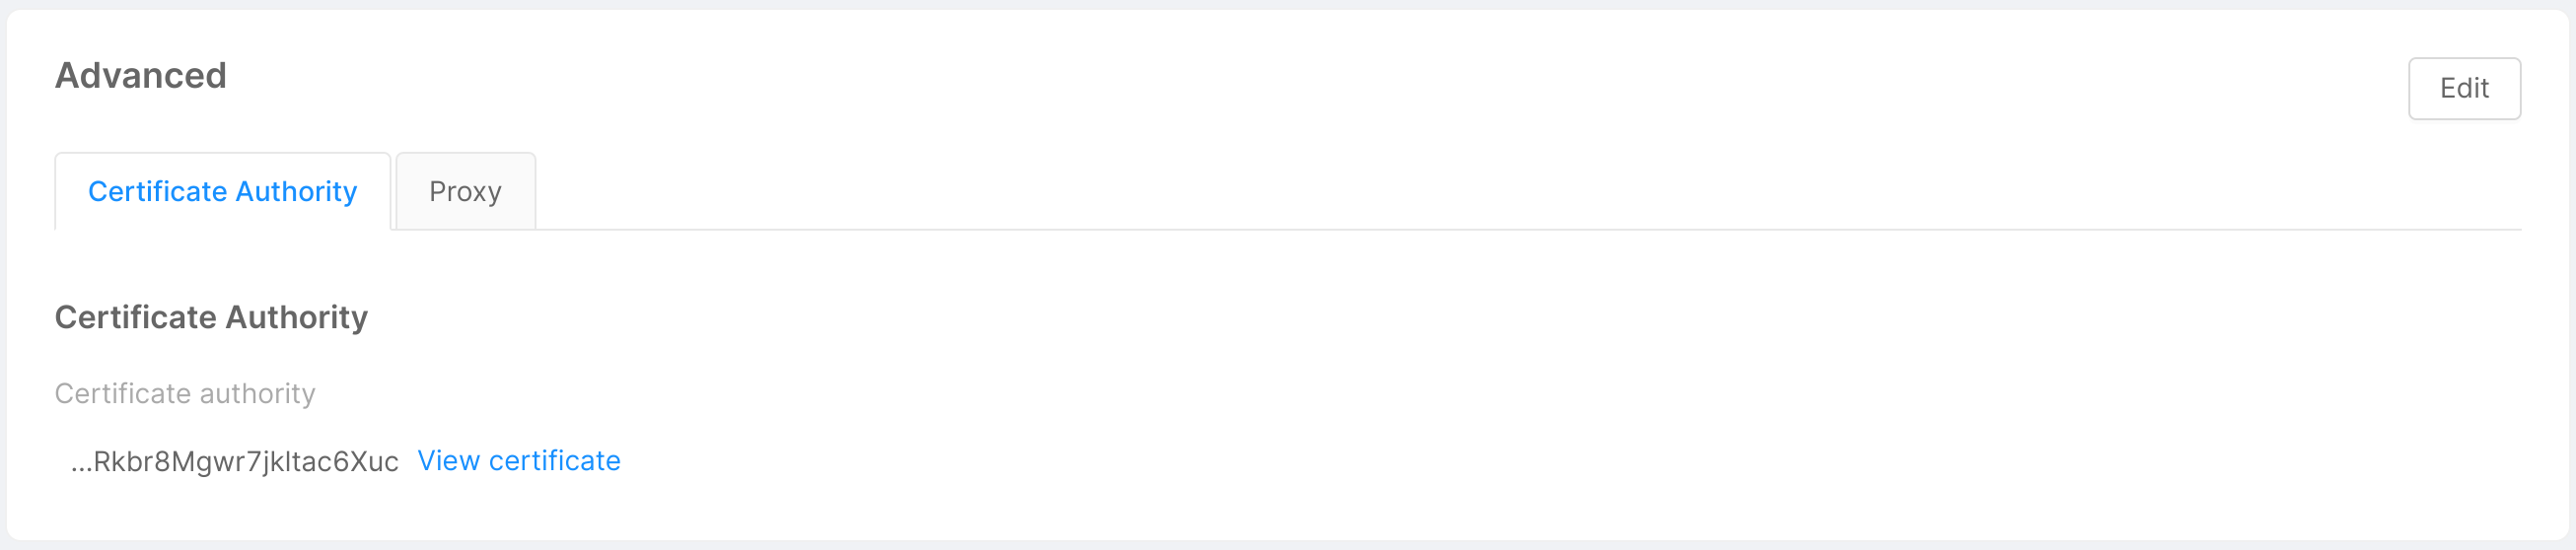
In case a base64 CA certificate has been entered, clicking on the "View certificate" button allows the user to visualize the certificate in both human-readable and plain versions in a two-tabs modal.
The "Expanded view" tab displays the human-readable version of the certificate, while the "Text view" tab shows its plain version and a copy button in the modal footer allows the user to quickly copy the plain base64 CA certificate.
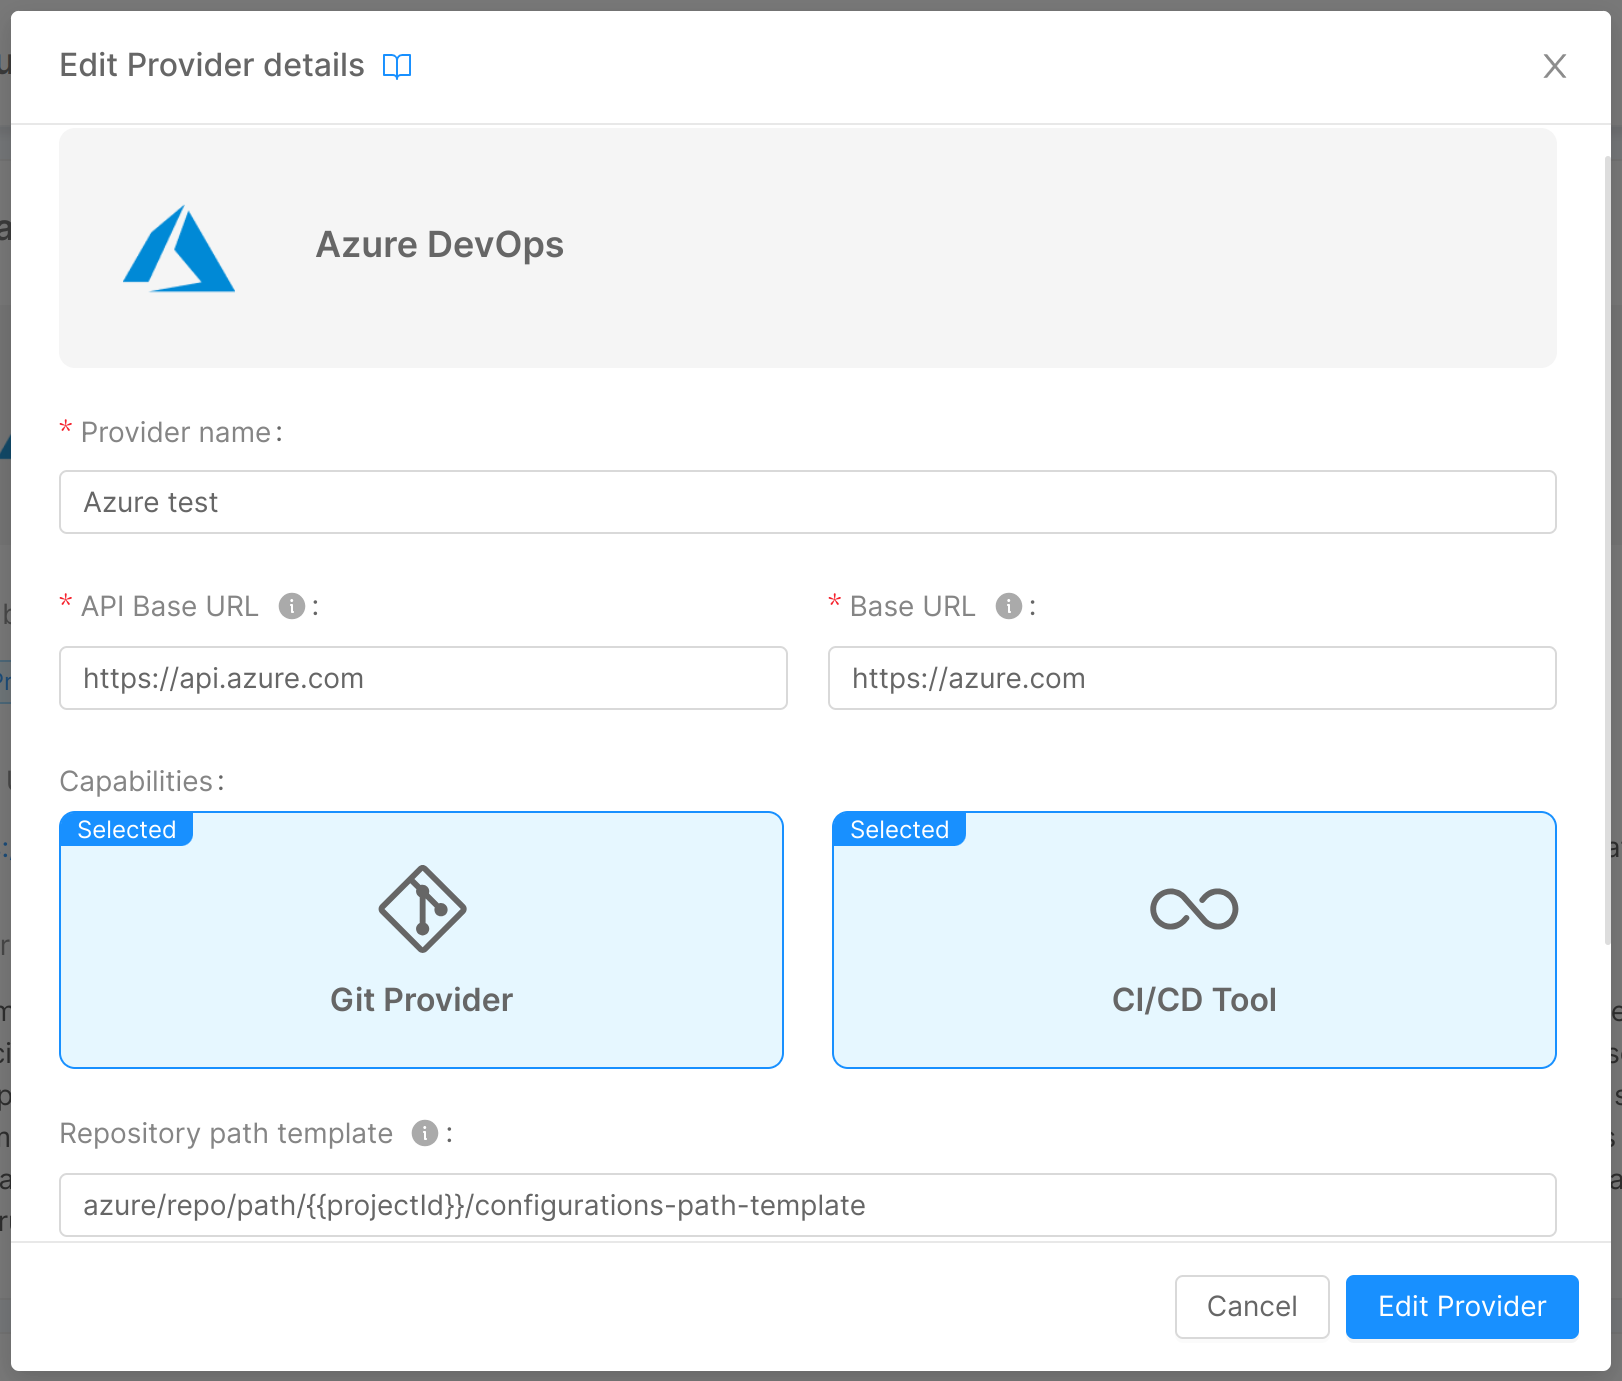
Edit a Provider
As mentioned in the previous section, through the button in the top right corner of the Details, Credentials, and Advanced cards, it is possible to modify the information inserted by the user while connecting the provider to the Console.
A click on the button will open a modal very similar to the one seen when connecting the provider, but only specific to the information you wish to edit.
In the Details card, the modal will allow you also to change the capabilities used by the provider, selected in step 1.
In the image below for example, the user clicked the "Edit" button on the "Details" card, opening a modal for editing the information entered during steps 1 and 2 of provider creation. By clicking on "Edit provider", the information about the provider will be updated.
Remove a Provider Connection
In the bottom part of a provider detail page, you will find a footer that allows you to remove the provider connection from the Console.

By clicking on the "Remove" button, a modal will be displayed, asking for confirmation of the removal.
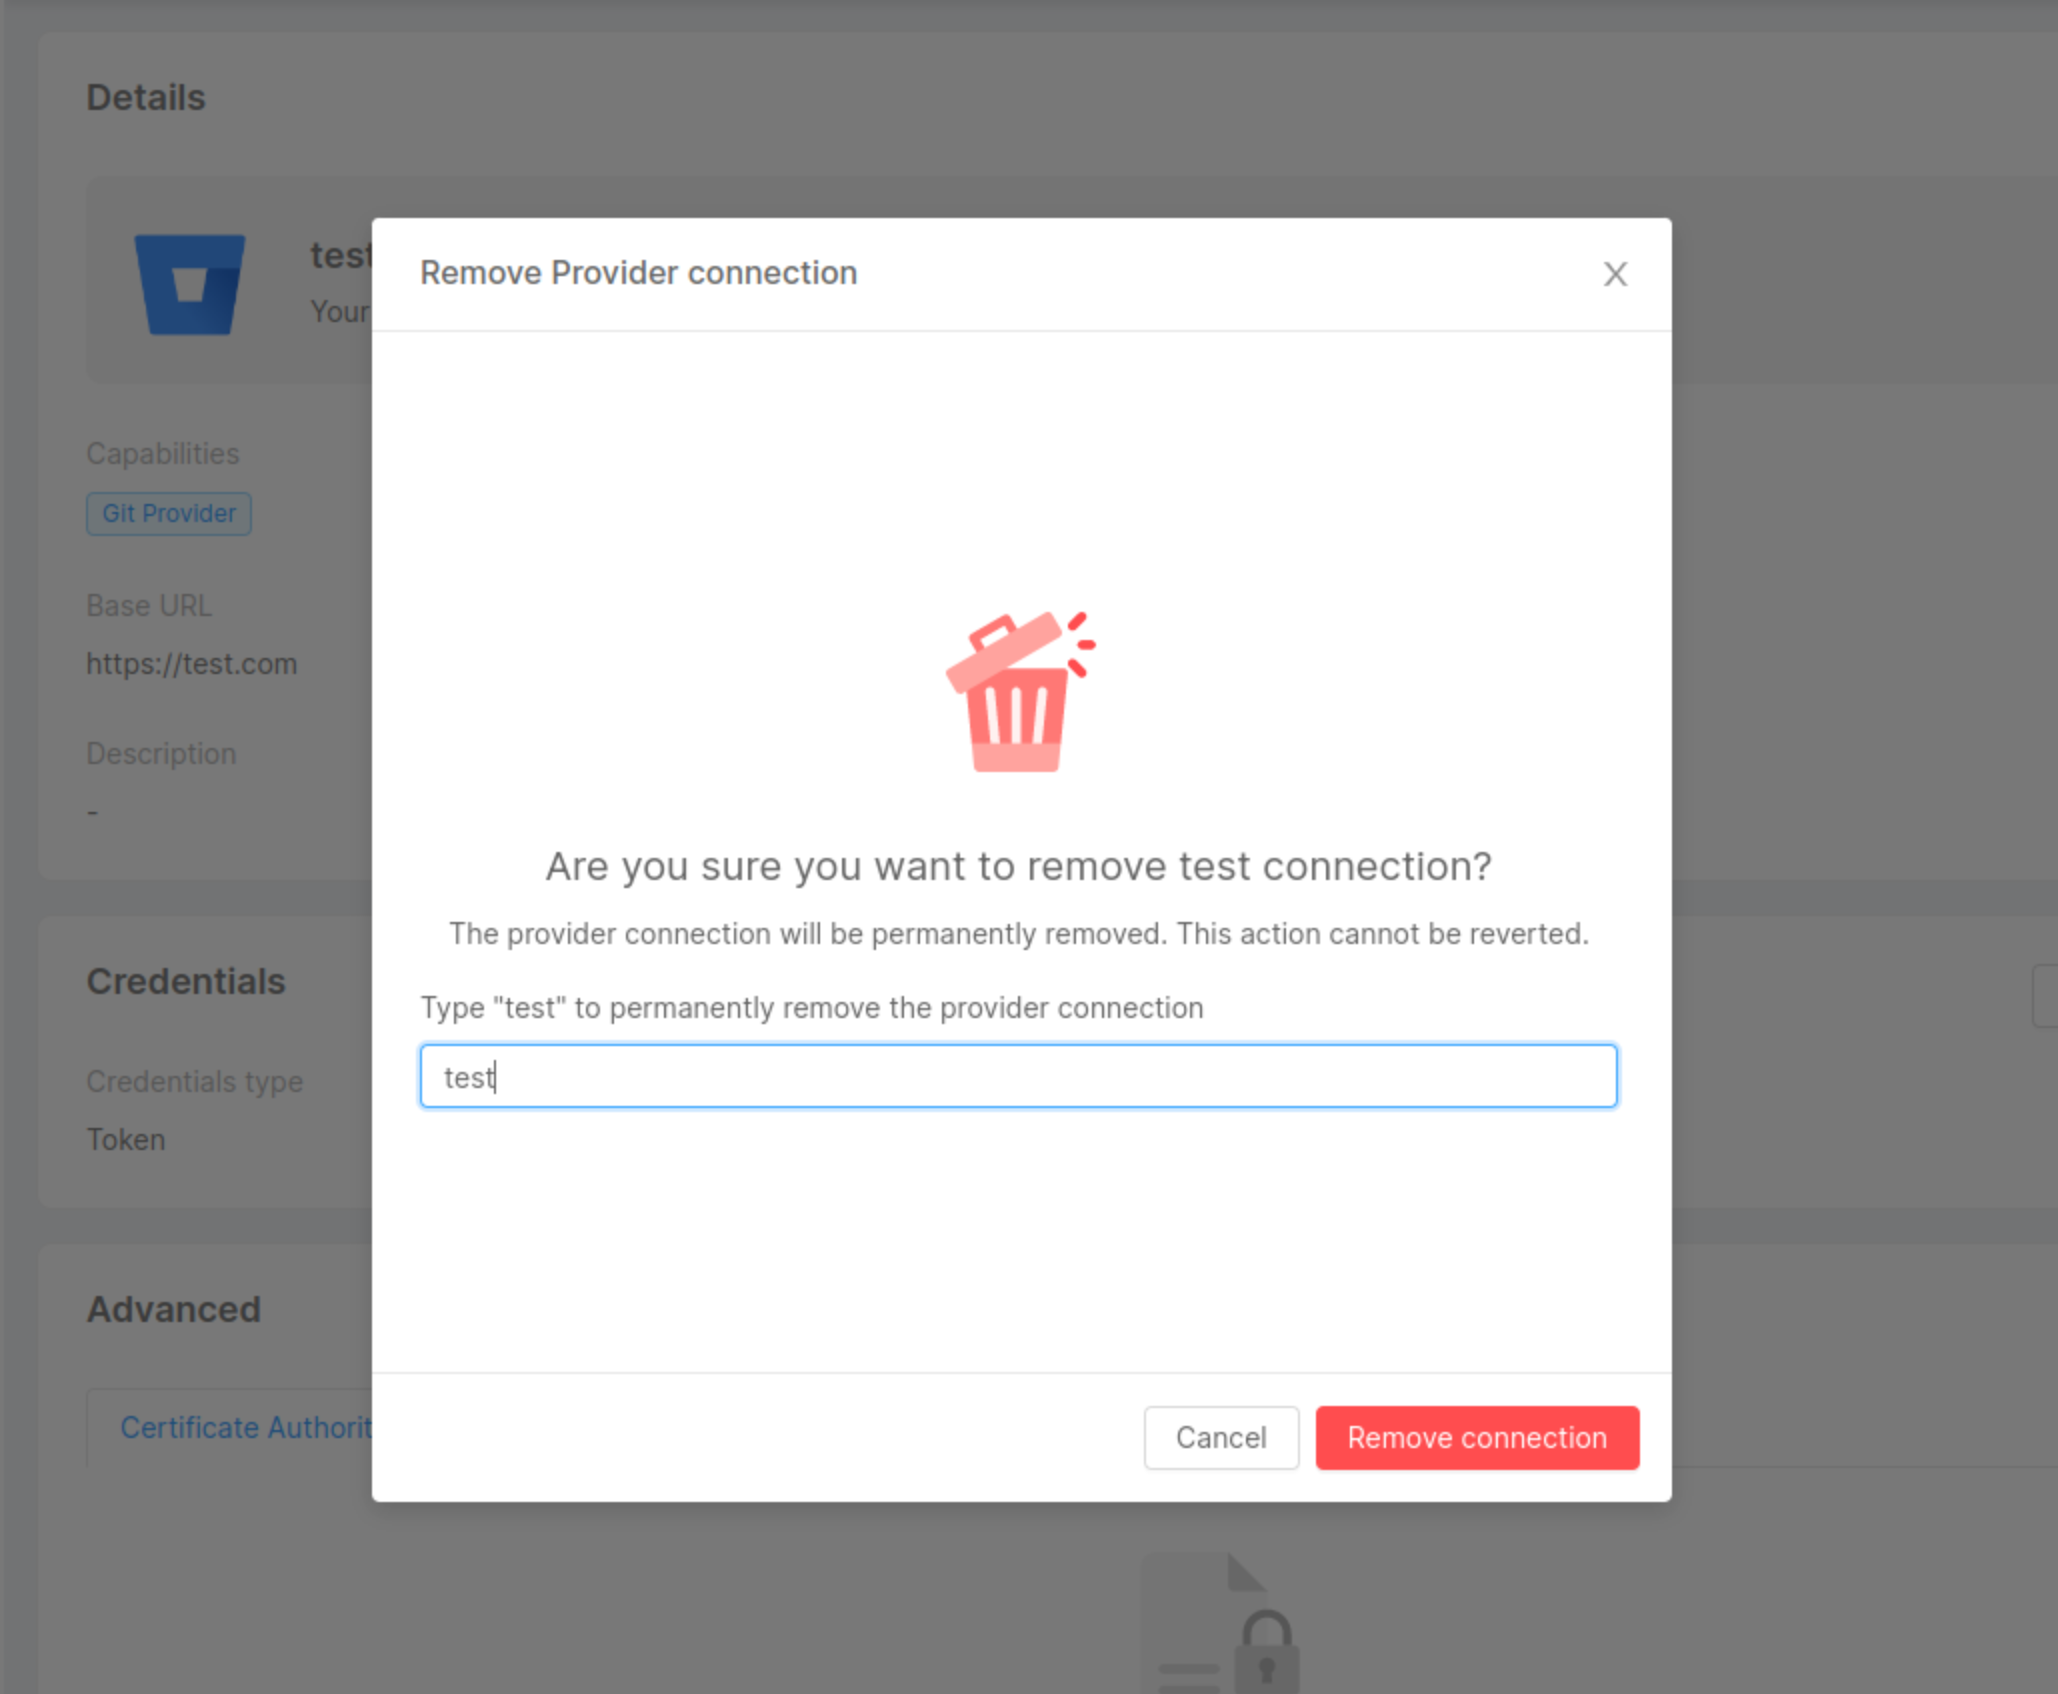
By entering the name in the input field and clicking Remove, a loading will appear.
After the request has been completed, a feedback of successful removal will be shown, and closing the modal will then redirect you to the providers' table. In case of errors, an informative feedback will be shown instead, and the Close button will not perform a redirection.
Removing a provider connection is only possible if the provider meets these two conditions:
- it has no usage in any of the Company Projects.
- it is not a default provider.
In case you need to remove your provider from a Project, you can have a closer look at the dedicated page later on this page.
You can also find further details on how to set a different default provider in the following section.
Set a Default Provider
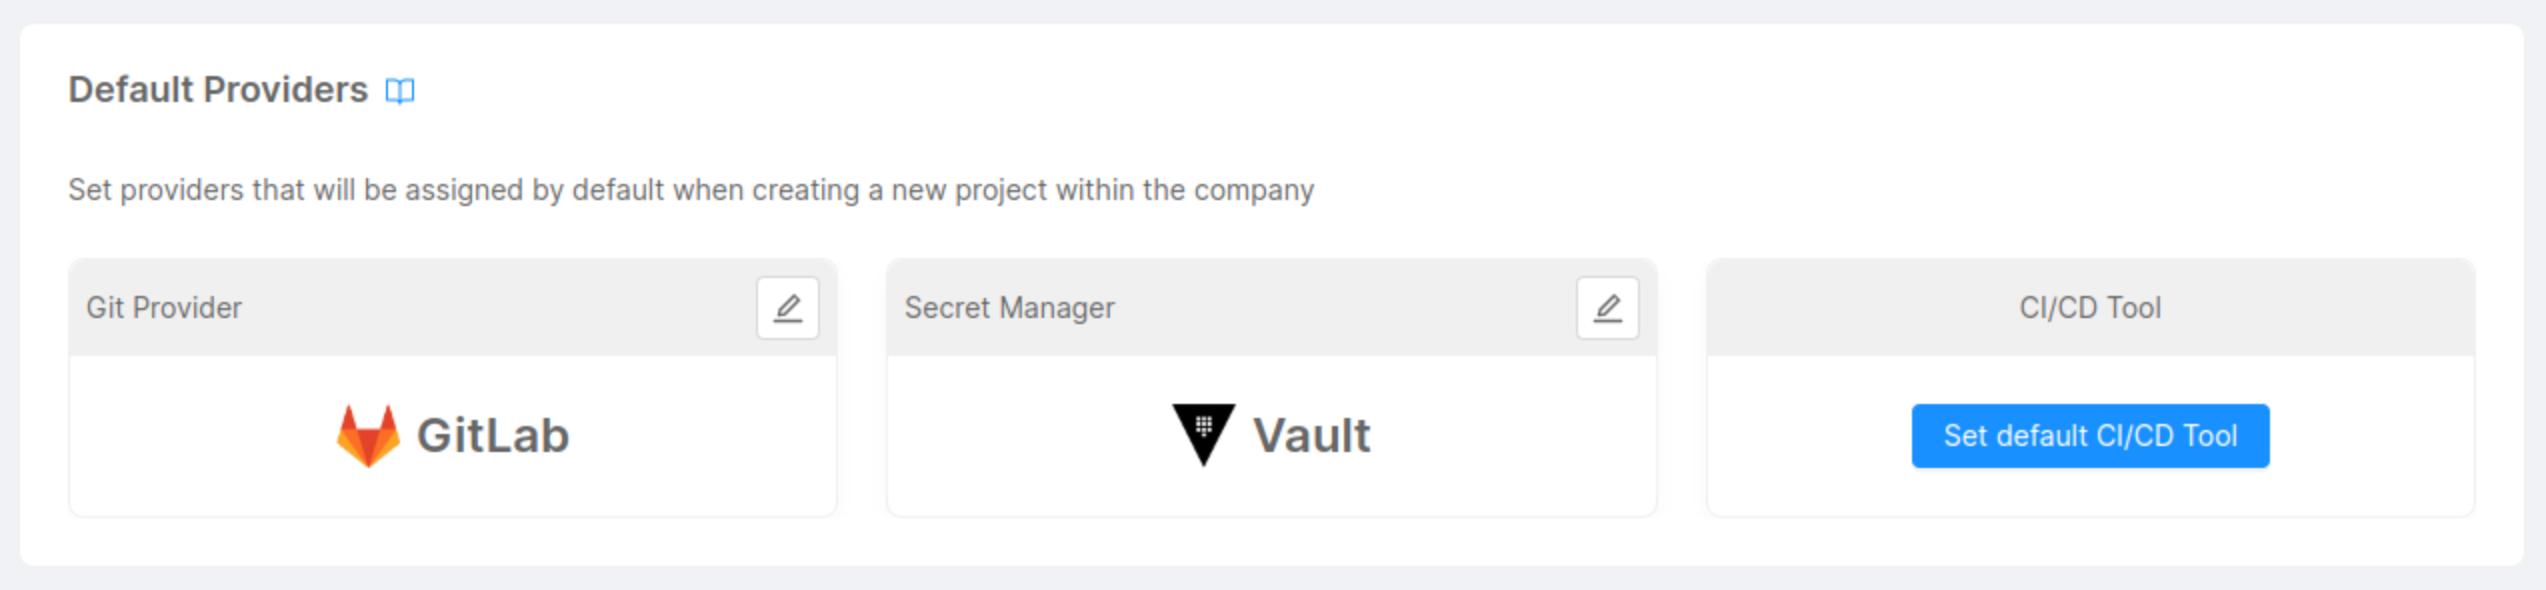
Once you create a provider connection, you will be able to set it as the default provider for a specific capability of that company.
By using the dedicated cards at the top of the providers' section, you will be able to select one of the providers implementing that specific capability.
As soon as the default provider has been set for a certain capability, the card will show the corresponding chosen provider. If no provider has been set, a "Set default capability" button will appear instead.
Setting a default provider for a company allows you to make that provider handle a specific capability for any Project that will be created within the company.
In this way, you will not need to manually specify a provider for your Projects.
Default Providers are automatically associated with newly created Projects inside the company.
Please make sure to have the right permissions to set or modify the default providers of a company.
Only Company Owners will be able to access this feature.
Edit a Default Provider
You can change the default provider connection for a specific capability by clicking the edit button located in the upper right corner of the default providers' cards.
A modal will appear allowing you to select one of the providers implementing that specific capability:
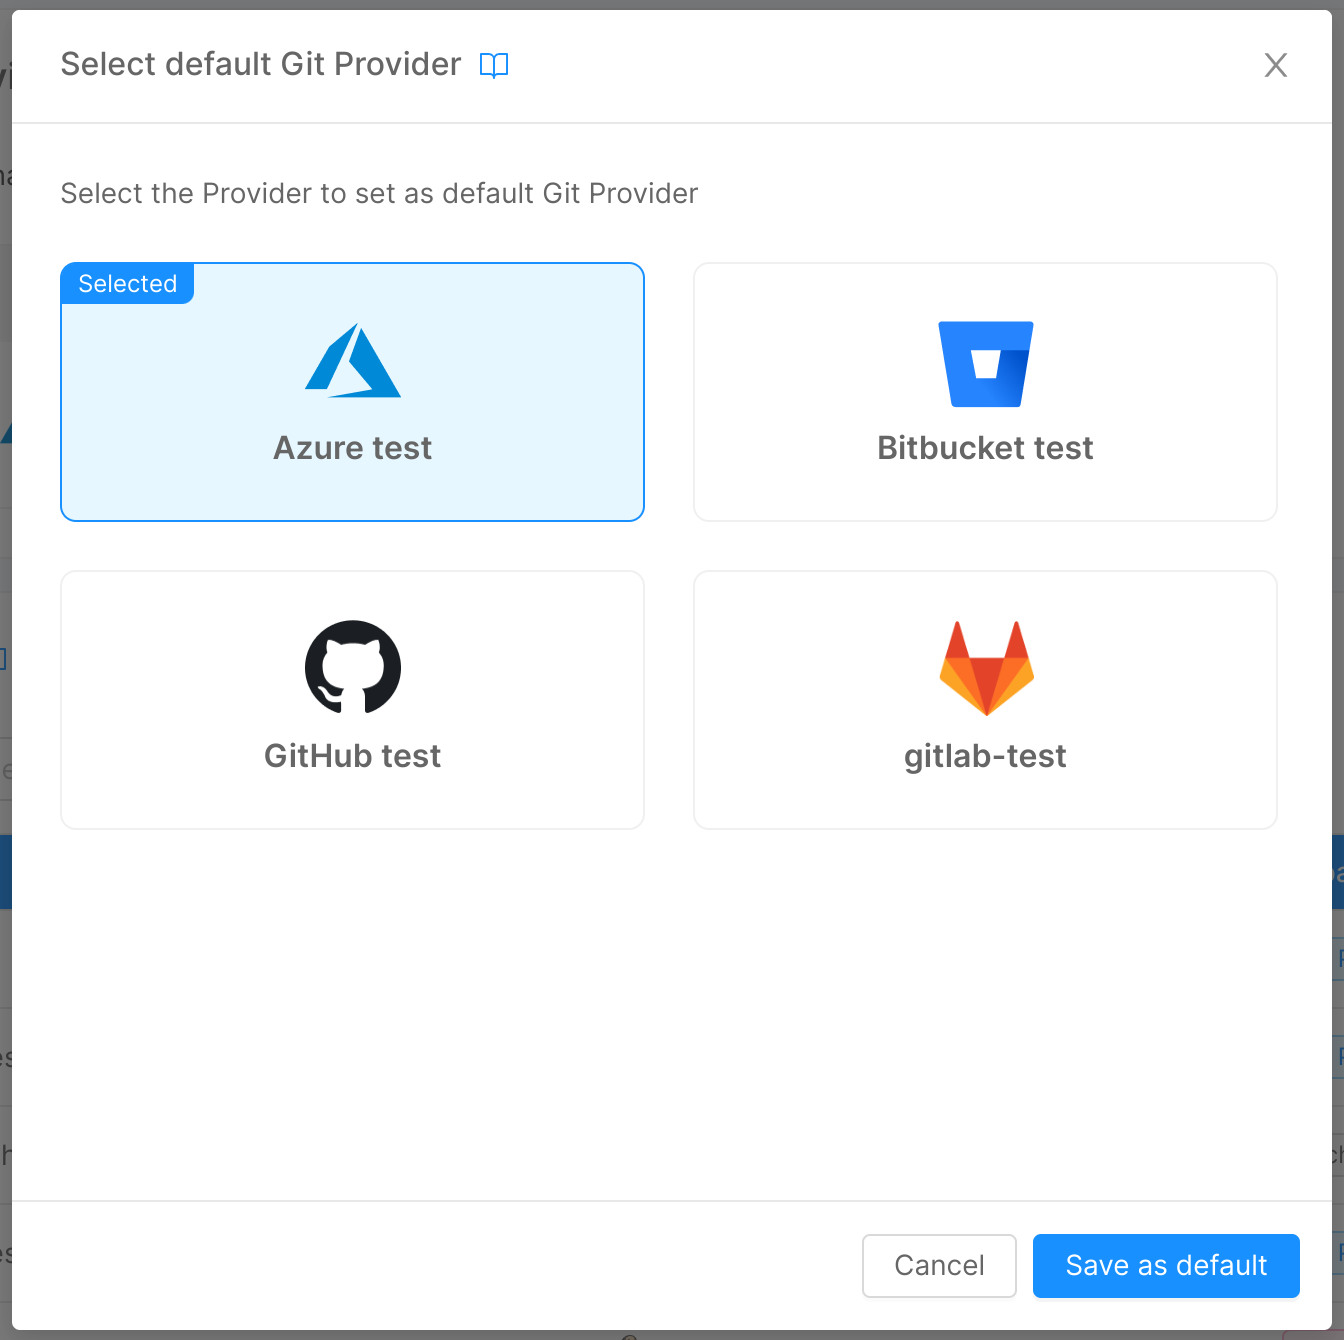
Once you edit the default provider, you will be able to see the card with the new provider set.