Manage Webhooks
Webhooks allow you to build or set up integrations that subscribe to certain Console events. When one of those events is triggered, the Console will send an HTTP POST payload to the webhook's configured URL.
Webhooks can be installed on a Console instance, a specific Company, or a specific project. Once installed, the webhook will be sent when one or more subscribed events occur.
Webhooks Overview
Mia-Platform Console allows authorized users to manage webhooks.
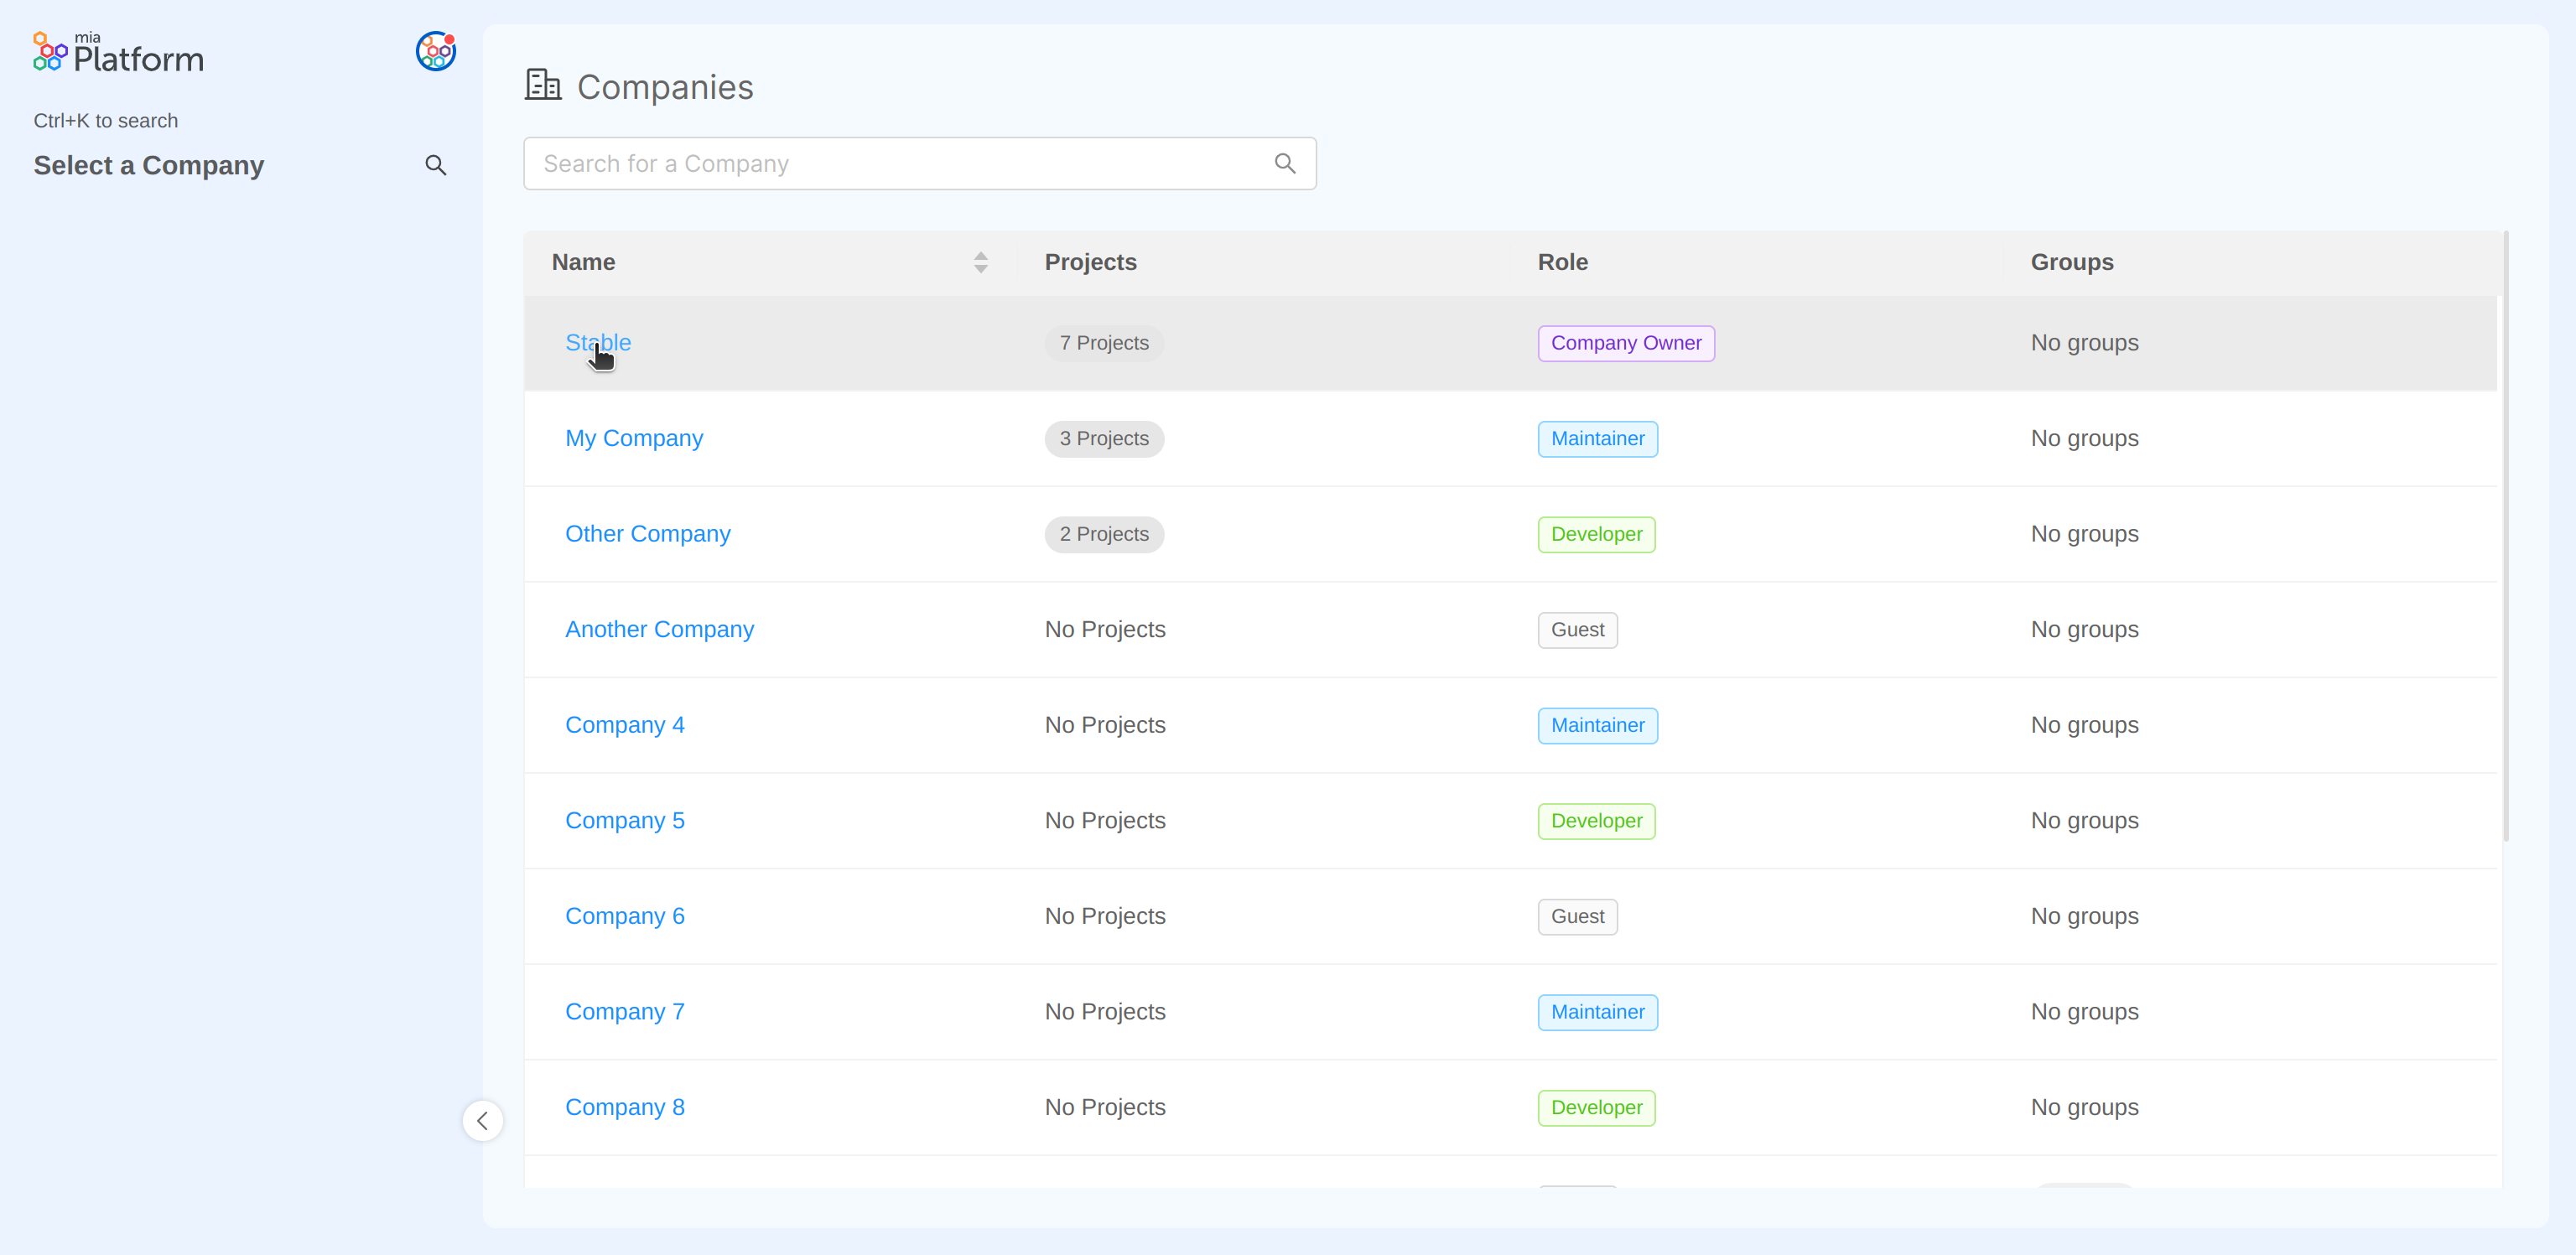
More specifically, a user can add, edit, and delete a webhook for a Company. To access these features, simply click on the Company name in the Companies table.
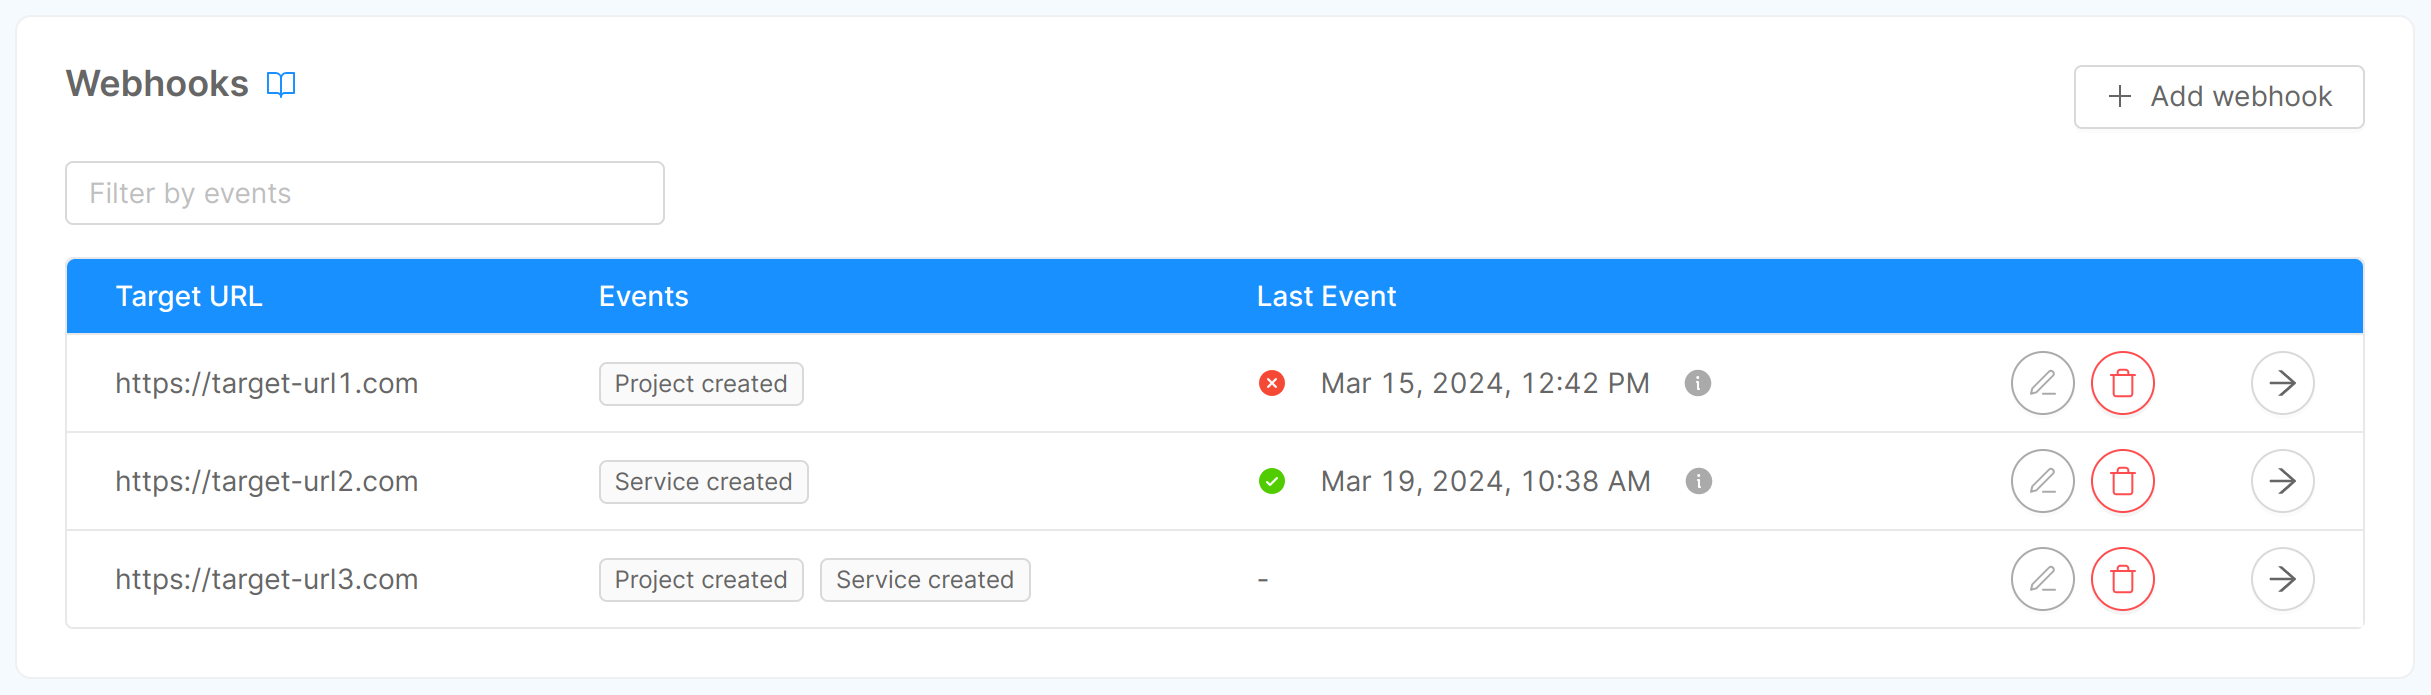
By clicking on "Webhooks" you will be redirected to the related section, in which (assuming you already have added some webhooks) you can see a table containing some information about the webhooks:
- Target URL: the HTTP URL that will be called when the event is triggered;
- Events: the name of the events the webhook should listen to. Check them out here;
- Last Event: information regarding the last event intercepted by the webhook. The column shows the status (success or error), date and time of dispatch of the event, and, via appropriate icon, more specific information about the event itself, i.e., event type and status code.
You can filter table data by events, add a webhook, edit/delete a specific webhook using the related button associated with its table row, or access its detail page.
Add a Webhook
You can add a webhook by clicking on the "Add webhook" button, located in the page's top right corner. A modal will show up, and, through a few steps, you will be asked to enter some information related to the webhook.
Step 1: Webhook Details
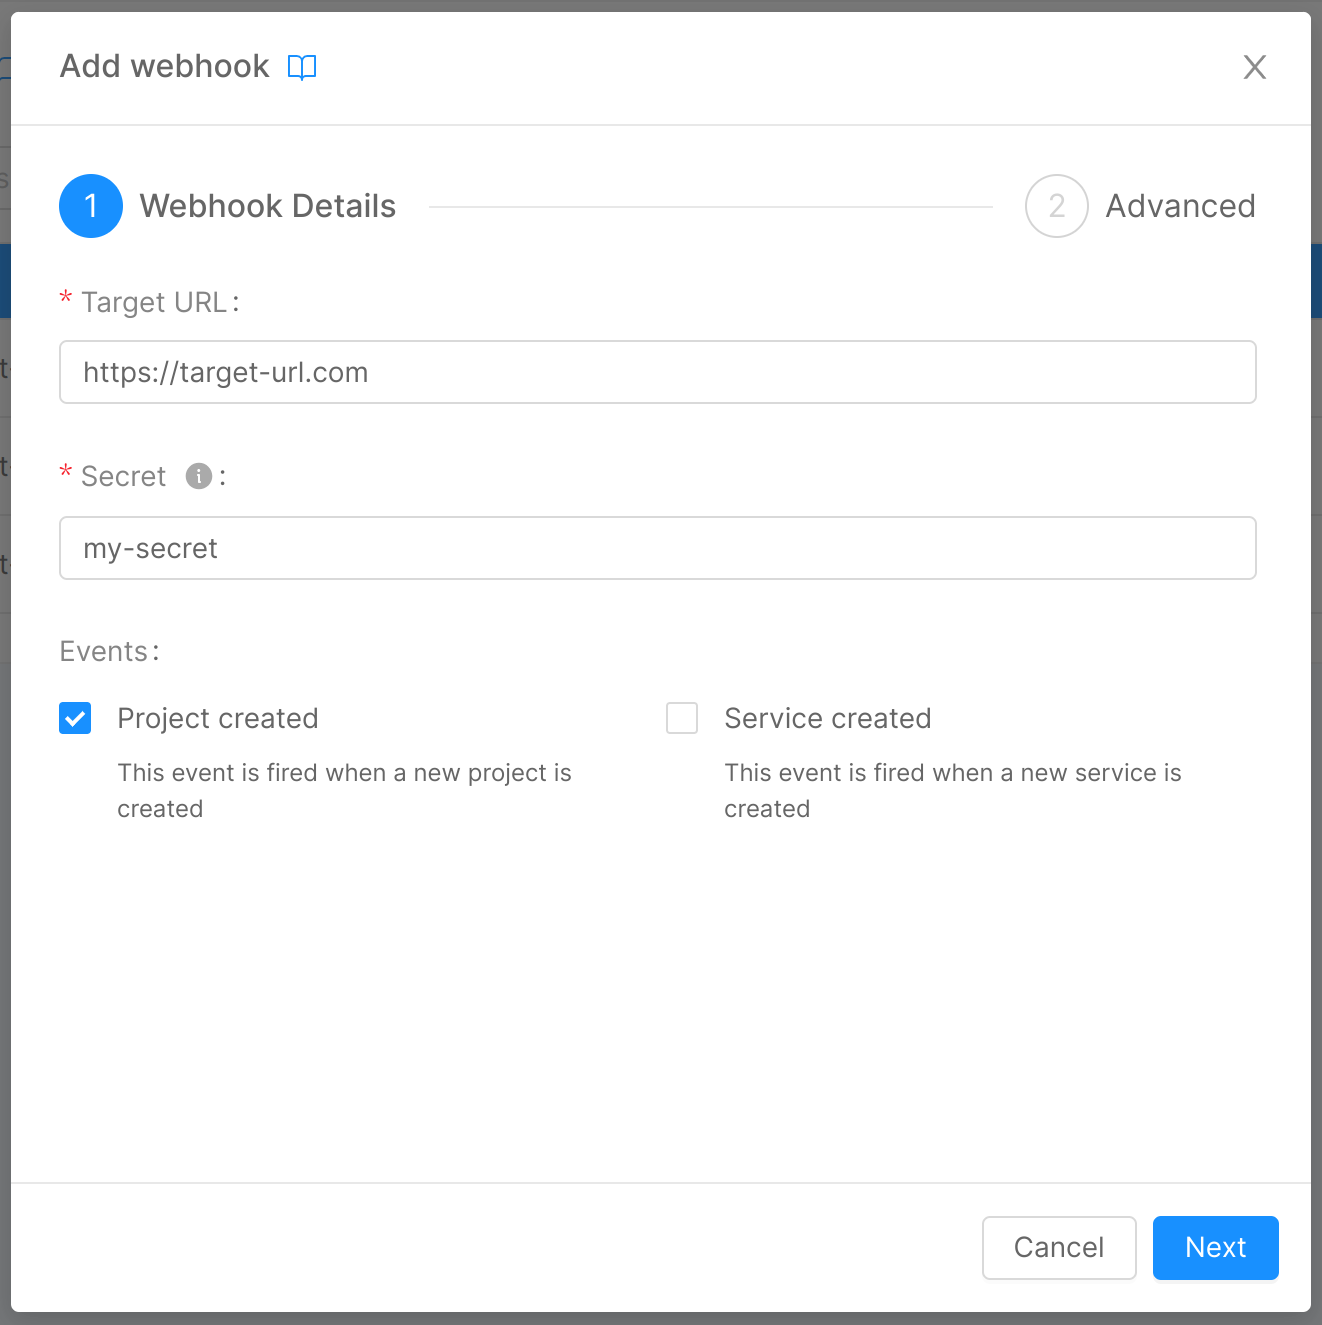
In this step, you can insert some general details about your webhook:
- Target URL (required): the HTTP URL that will be called when the event is triggered;
- Secret (required): the shared secret used to authenticate the events payload;
- Events (required): the events the webhook should listen to.
The secret entered at this stage, for security reasons, will never again be shown to the user, who will be able to replace it with a new one but not visualize it again.
Step 2: Advanced
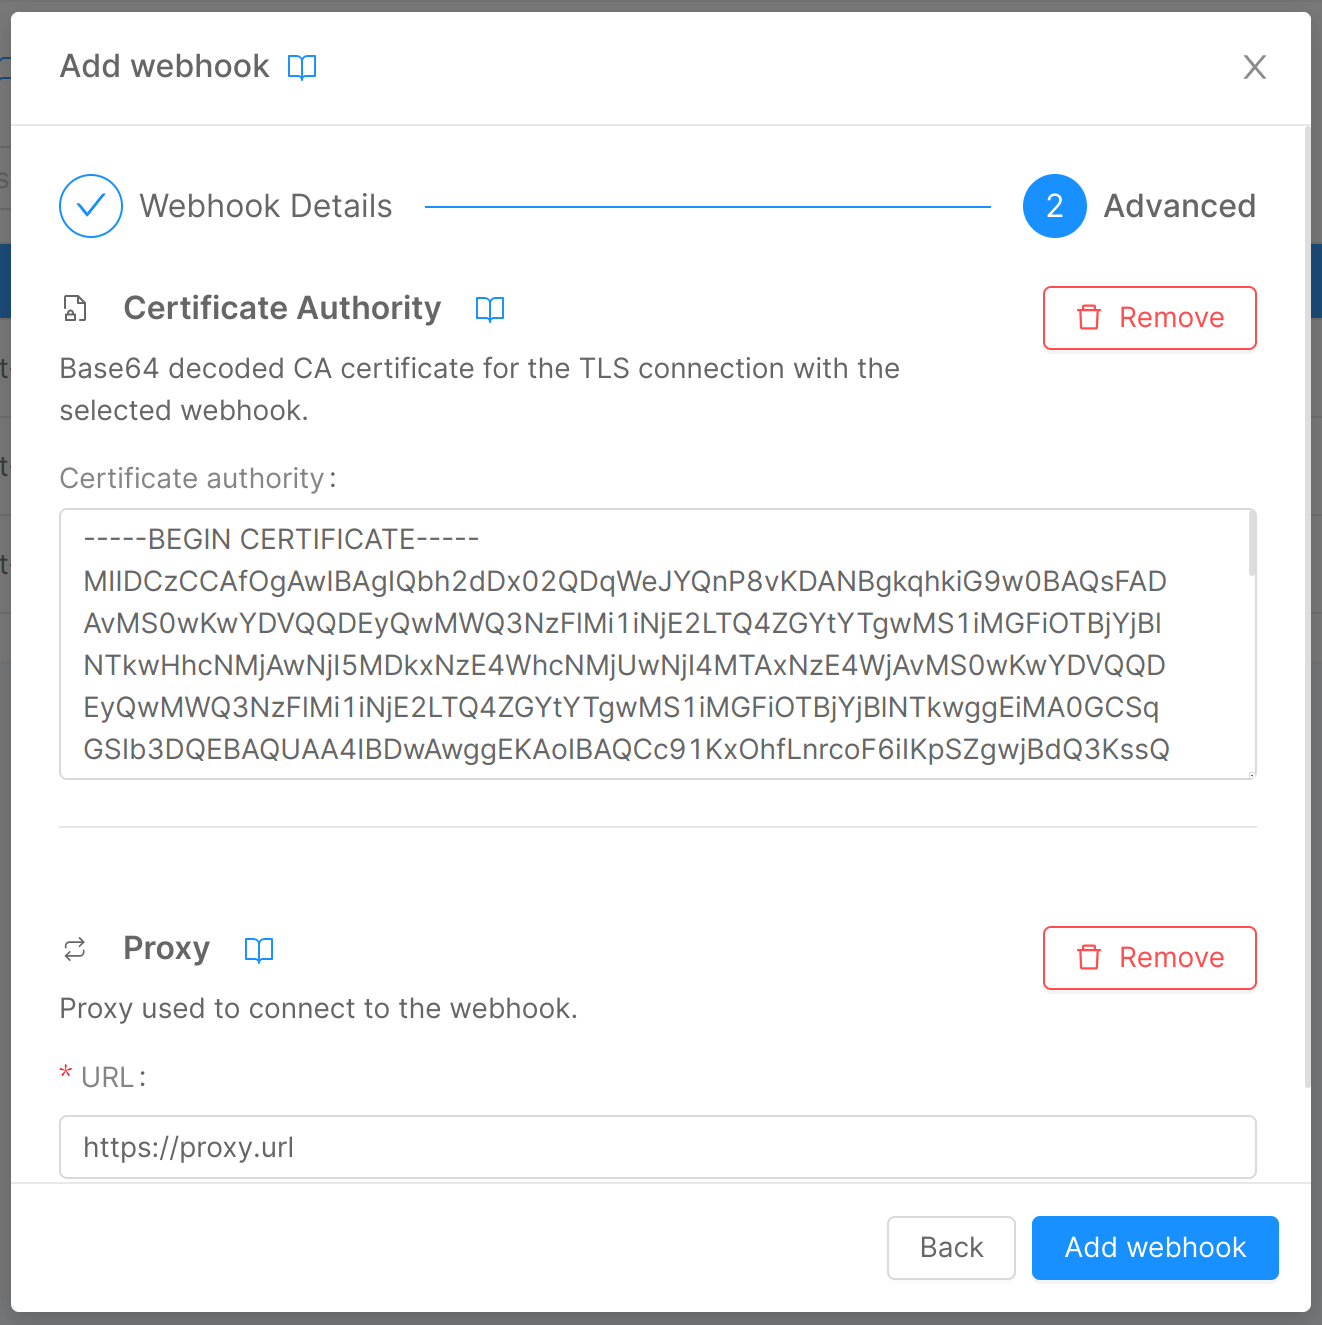
In this step, you can enter some optional advanced information through two expandable forms:
Certificate Authority
If you have set up verification of a CA for the connection to your webhook, here you can enter it through the homonymous field:
- Certificate authority: base64 decoded CA certificate for the TLS connection with the webhook, exposed by the target URL.
Proxy
If the Console needs to use a proxy to forward calls to the webhooks, here you can enter the information needed for the connection:
- URL: the URL used to connect to the proxy, which indicates where the proxy is exposed.
By clicking on "Add webhook", the connection to the webhook will be set, and it will appear as a new entry in the table.
Edit a Webhook
As mentioned in the previous section, you can edit a specific webhook using the related button associated with its table row. A click on the button will open the webhook edit modal, very similar to the one used for the add flow, with the only difference being that the secret, having already been set, is no longer a required piece of information.
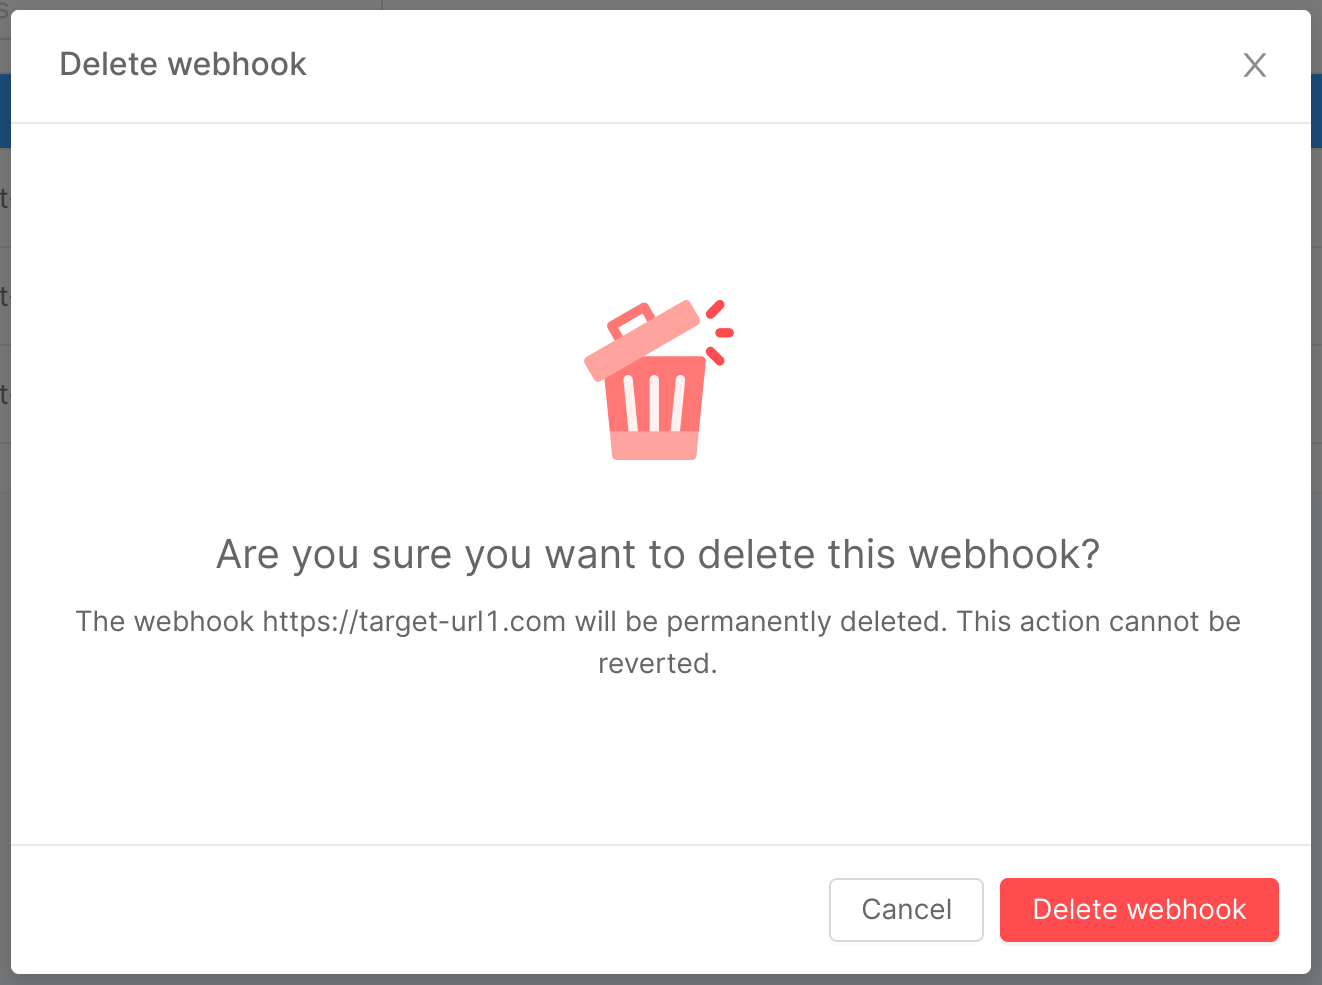
Delete a Webhook
As mentioned in the previous section, you can delete a specific webhook using the related button associated with its table row. A click on the button will open the webhook delete modal, the operation will be confirmed upon clicking the "Delete webhook" button within the modal, which will initiate the deletion process.
Event history
By clicking on the arrow button of a table row, the detail page of the corresponding webhook can be opened. Here an "Event history" card containing the most recent events (up to a maximum of 200) related to the webhook is shown.
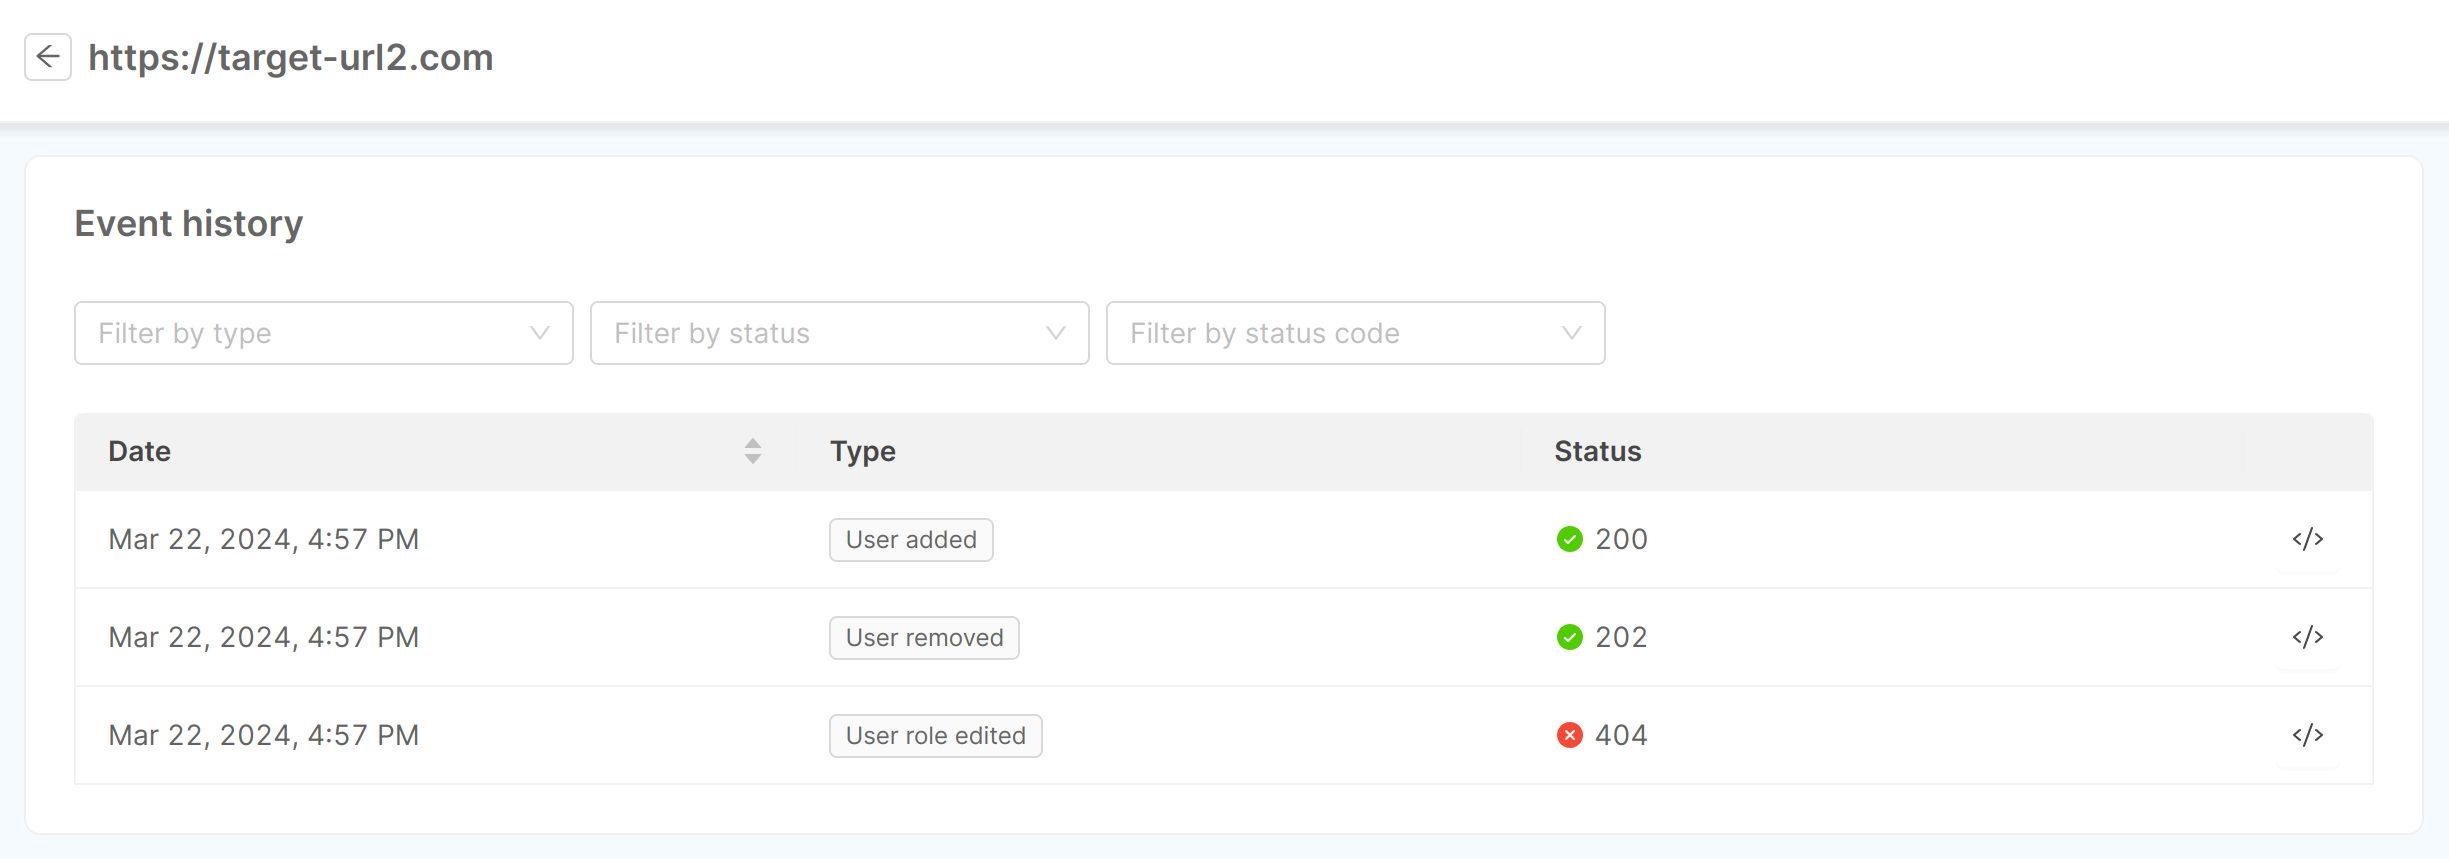
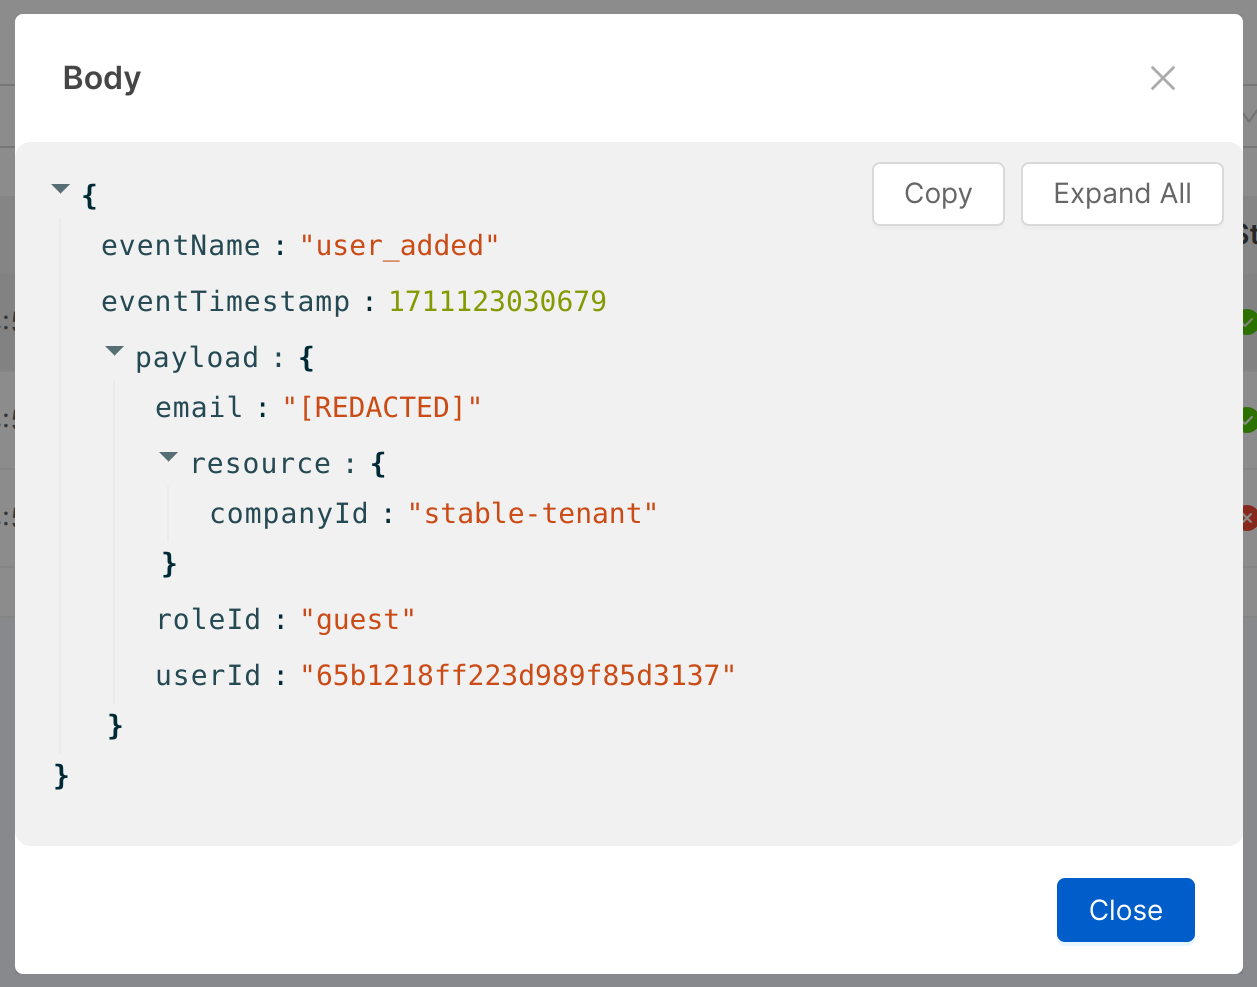
For each event, the date and time of the dispatch, type, and status (which includes both the "success" or "error" condition and the status code) are shown. It is also possible to change the sorting of events by showing them from oldest to newest, and filter by event type, status ("success" or "error") or status code. Lastly, using the button to the right of each line, the request body of the event can also be displayed.
Payload authentication
The payload delivered by the Console will be authenticated using the X-Mia-Signature header. This will both prevent the modification of the payload by third-parties and allow the receiver to make sure that the event has been triggered by the Console.
This authentication method is not safe against replay attacks.
It is recommended to store the latest eventTimestamp on the receiver side to prevent this attack.
The X-Mia-Signature header will contain the hex encoded sha256 digest of the event payload concatenated with the provided secret. In formula:
X-Mia-Signature = hex(sha256( payload + secret ))