Mia-Platform Microfrontend Composer Templates Tutorial
In this tutorial, we will explore the world of ready-to-use page templates within the Mia-Platform Microfrontend Composer. These templates serve as potent tools, enabling us to craft intricate pages with ease. Leveraging the insights gained from the Microfrontend Composer Basics Tutorial, we will delve into harnessing the full potential of these templates to enhance the efficiency and effectiveness of our page implementation. Get ready to uncover an innovative approach that accelerates the creation process.
What We Will Build
In this tutorial, we'll guide you through the process of creating Microfrontend Composer pages using various Microfrontend Composer templates. We'll cover the following templates:
- Setup an iFrame Page
- Setup a Calendar View Page
- Setup a Picture Gallery Page
- Setup a Show Info/Details Page
Each of these templates offers unique capabilities, and we'll walk you through the steps to implement them effectively.
Prerequisites
Before diving into this tutorial, it's essential to have a grasp of the fundamental concepts of the Mia-Platform Microfrontend Composer and to have completed the Microfrontend Composer Tutorial Basics. This foundational knowledge will ensure a smoother understanding of the upcoming content.
Setup an iFrame Page
To create a new Microfrontend Composer page using the Microfrontend Composer iFrame, follow these steps:
- Access the Microfrontend Composer Configuration and navigate to the Pages tab.
- Click on the Create New Page button.
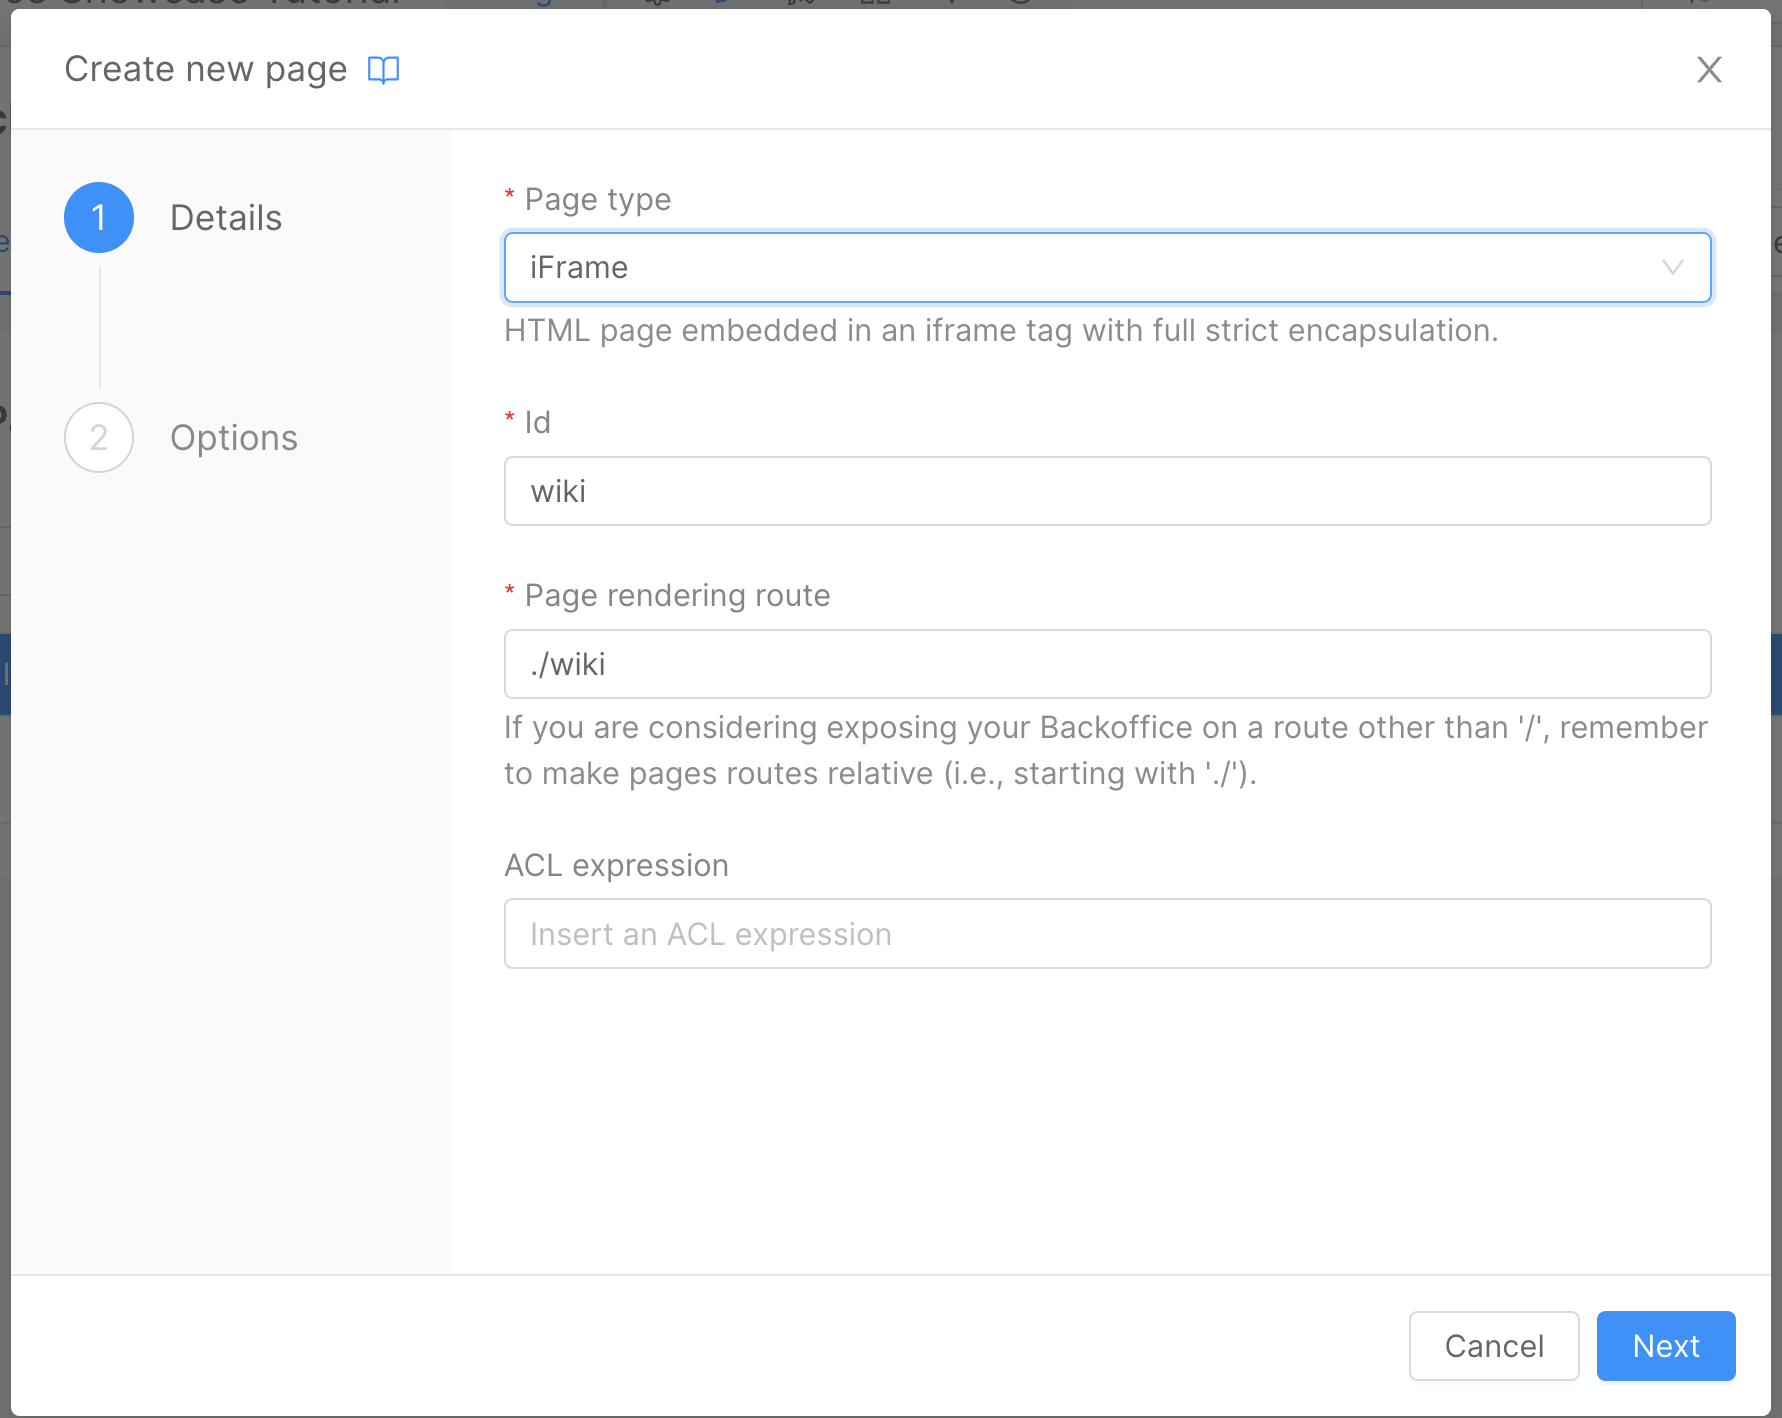
In the first step of the wizard, select the Page type as an iFrame. Provide an appropriate id for the page (e.g., "wiki"). Set the Page rendering route to "./wiki".
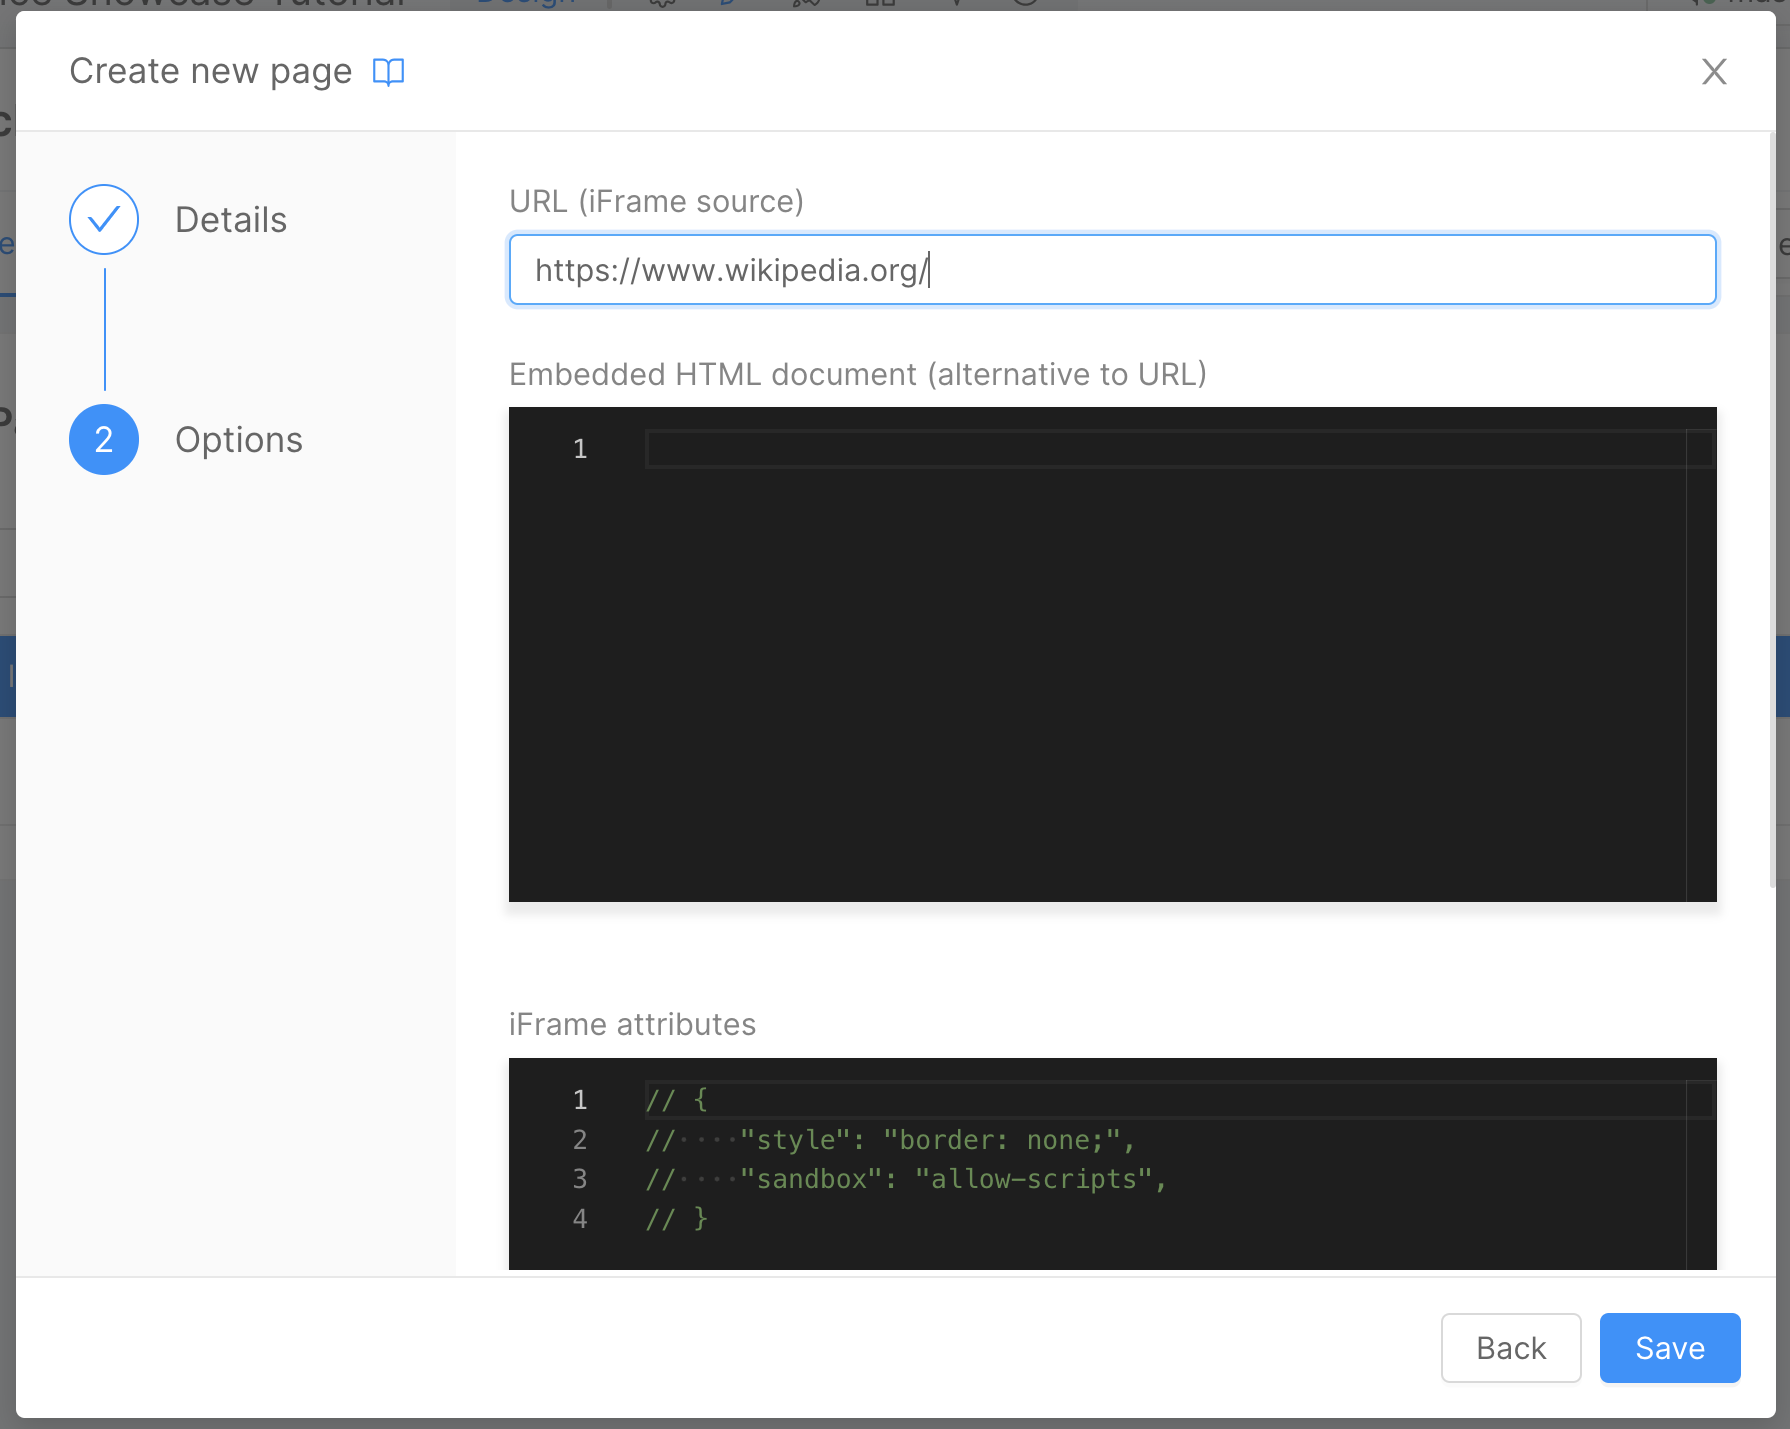
In the second step of the wizard, provide the URL (iFrame source). For example, you can use "https://www.wikipedia.org/". After filling in the necessary details, click the Save button to create the page.
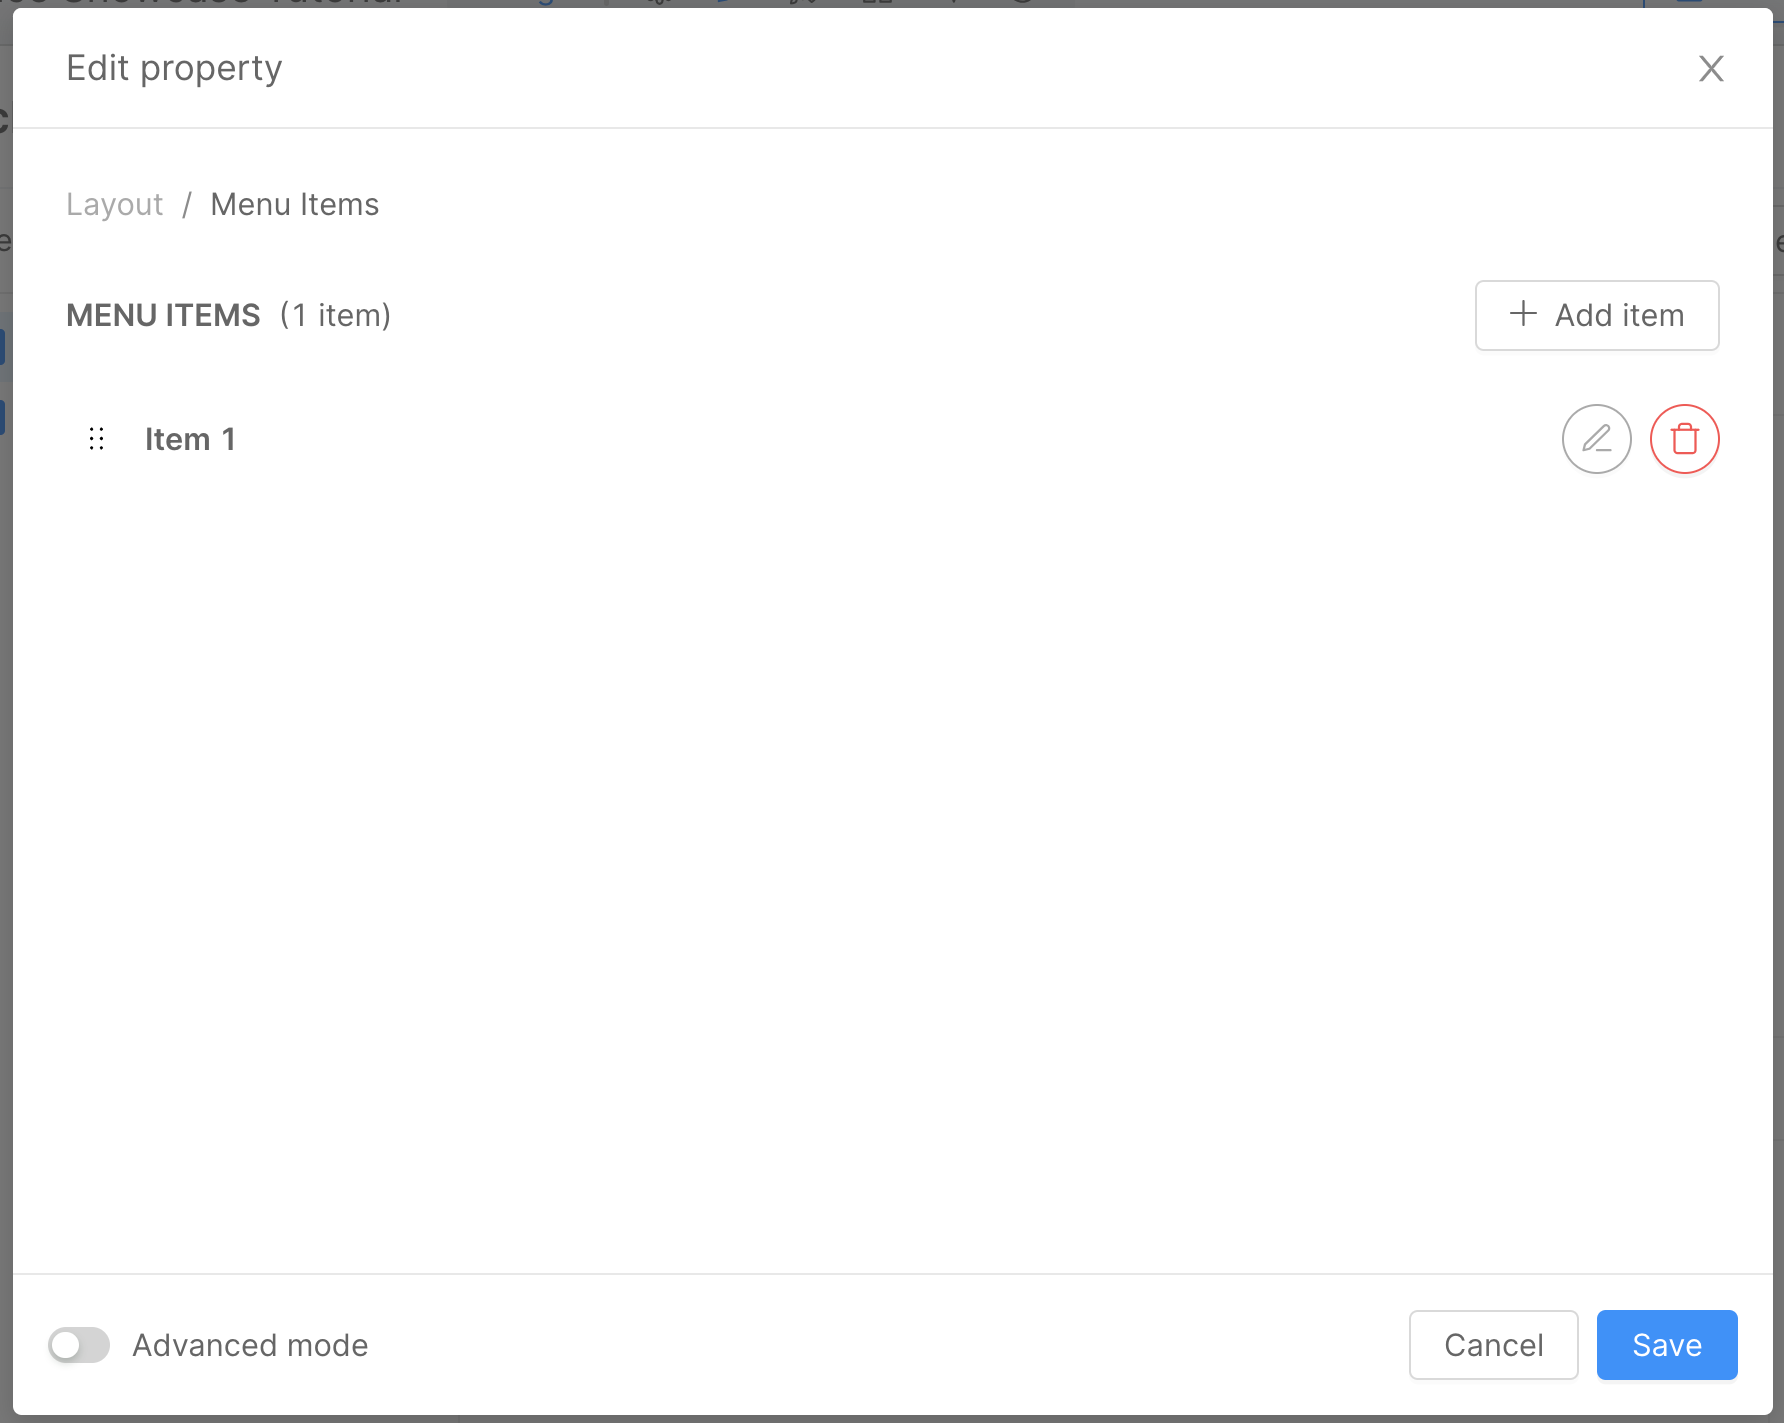
To integrate the new page into the menu, navigate to the Layout tab and click on the Layout button in the left panel.
- Click on the Add Item button.
- Click on the Edit option next to the new menu item in the list.
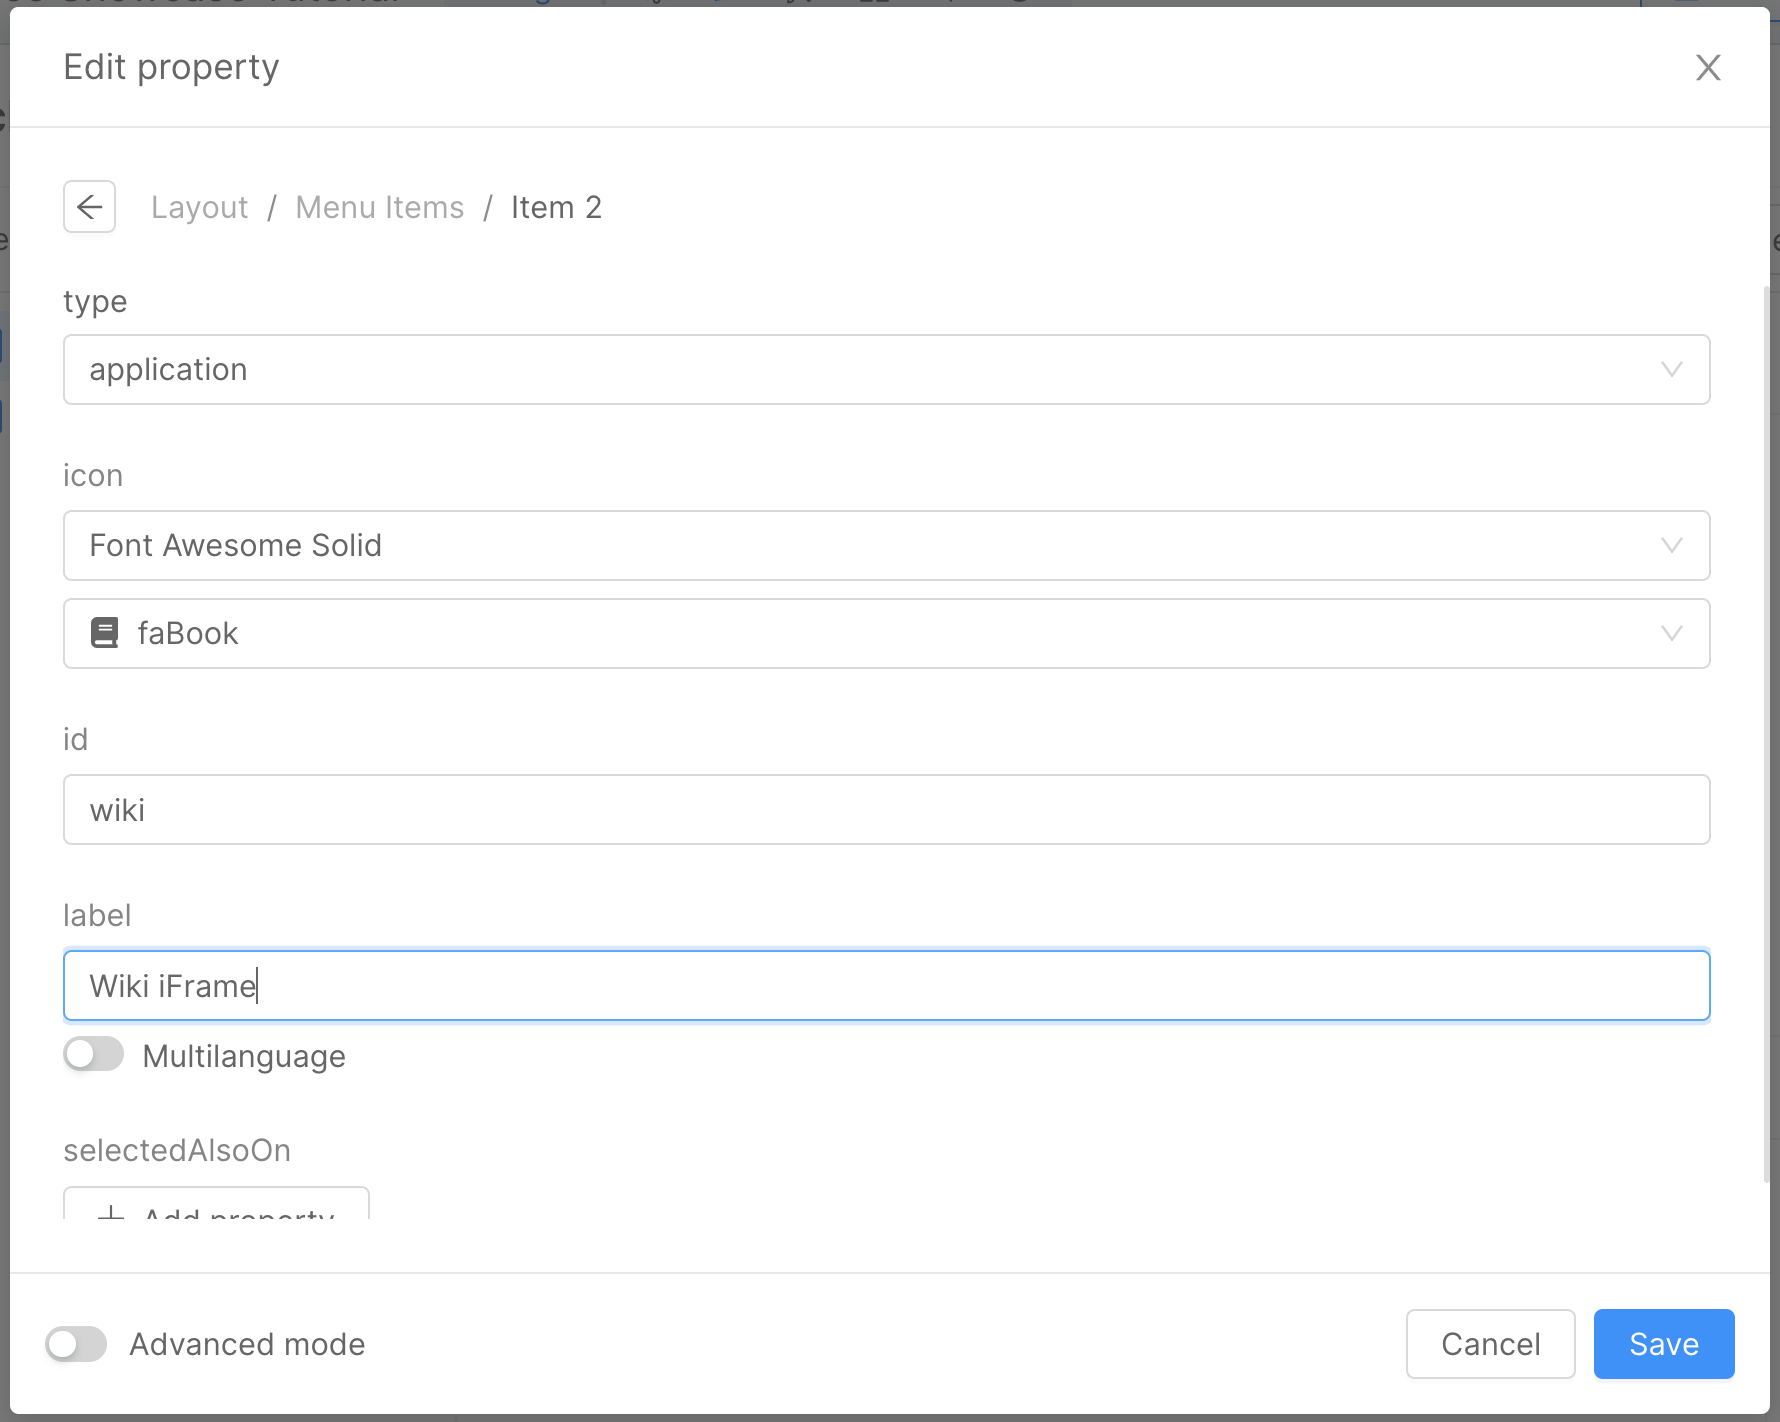
In the modal that appears, make the following changes:
- Change the id to "wiki".
- Update the label to "Wiki iFrame".
- Choose an appropriate icon set and icon for the menu item.
Once the configurations are set, you can save the changes and proceed to save the configuration and deploy.
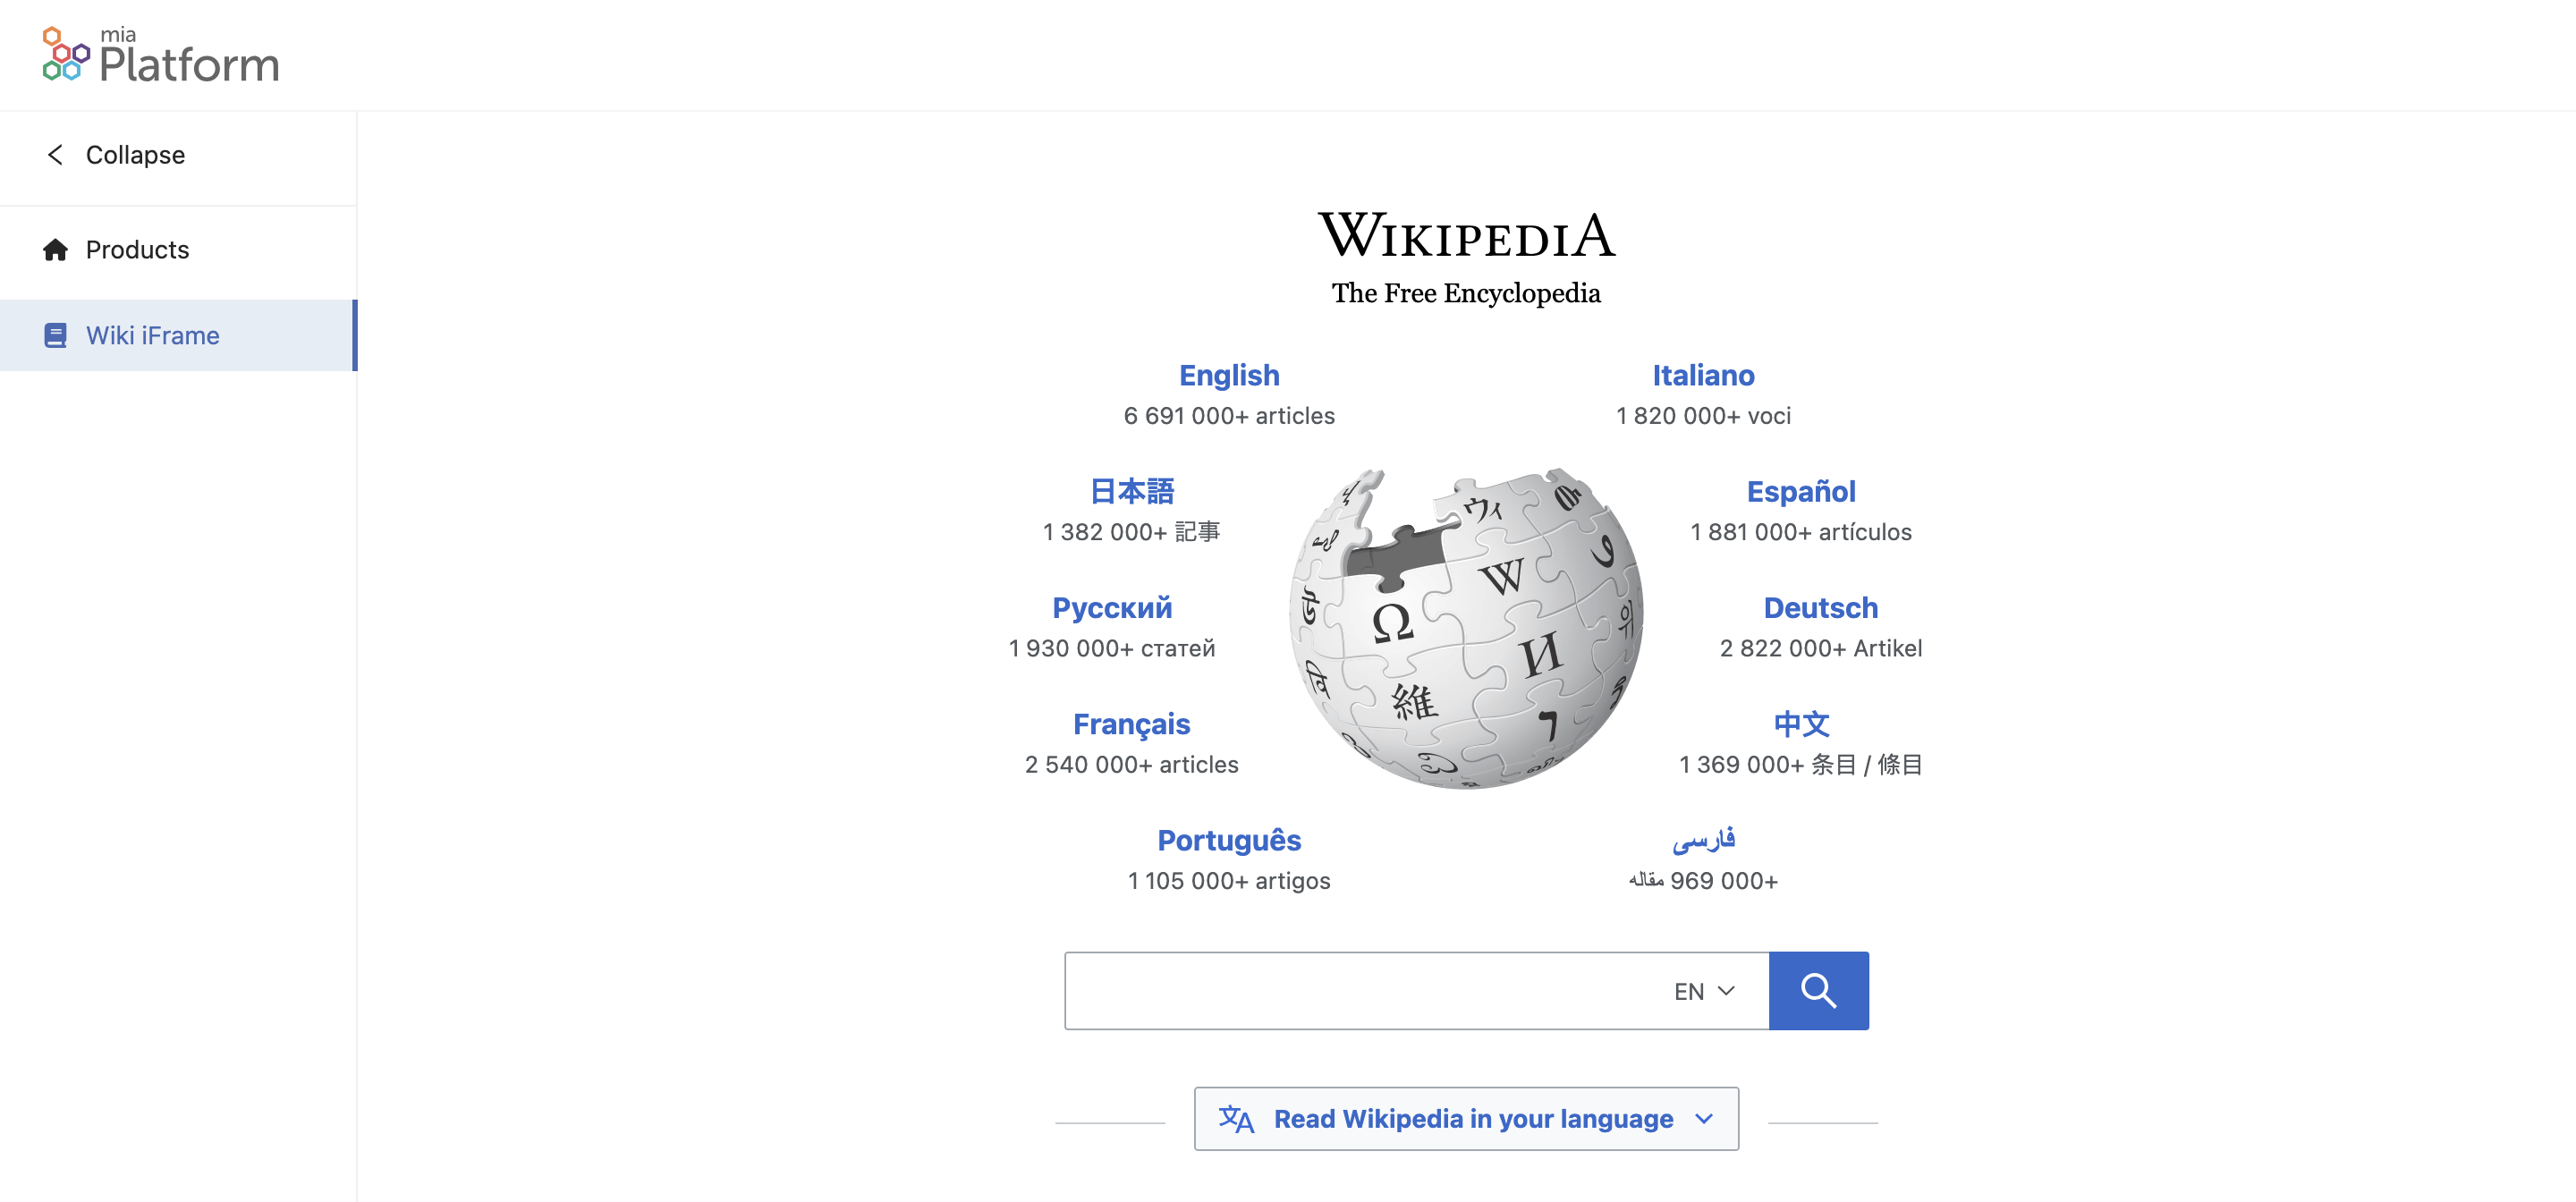
Upon completion, the new iFrame page will be accessible. Here's an example of how the page might appear:
Setup a Calendar View Page
To create a new Microfrontend Composer page using the Microfrontend Composer Calendar View Template, follow these steps:
Setting Up the CRUD Collection
Before creating a new Microfrontend Composer page using the Calendar View Template, you need to set up a CRUD collection named "calendar" as the data source. You can follow the same procedure outlined in the Microfrontend Composer Tutorial Basics tutorial. Define the following data schema for the collection:
- title: Type - string, Required - true
- startDate: Type - Date, Required - true
- endDate: Type - Date, Required - true
For this example, we'll omit the default fields generated by the CRUD collection. Here's the JSON schema representing the specific fields:
[
  {
    "name": "title",
    "type": "string",
    "required": true,
    "nullable": false,
    "sensitivityValue": 0,
    "encryptionEnabled": false,
    "encryptionSearchable": false
  },
  {
    "name": "startDate",
    "type": "Date",
    "required": true,
    "nullable": false,
    "sensitivityValue": 0,
    "encryptionEnabled": false,
    "encryptionSearchable": false
  },
  {
    "name": "endDate",
    "type": "Date",
    "required": true,
    "nullable": false,
    "sensitivityValue": 0,
    "encryptionEnabled": false,
    "encryptionSearchable": false
  }
]
Now you can expose the CRUD data using an endpoint named "calendar".
Setup the Calendar View Page
To create a new Microfrontend Composer page using the Microfrontend Composer Calendar View Template, follow these steps:
- Open the Microfrontend Composer Configuration and navigate to the
Pagestab. - Click on the
Create New Pagebutton.
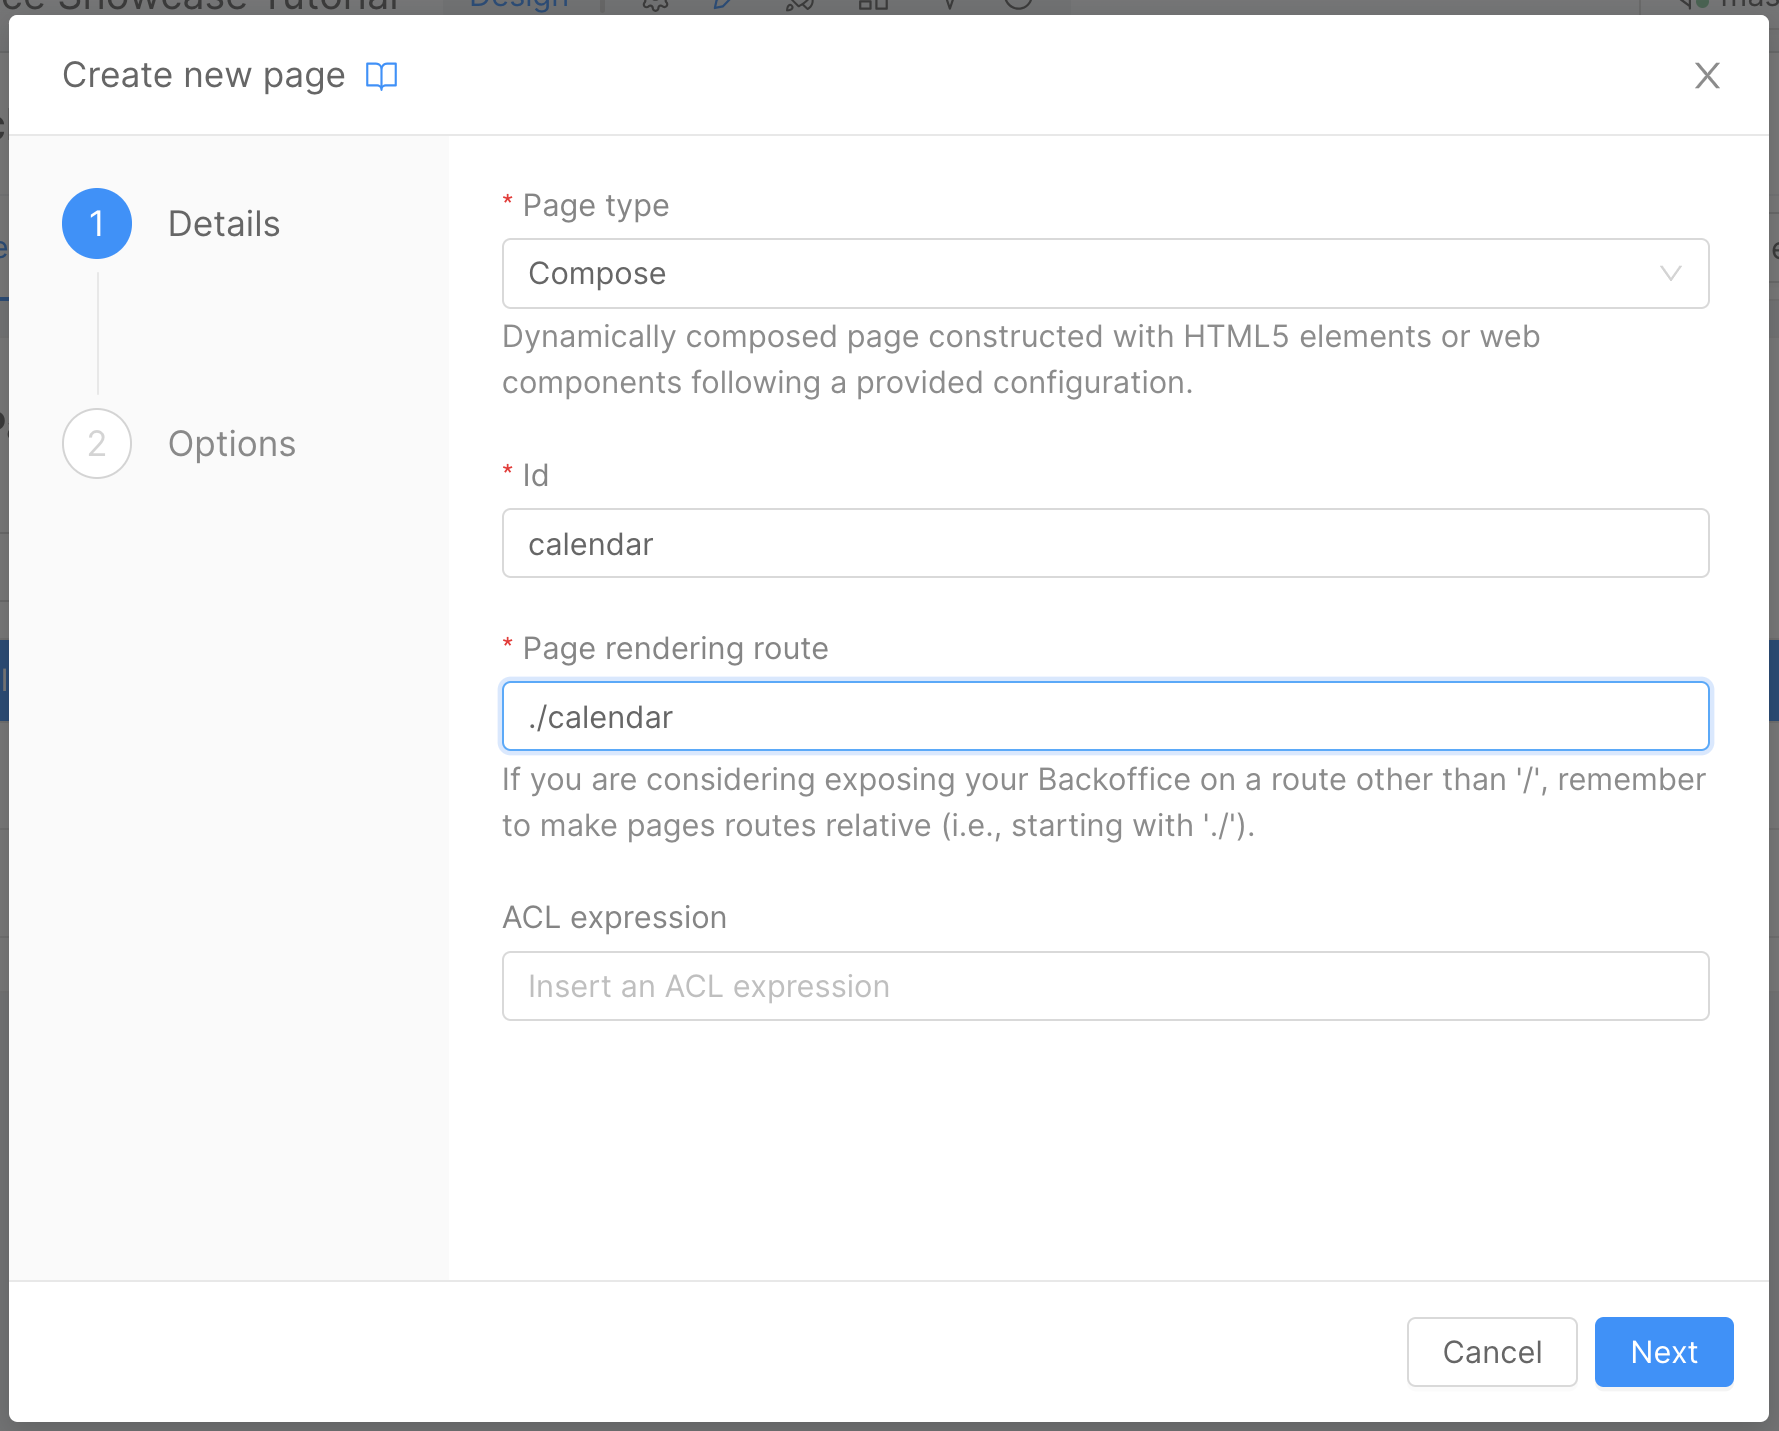
In the first step of the wizard:
- Choose the
Page typeasCompose. - Provide an
idfor the page, such ascalendar. - Set the
Page rendering routeto./calendar.
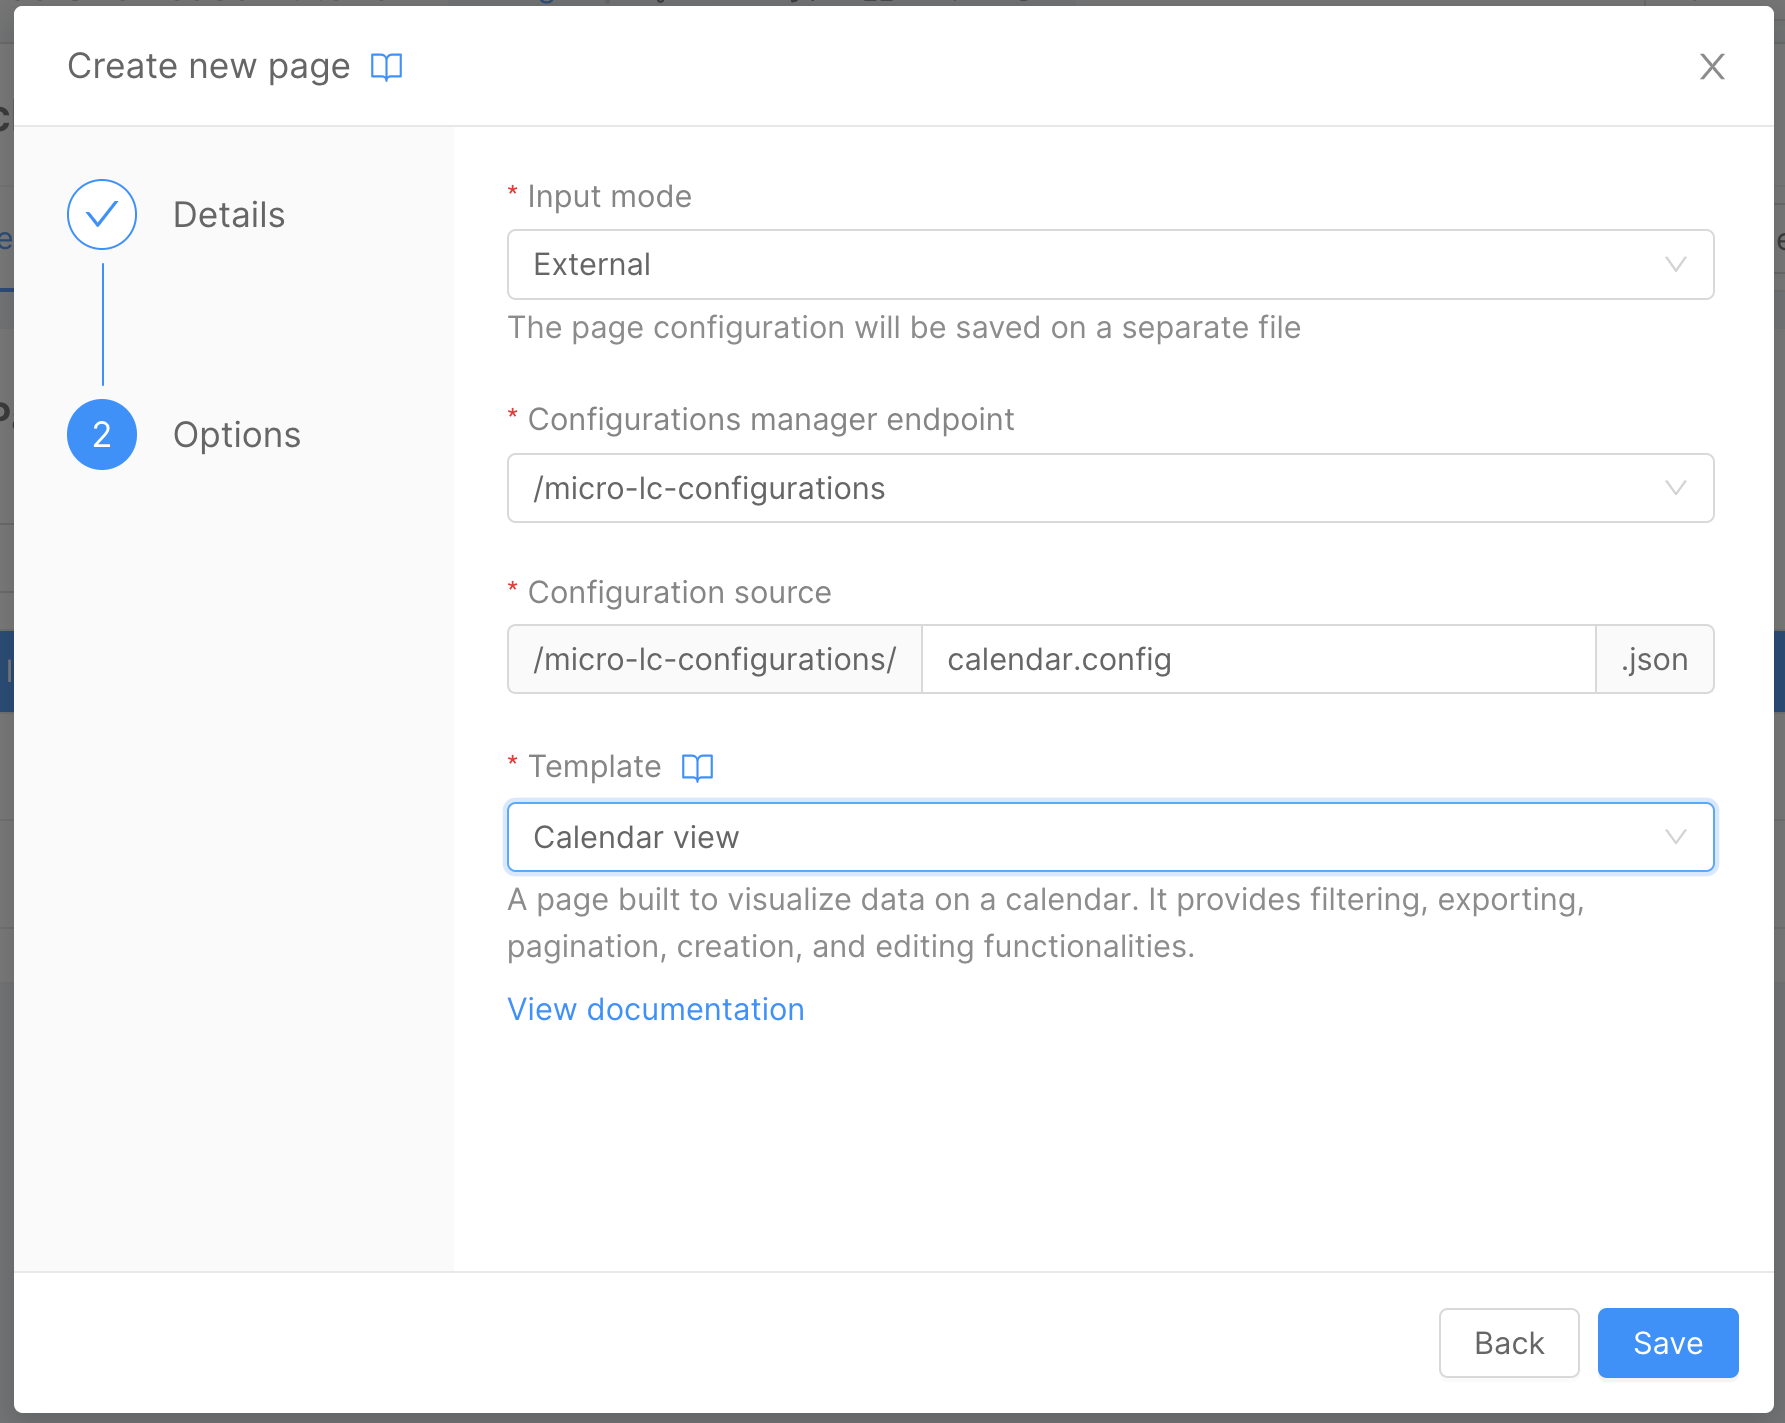
In the second step of the wizard:
- Choose the
Calendar Viewtemplate.
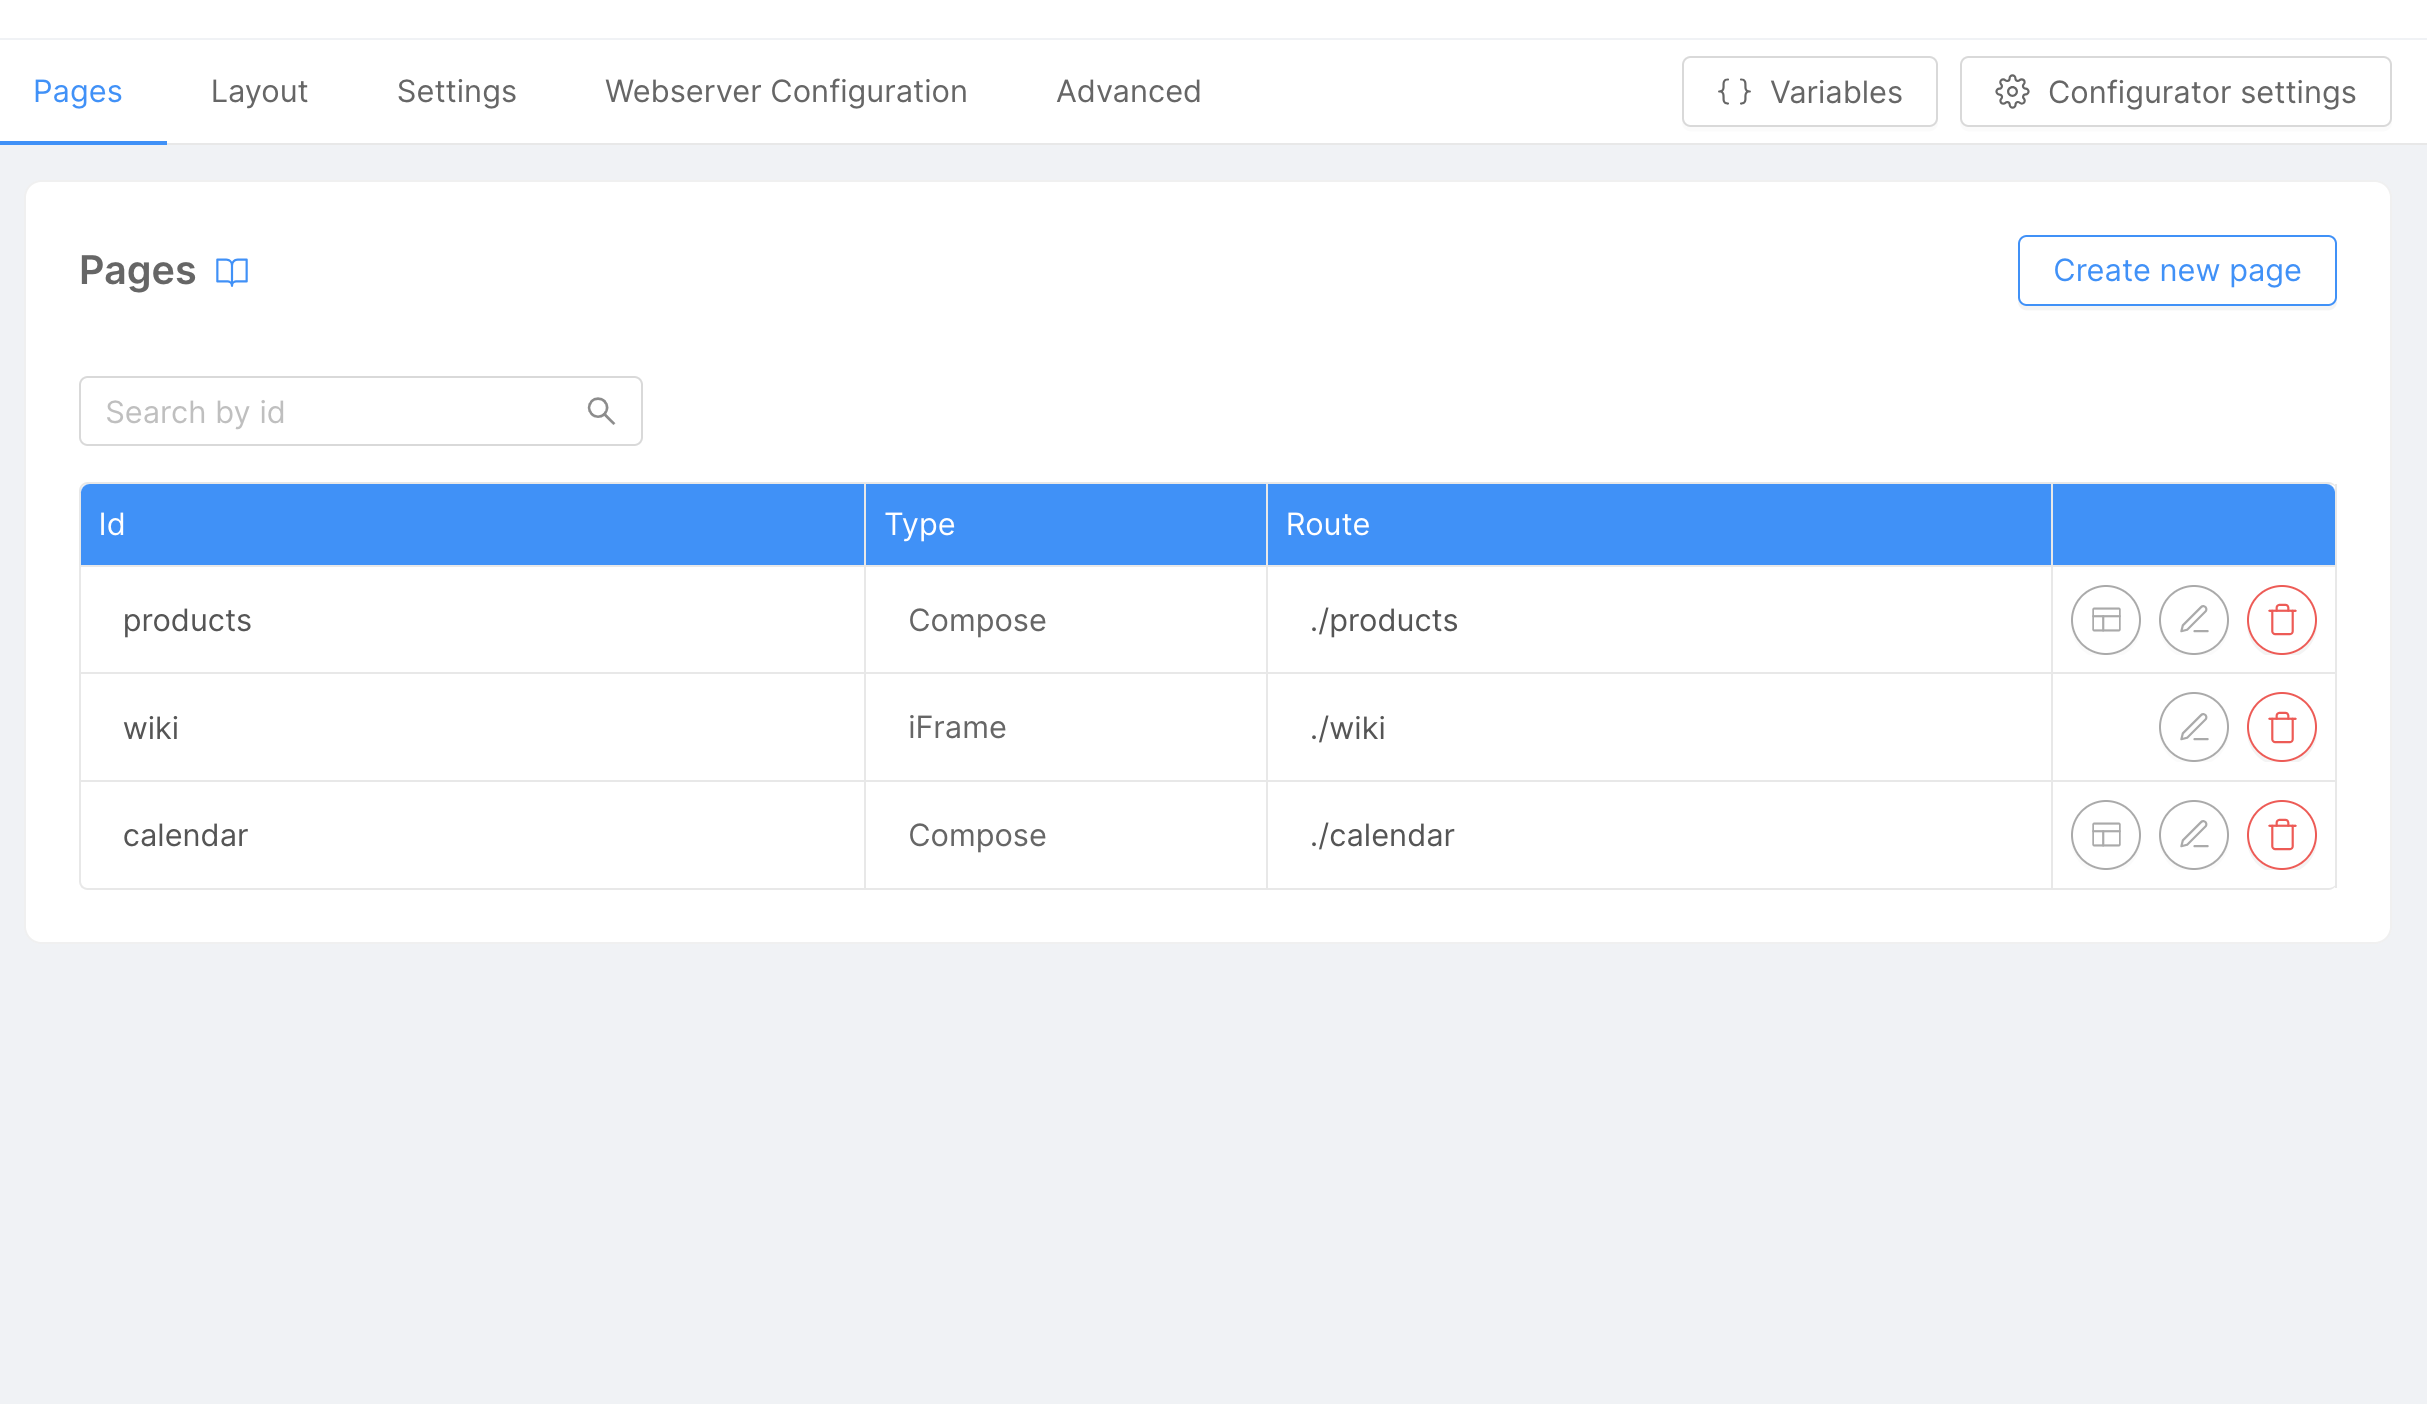
In the Pages tab within the Microfrontend Composer section:
- Locate the
Calendarpage that was previously created. - Click on the
Composebutton (placed on the left of the "Edit" button) to open the page composer.
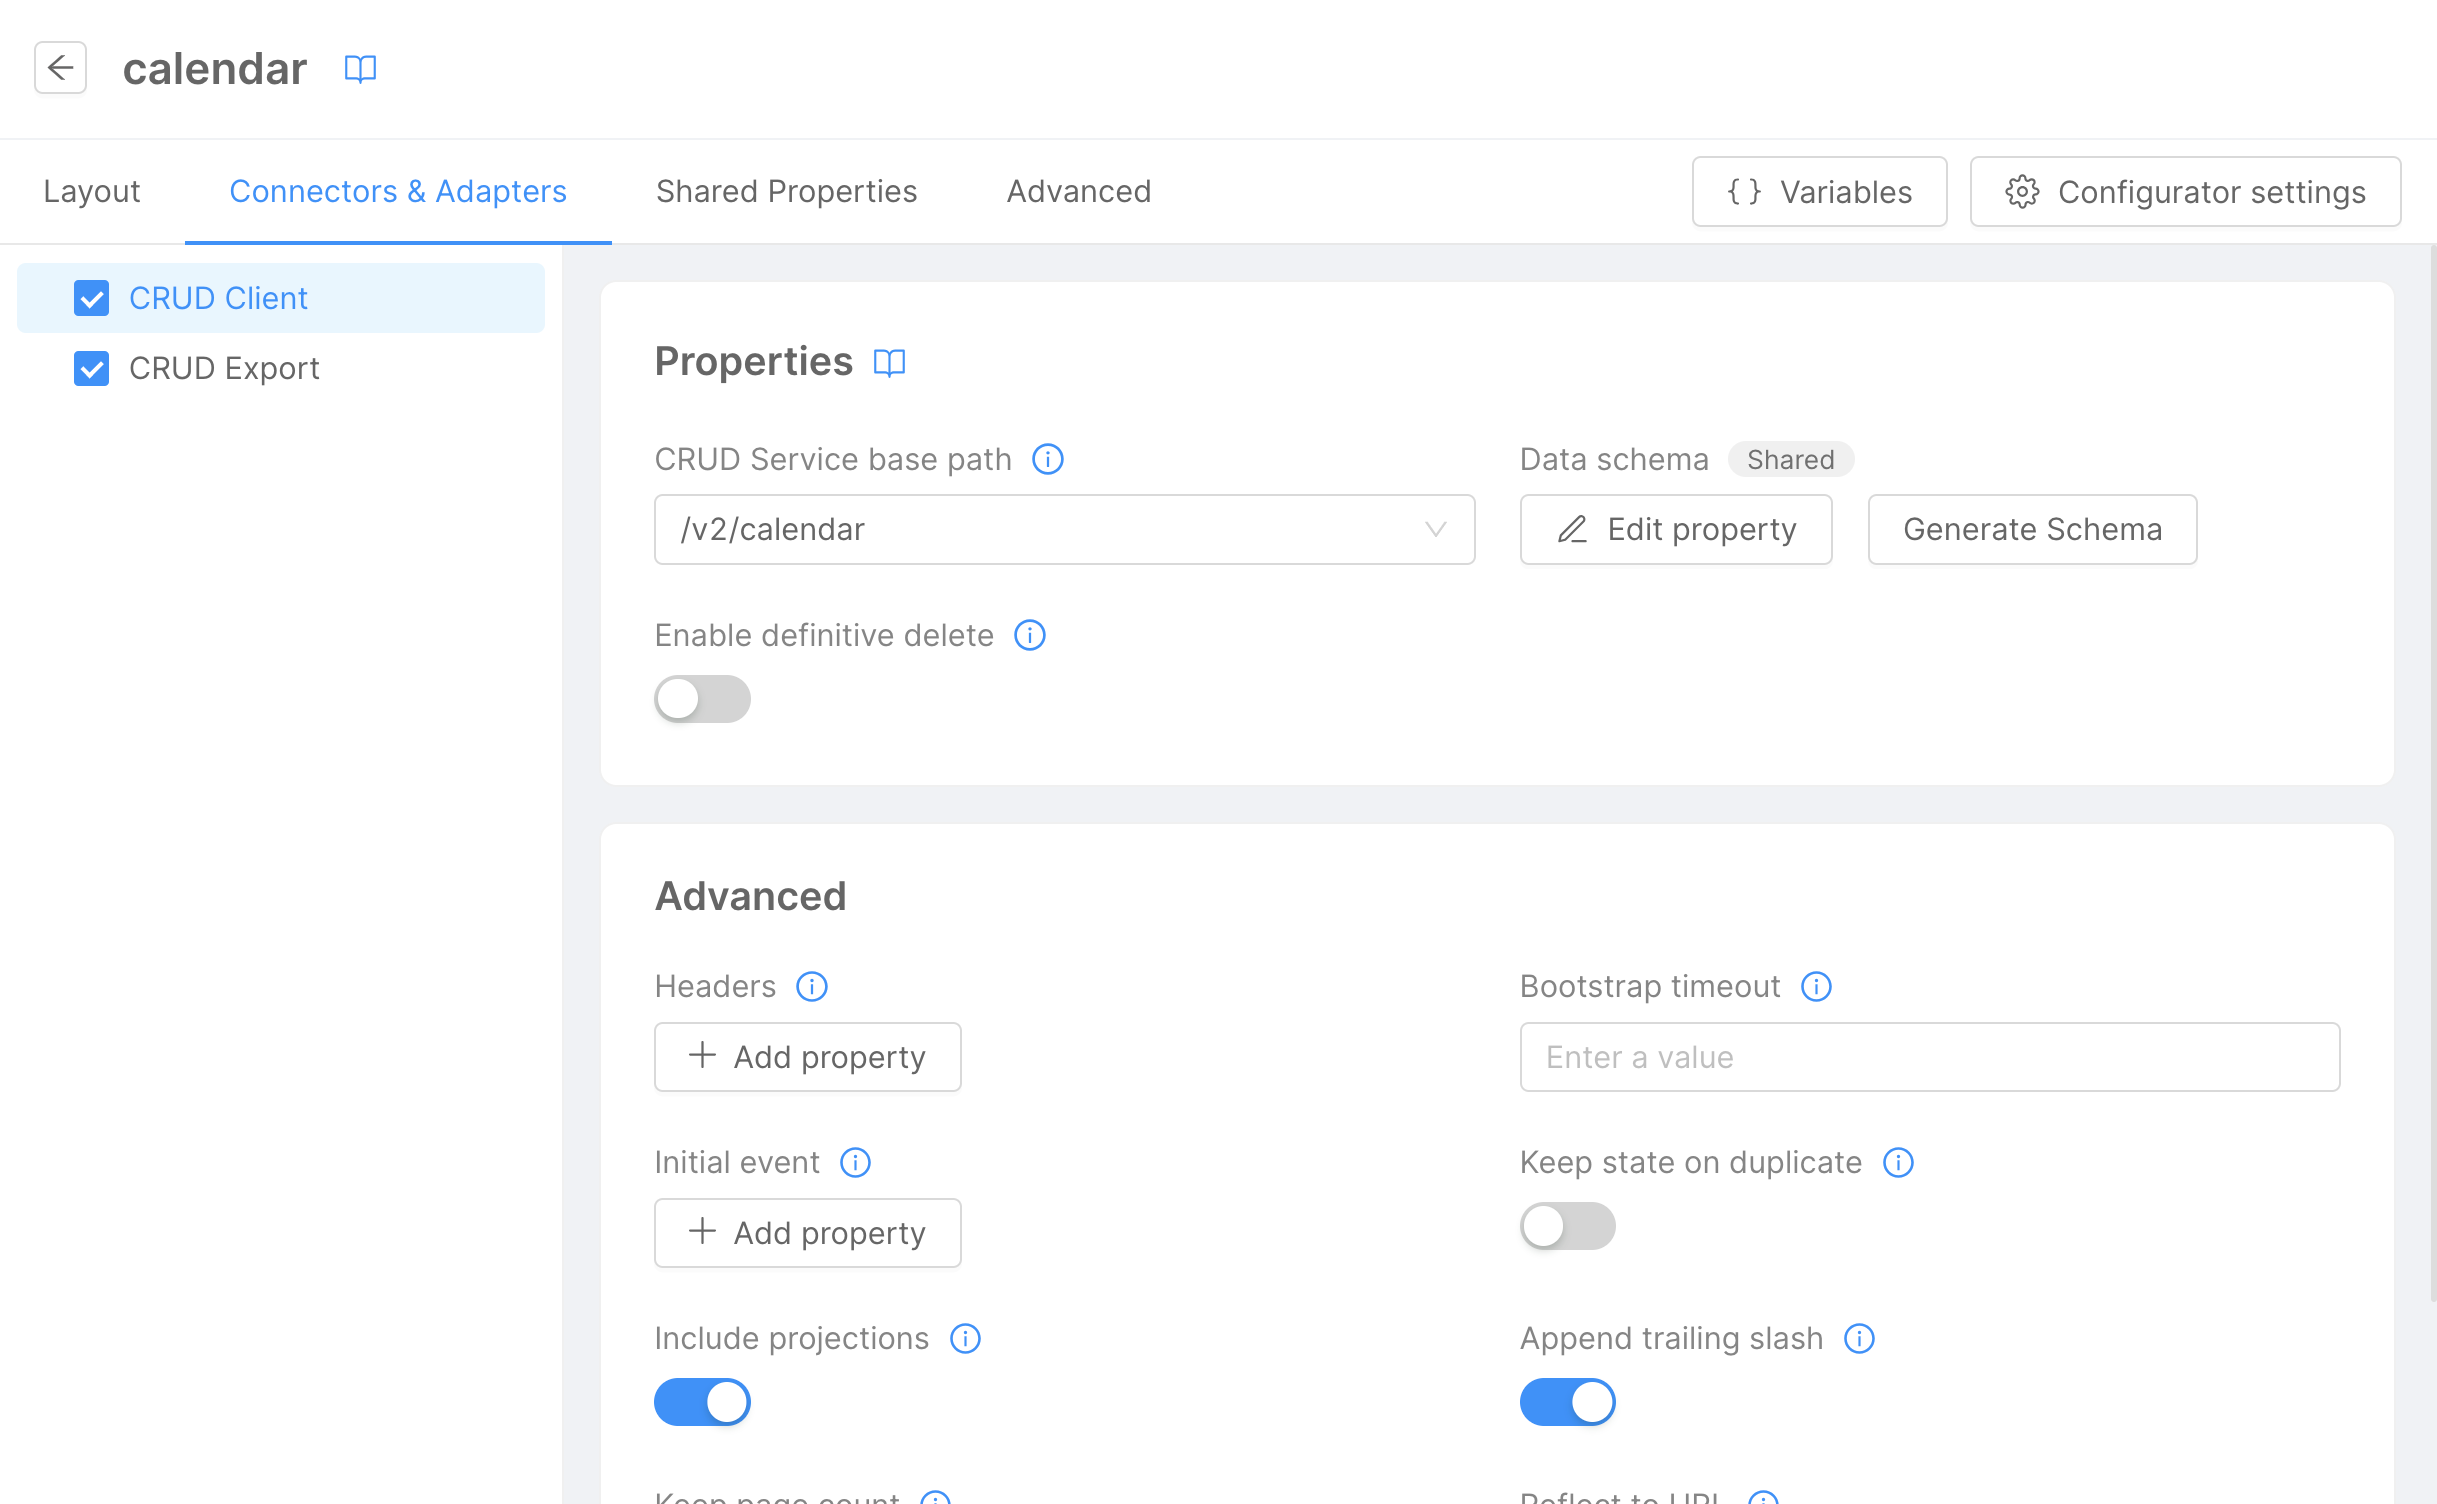
Navigate to the Connectors & Adapter section:
- Click on the
CRUD Client. - Select the endpoint
/v2/calendar. - Click on the
Generate Schemabutton.
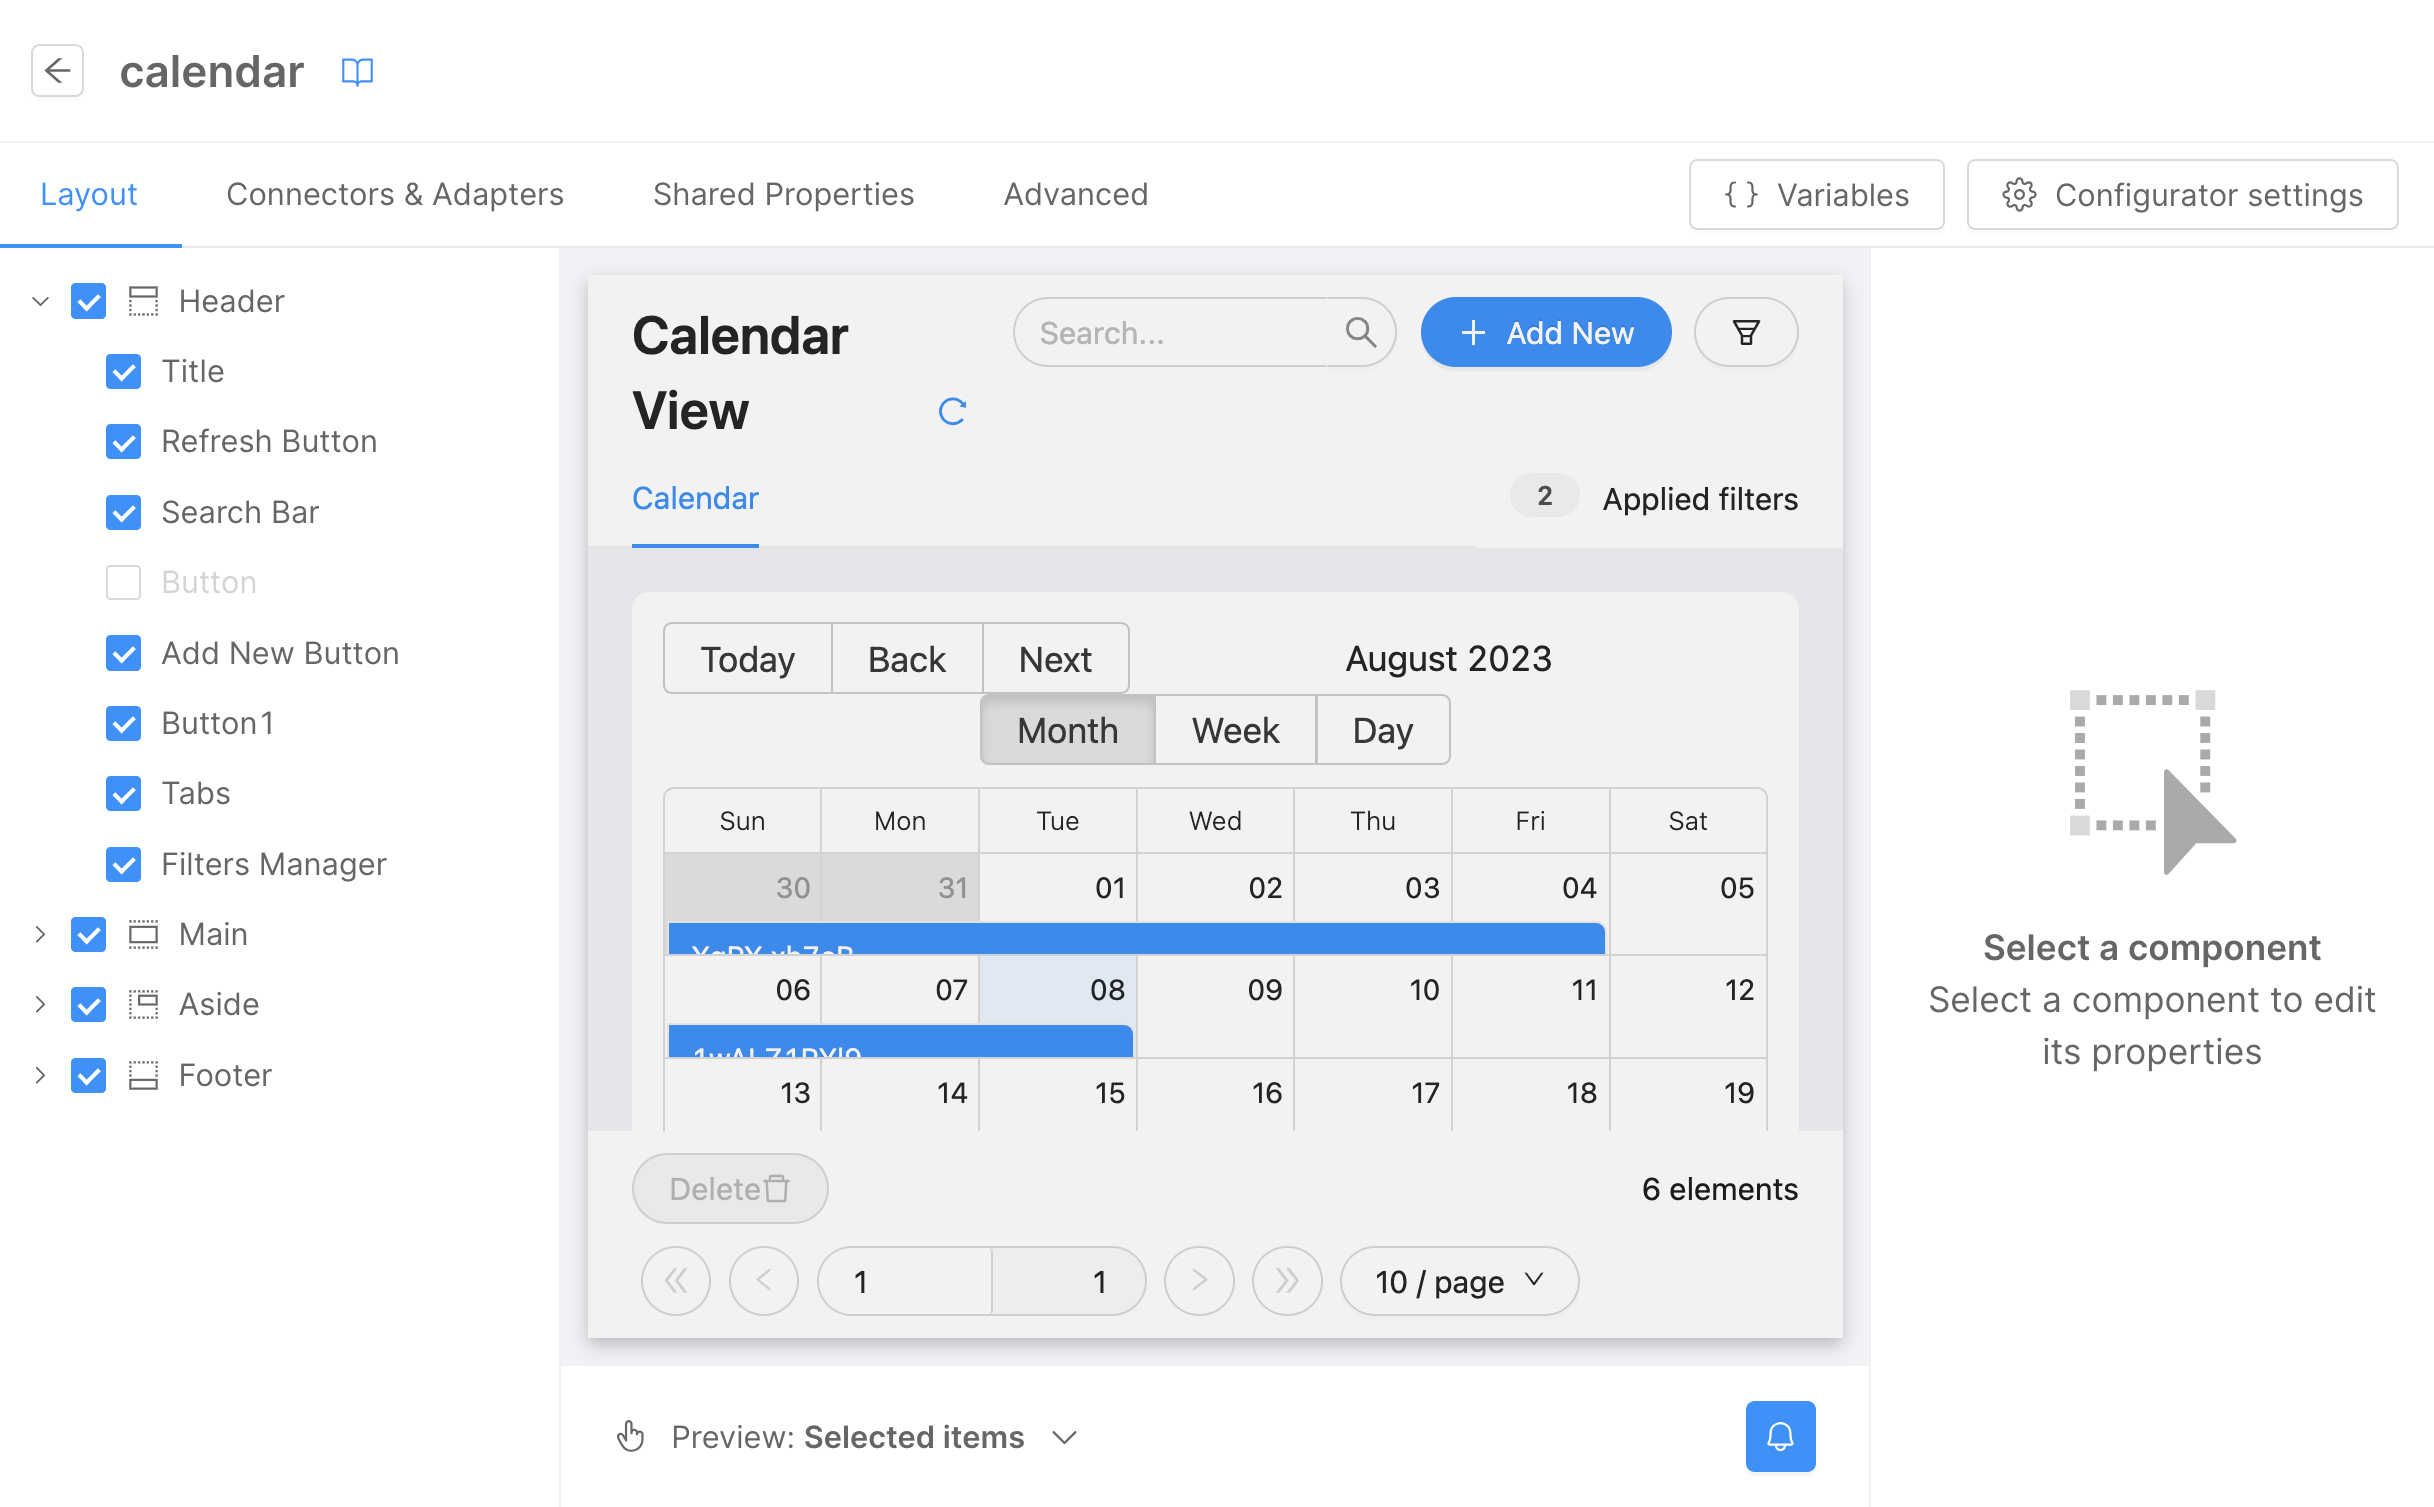
Now return to the Layout tab. Here you can:
- View the preview of the
Calendar Viewpage. - Personalize the page title and the tab label, as previously learned in the Microfrontend Composer Tutorial Basics. For example, use
Calendar Viewas the page title andCalendaras the tab label.
If you wish to remove the Export button from the page:
- Click on the
Exportbutton in the preview (highlighting the button in the left panel). - Uncheck the
Exportcheckbox on the left sidebar to remove the export functionality.
Before proceeding, connect the page to the menu using the same steps explained in the Microfrontend Composer Tutorial Basics. Use calendar as the id and Calendar as the label.
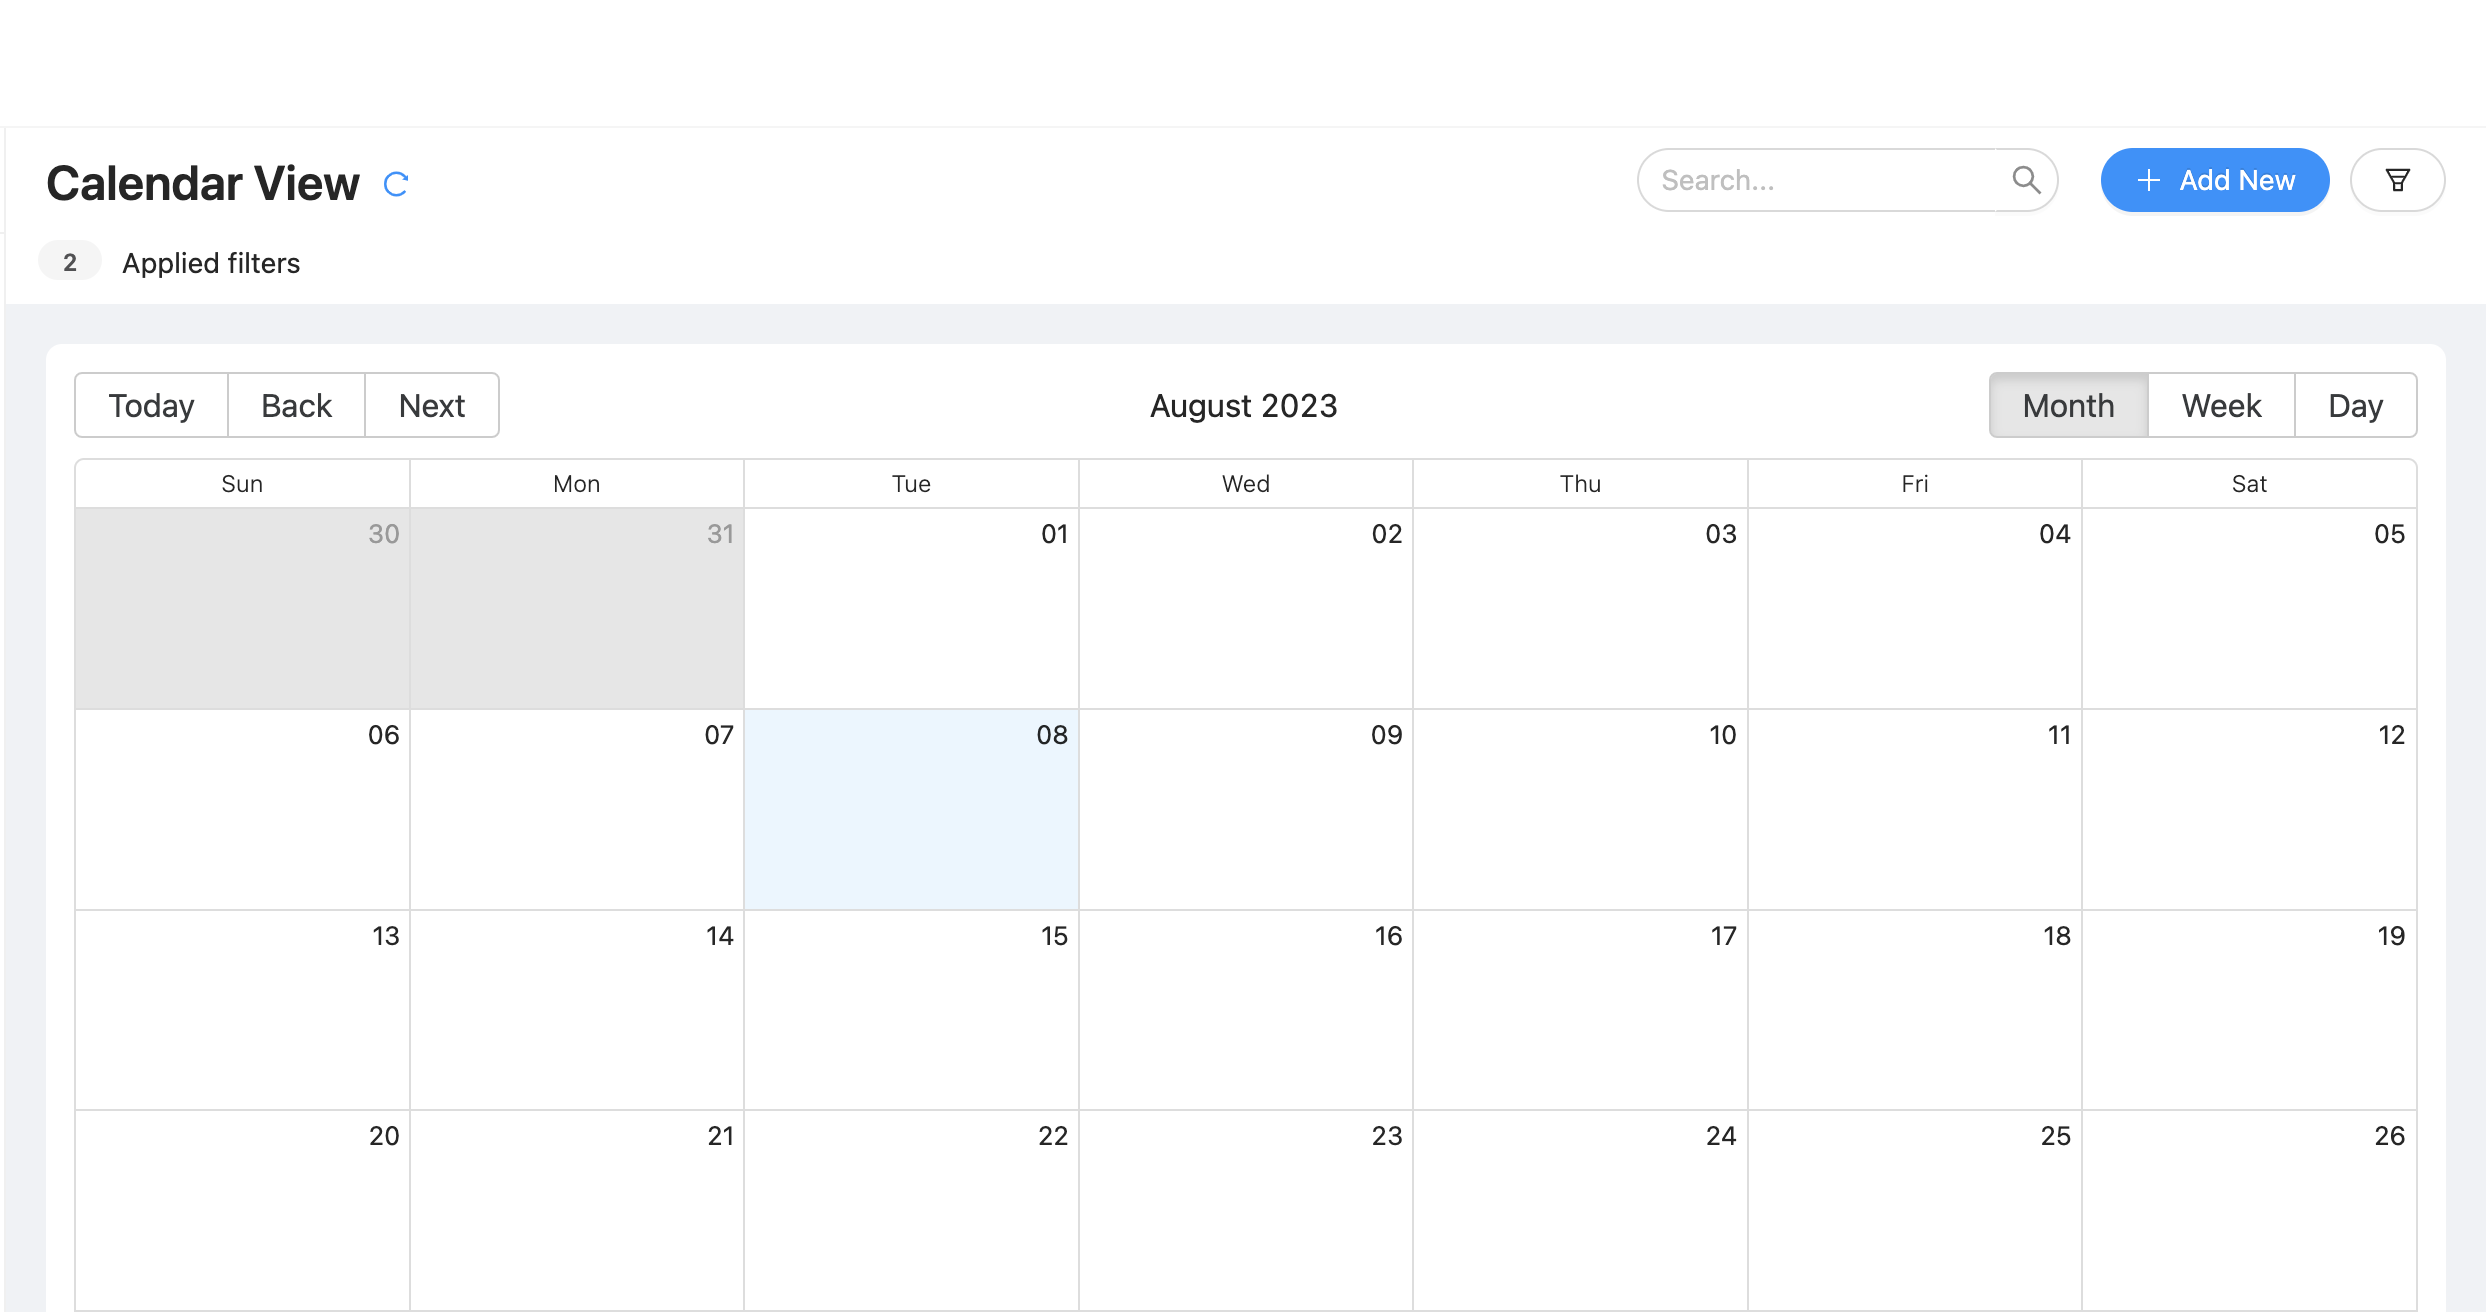
To test the new page, save the configuration and deploy the changes by following the save and deploy process.
Below is the result:
Setup a Picture Gallery Page
Setup the CRUD Collection
Before creating a new Microfrontend Composer page using the Microfrontend Composer Picture Gallery Template, you need to set up a CRUD collection named gallery as a data source. Follow the same procedure outlined in the Microfrontend Composer Tutorial Basics to create this collection. Here's the required data schema:
file: Represents aRawObjectand isrequired.title: Represents astringand isrequired.description: Represents astringand isrequired.
Please note that in this example, we've excluded the default fields that are automatically generated by the CRUD collection. Below is the JSON schema for the specific fields:
[
  {
    "name": "file",
    "type": "RawObject",
    "required": true,
    "nullable": false,
    "sensitivityValue": 0,
    "encryptionEnabled": false,
    "encryptionSearchable": false
  },
  {
    "name": "title",
    "type": "string",
    "required": true,
    "nullable": false,
    "sensitivityValue": 0,
    "encryptionEnabled": false,
    "encryptionSearchable": false
  },
  {
    "name": "description",
    "type": "string",
    "required": true,
    "nullable": false,
    "sensitivityValue": 0,
    "encryptionEnabled": false,
    "encryptionSearchable": false
  }
]
Now, let's expose the CRUD data using an endpoint called gallery.
The File Service can support various file storage services, such as AWS S3 and Google Cloud Storage. However, in this example, we'll use MongoDB as the file storage service.
To achieve this, we need to create a new CRUD collection called files to store the files. Follow the same procedure outlined in the Microfrontend Composer Tutorial Basics to create this collection. Here's the required data schema:
name: Represents astringand isrequired.file: Represents astringand isrequired.size: Represents anumberand isrequired.location: Represents astringand isrequired.
Just like in the previous examples, we've excluded the default fields that are automatically generated by the CRUD collection. Below is the JSON schema for the specific fields:
[
  {
    "name": "name",
    "type": "string",
    "required": true,
    "nullable": false,
    "sensitivityValue": 0,
    "encryptionEnabled": false,
    "encryptionSearchable": false
  },
  {
    "name": "file",
    "type": "string",
    "required": true,
    "nullable": false,
    "sensitivityValue": 0,
    "encryptionEnabled": false,
    "encryptionSearchable": false
  },
  {
    "name": "size",
    "type": "number",
    "required": true,
    "nullable": false,
    "sensitivityValue": 0,
    "encryptionEnabled": false,
    "encryptionSearchable": false
  },
  {
    "name": "location",
    "type": "string",
    "required": true,
    "nullable": false,
    "sensitivityValue": 0,
    "encryptionEnabled": false,
    "encryptionSearchable": false
  }
]
In this scenario, exposing the CRUD data using an endpoint is not required. Hence, we can skip this step.
Setup the File Service
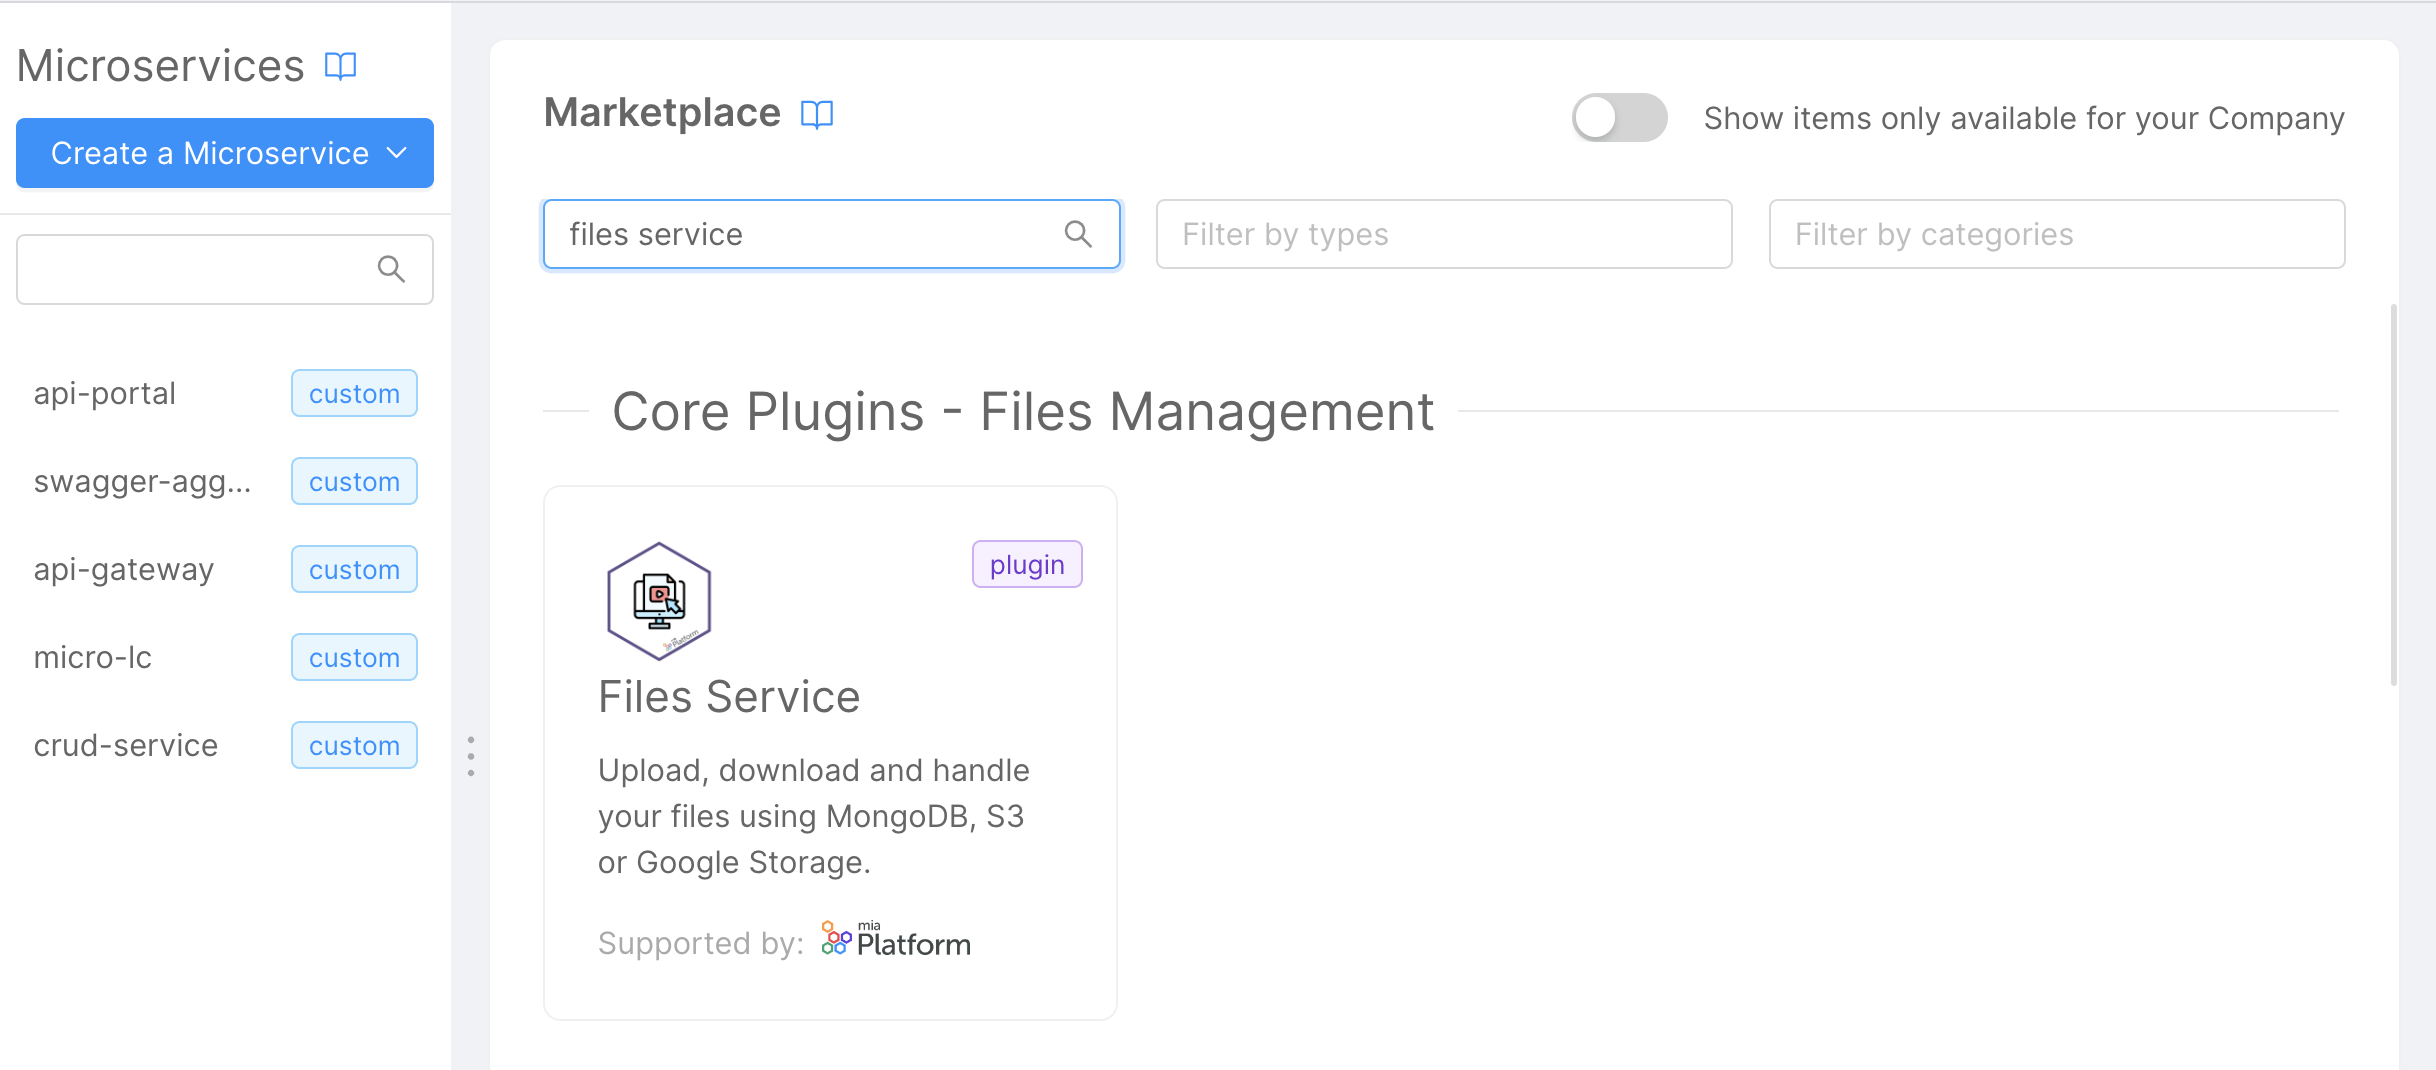
To set up a new file service microservice, follow these steps:
- Navigate to the
Microservicessection in the Console. - Click on
Create a MicroservicefromMarketplace. - Choose the
File Servicefrom the list of available microservices.
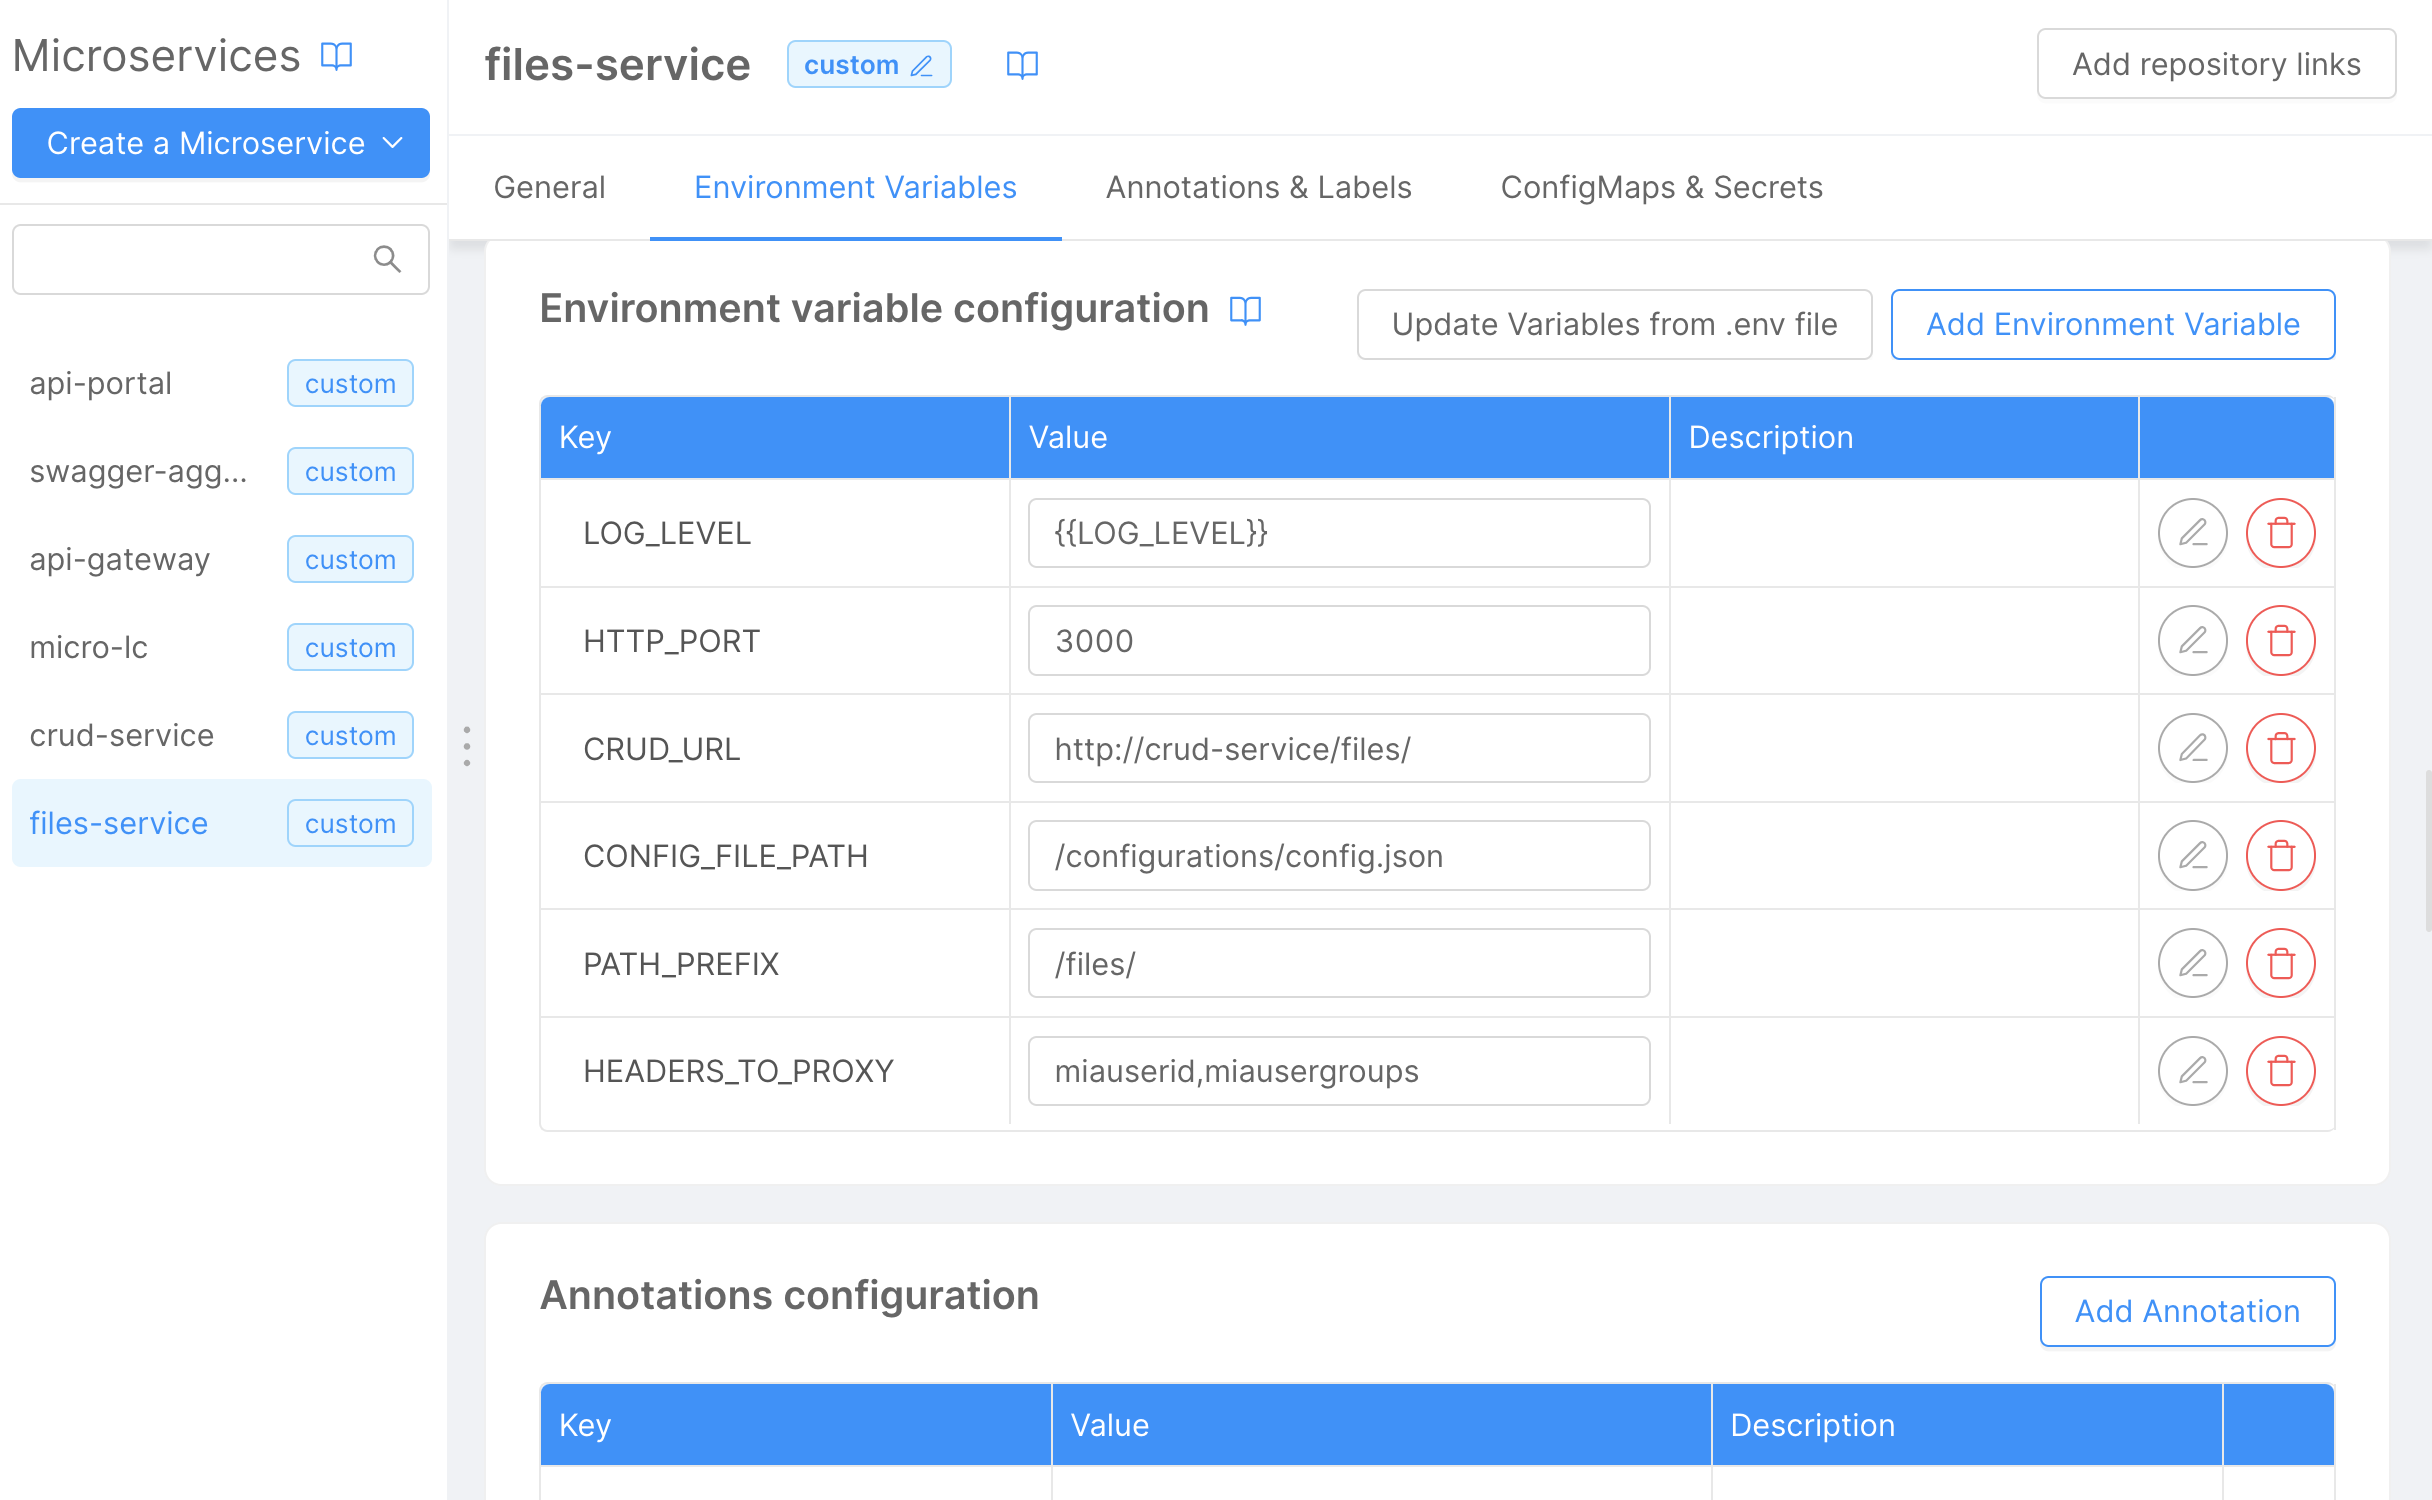
Configure the following environment variables:
CRUD_URL: Set this to the name of the CRUD collection. For this instance, usehttp://crud-service/files/.CONFIG_FILE_PATH: Set this to the path of the configuration file. In this case, use/configurations/config.json.PATH_PREFIX: Set this to the path prefix of the file service. Here, use/files/.
To avoid any build error you have to remove any other environment variables except for LOG_LEVEL, HTTP_PORT, CRUD_URL, CONFIG_FILE_PATH, PATH_PREFIX, and HEADERS_TO_PROXY.
On the same page, configure a ConfigMap for the configuration file:
Name:configurationsRuntime Mount Path:/configurations/
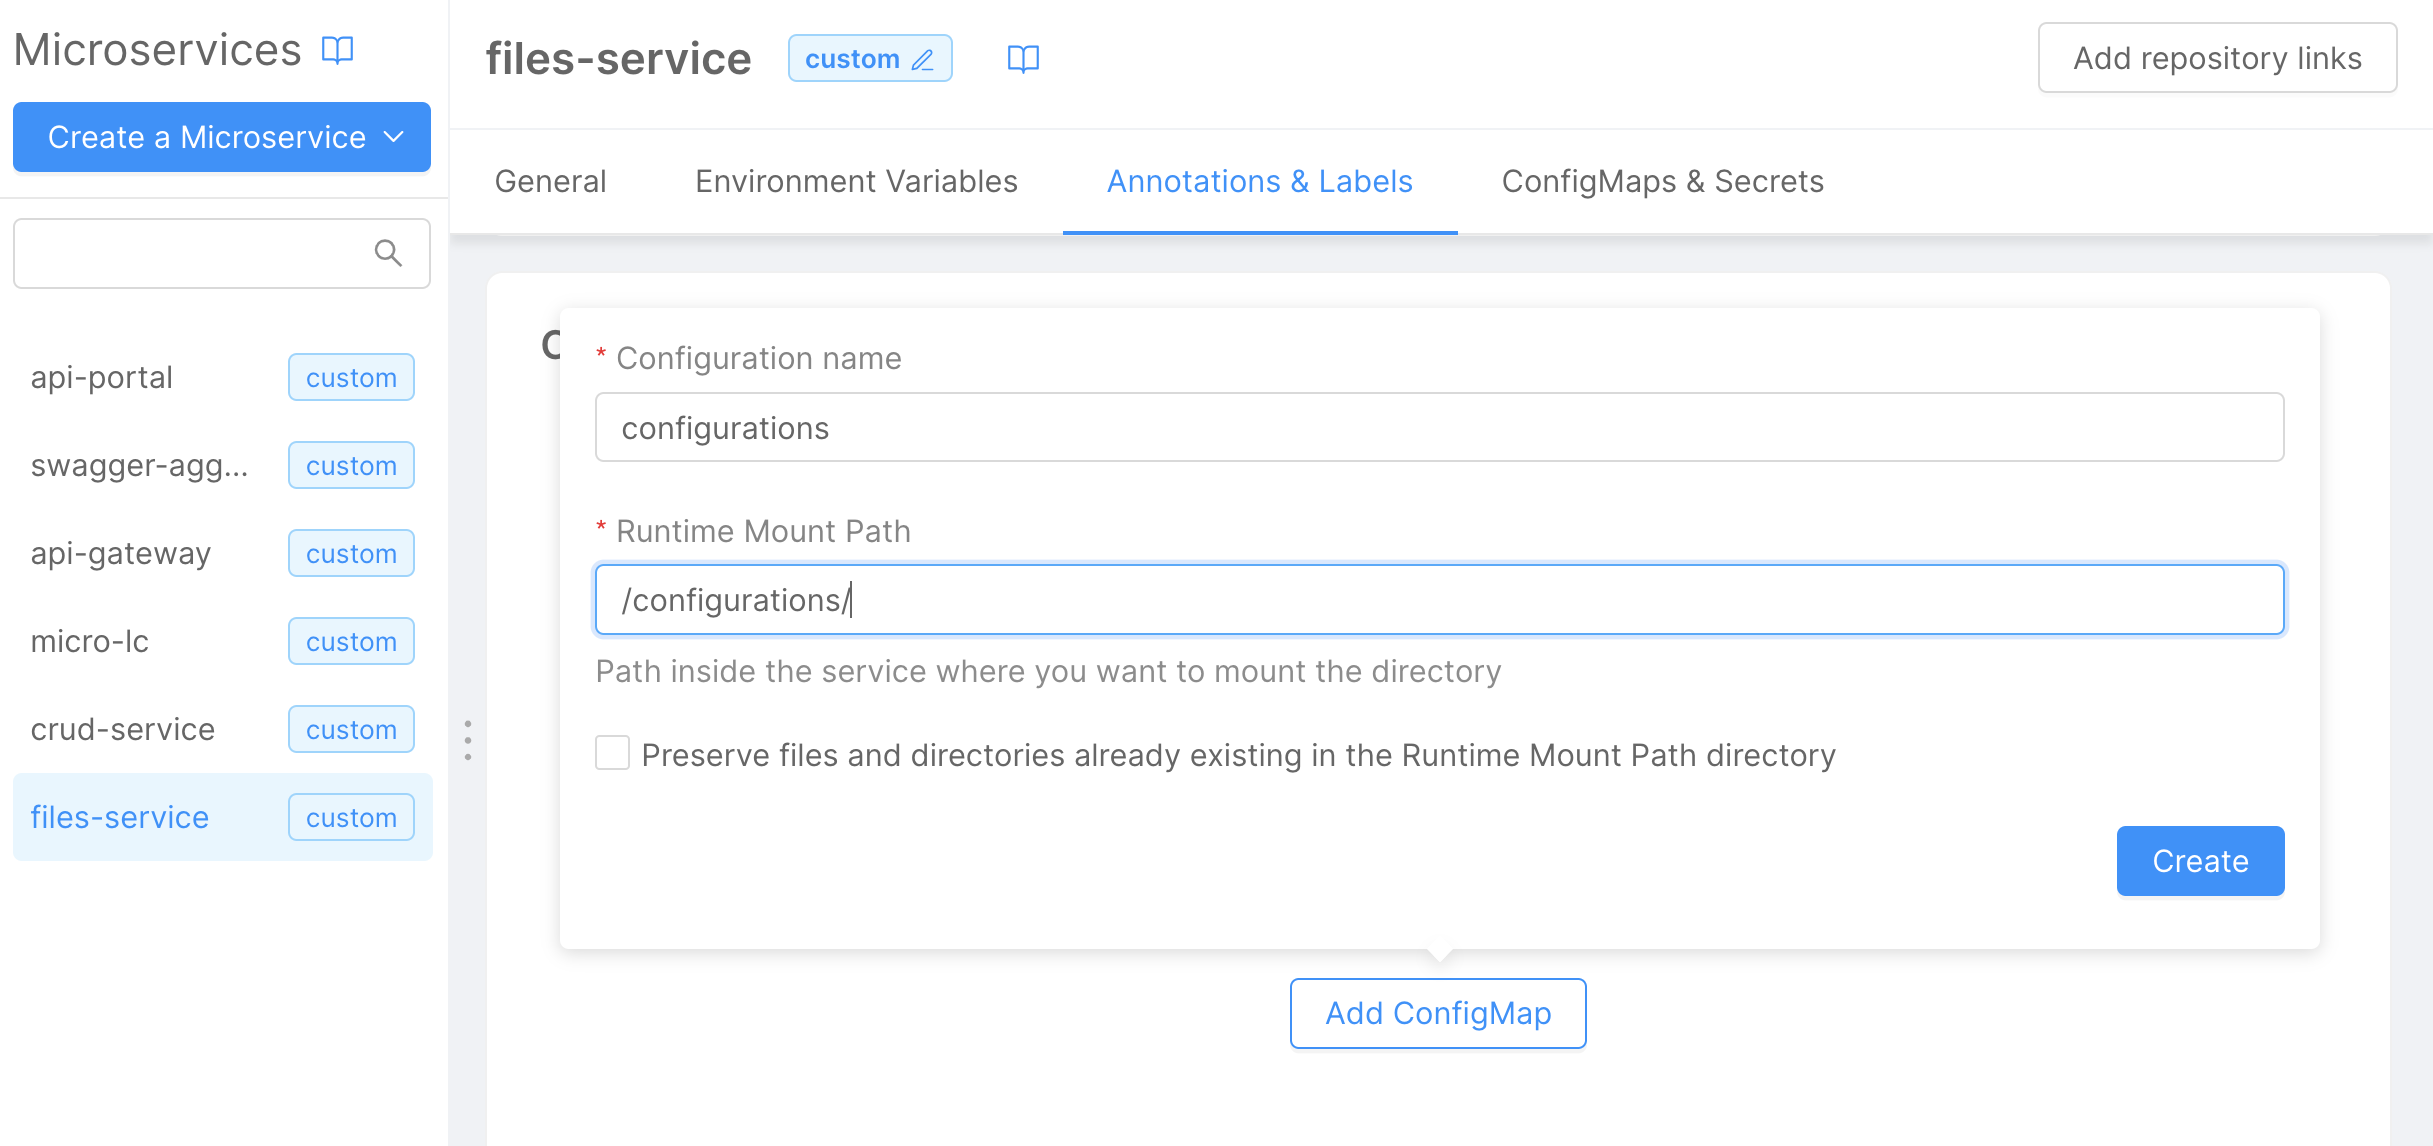
Click the Add File button to create a new file named config.json.
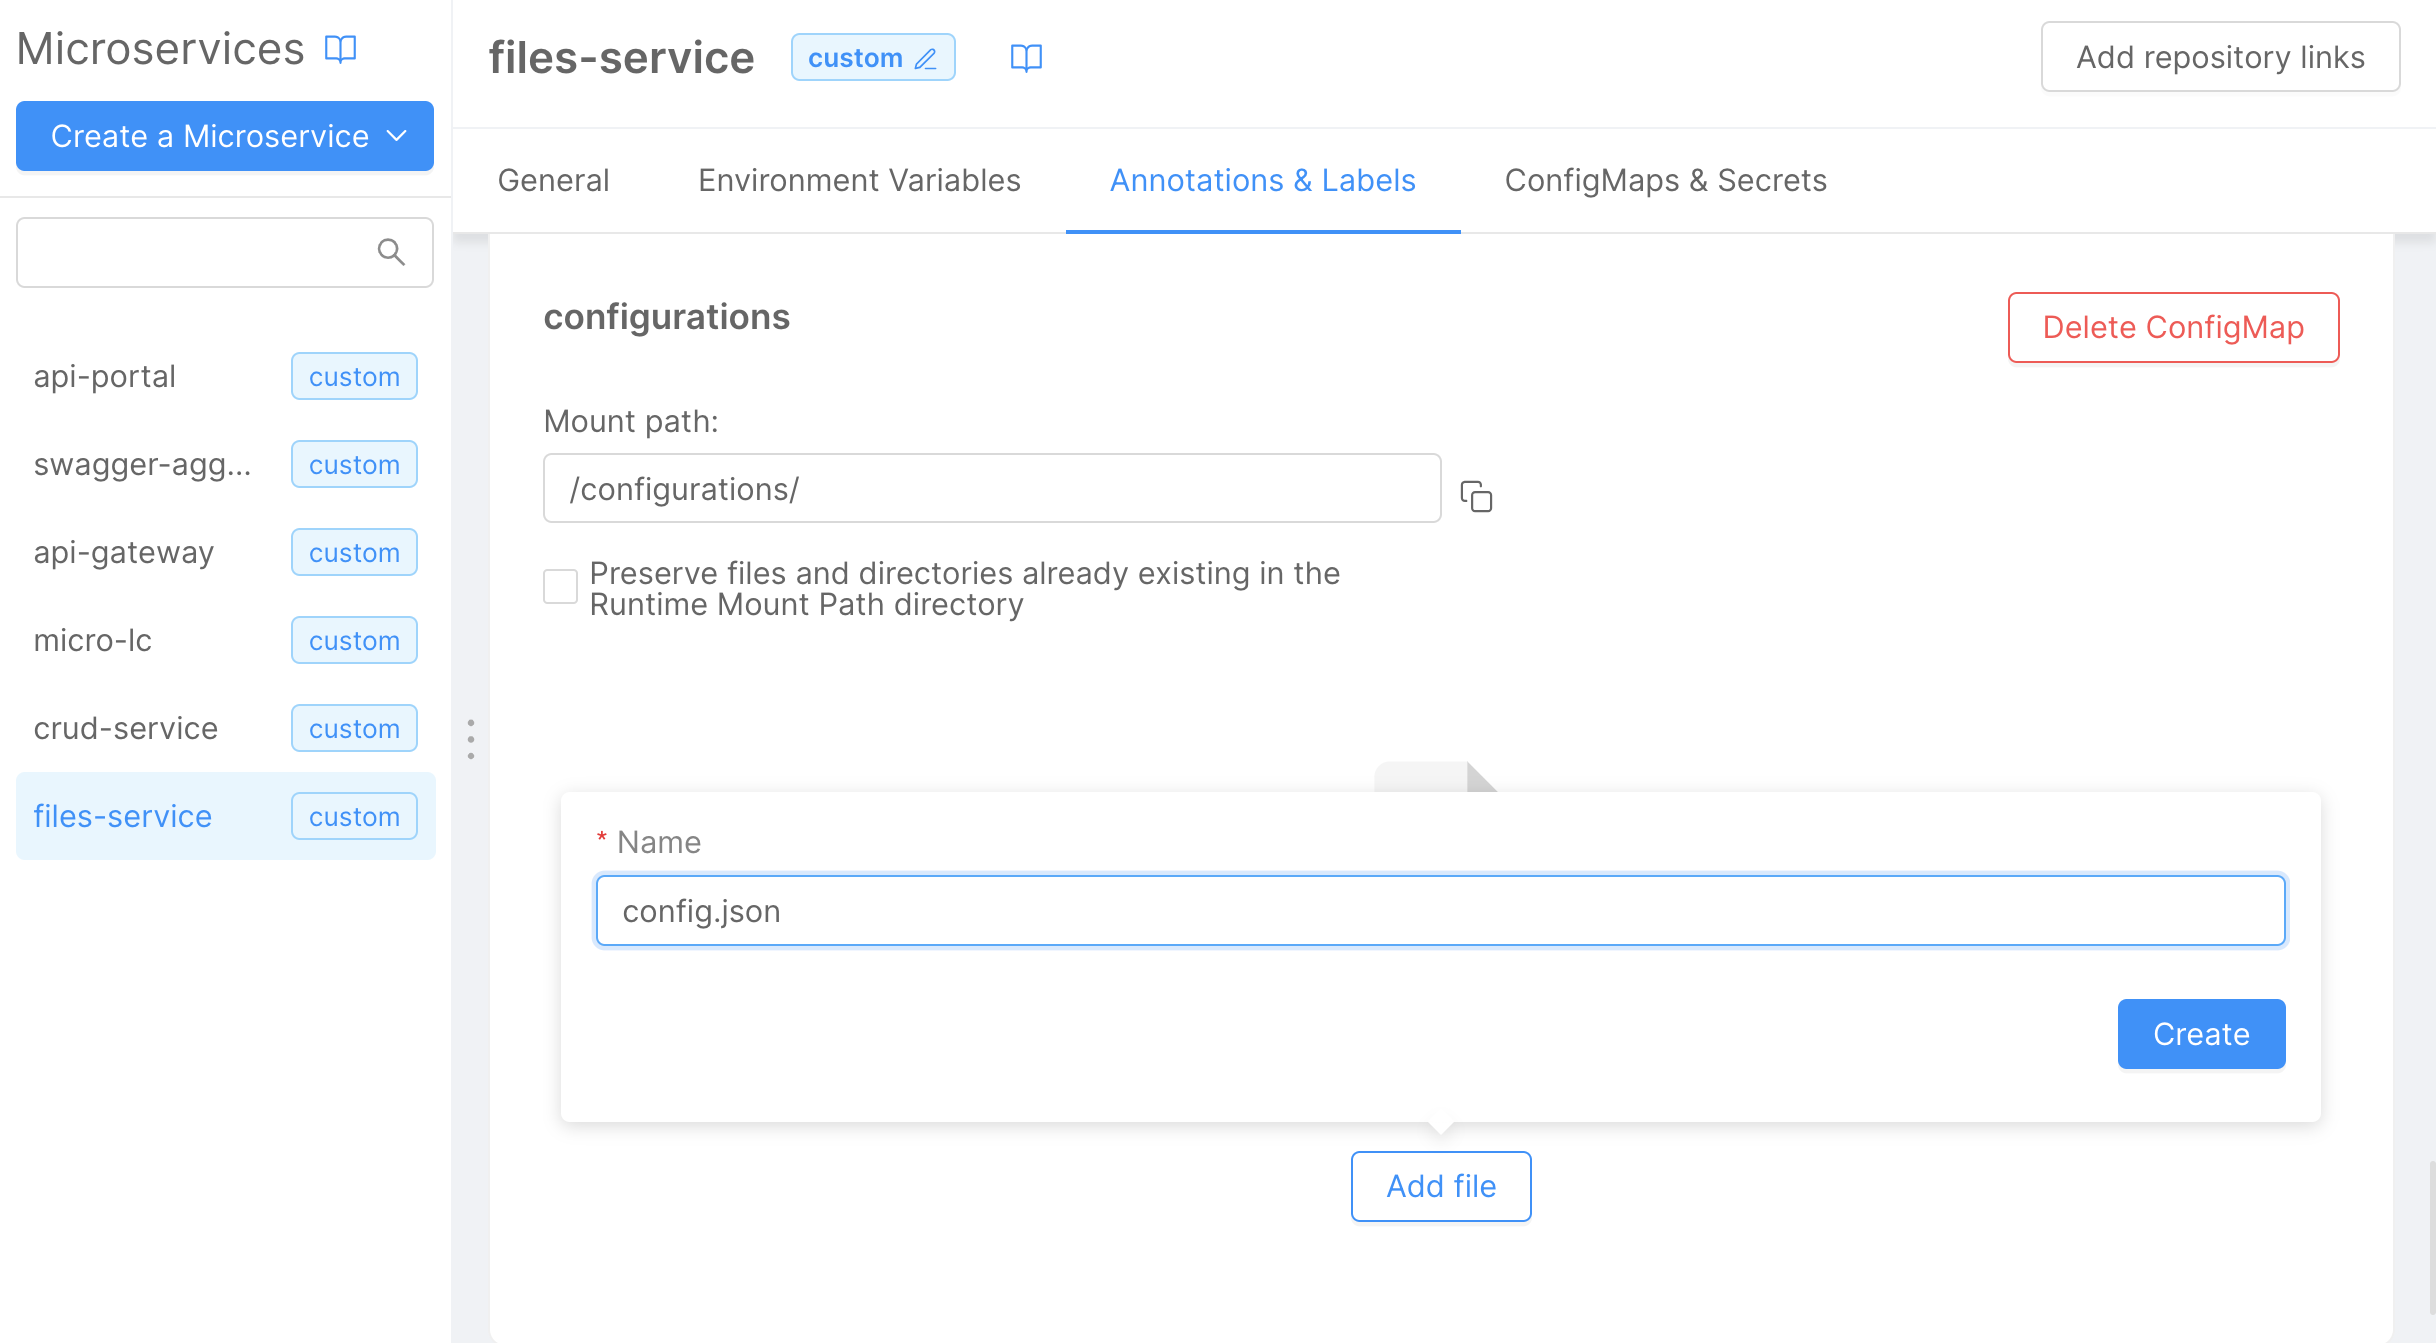
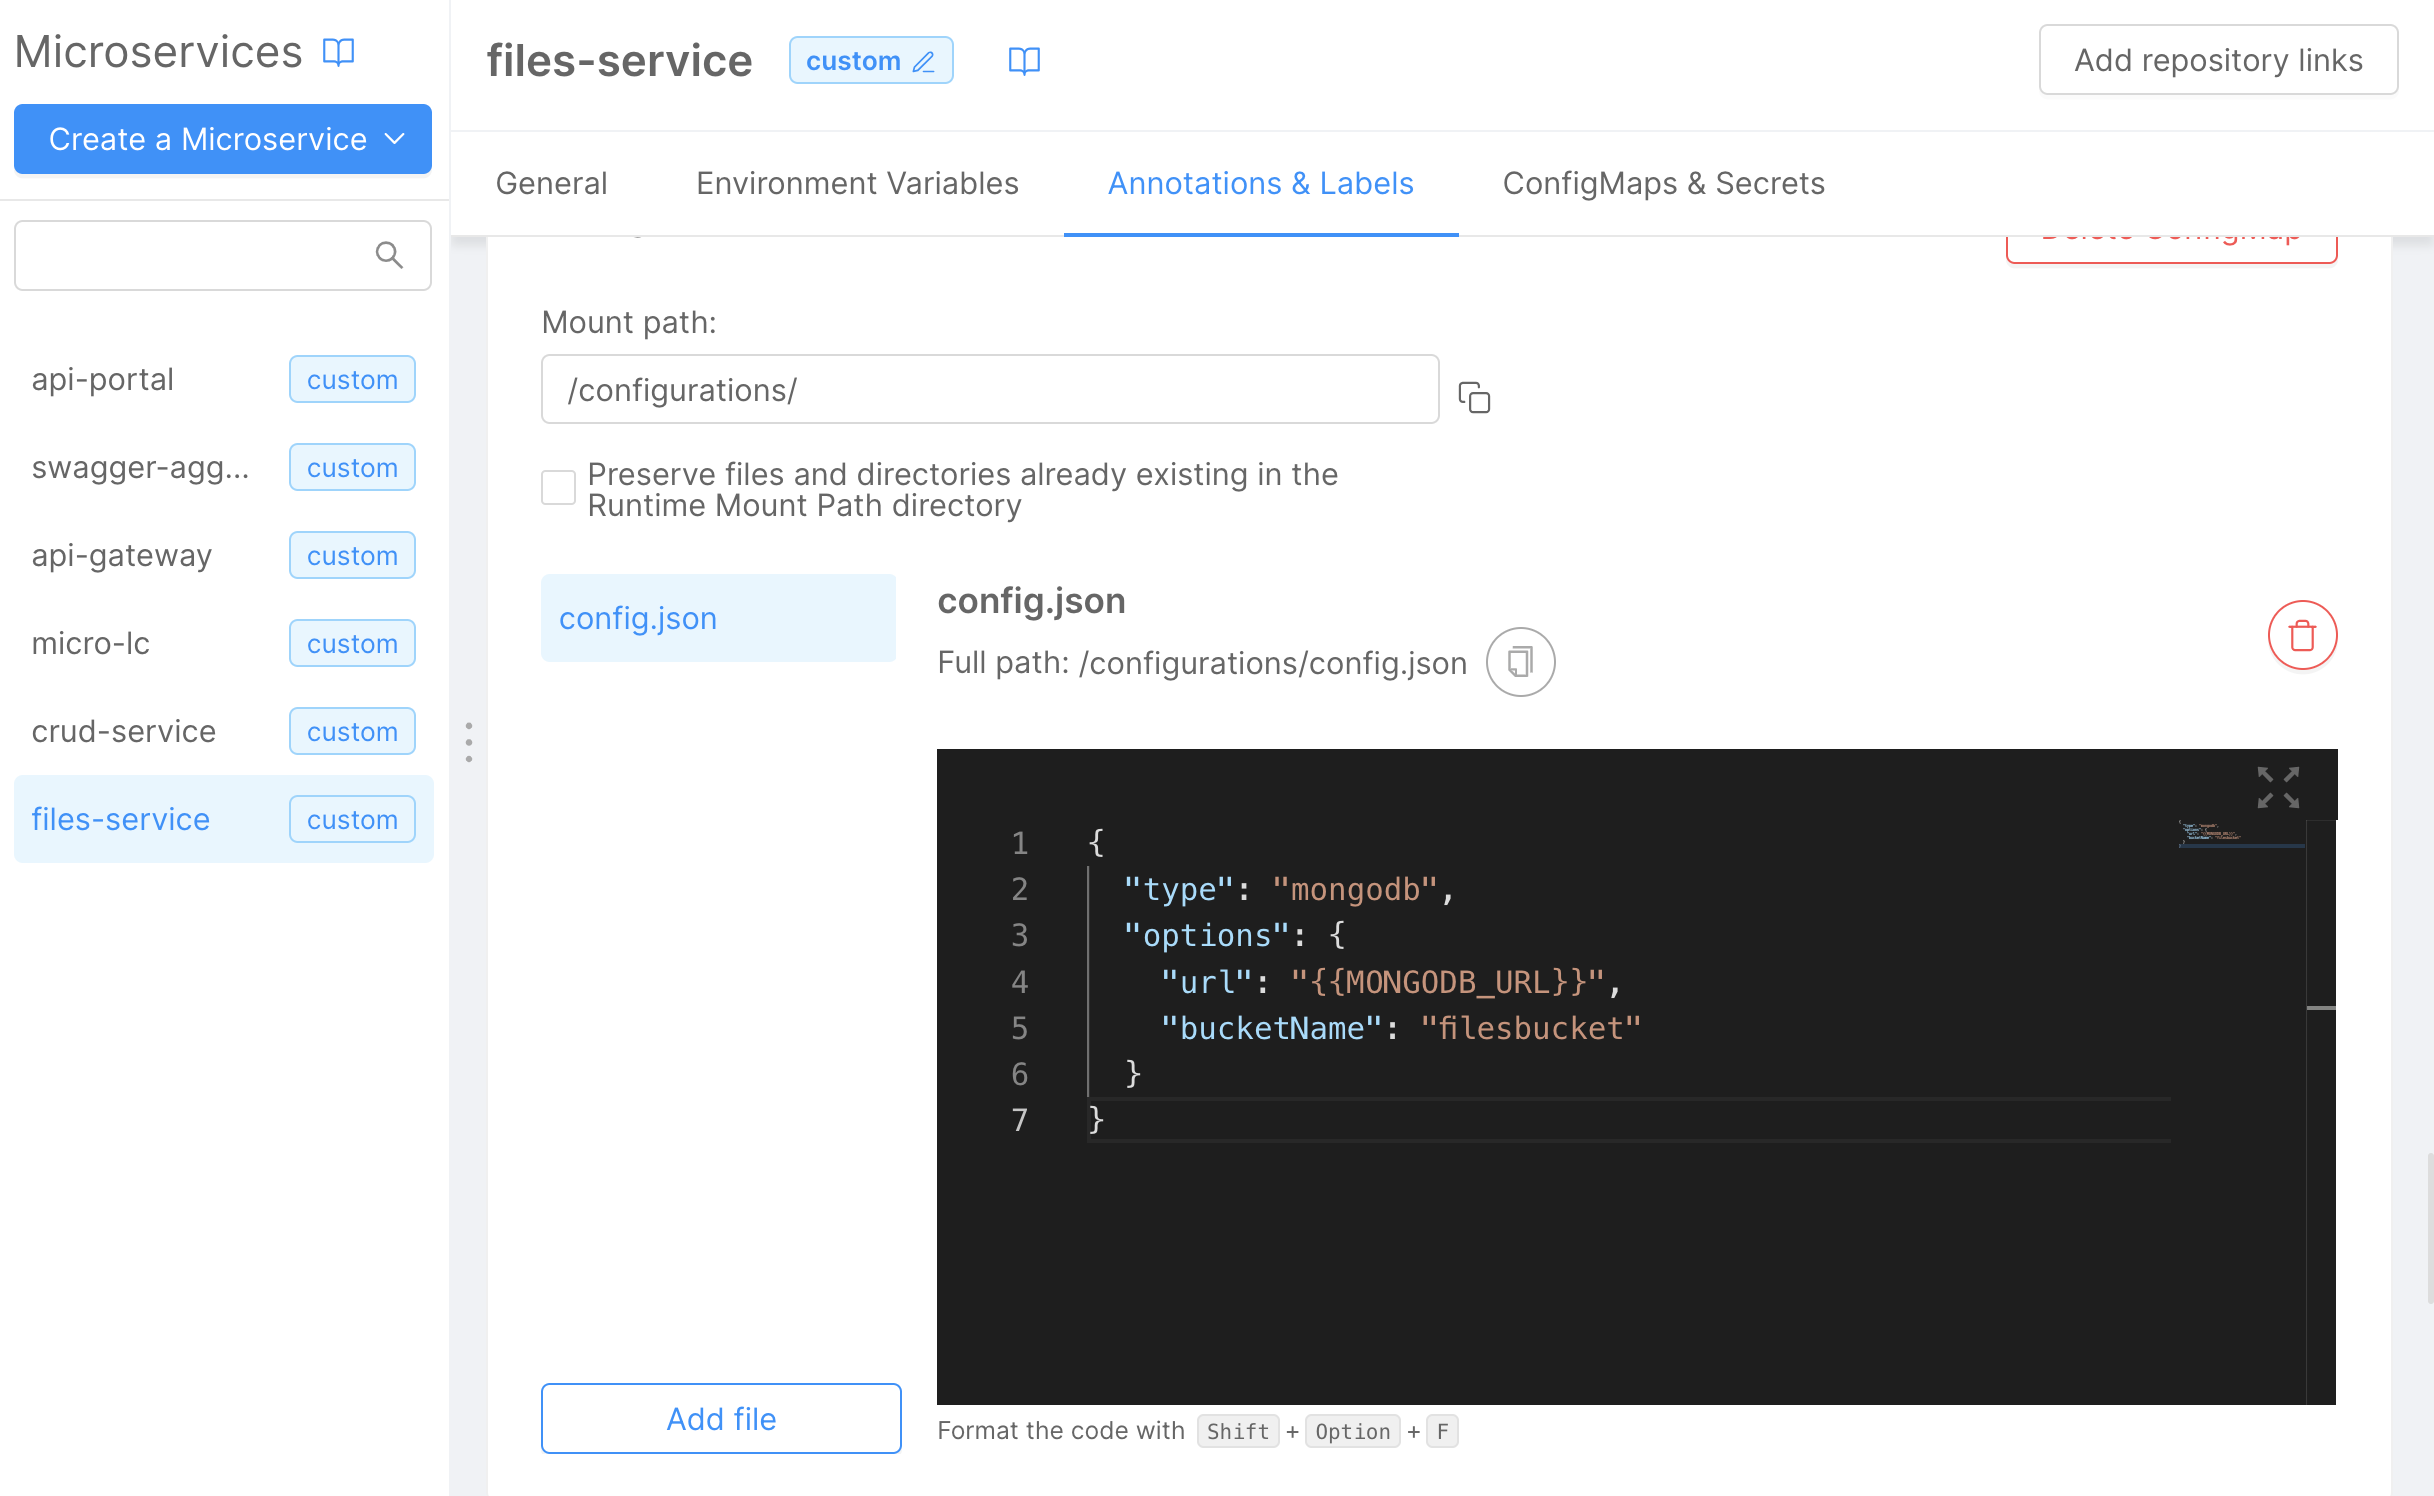
Save the file by clicking the Create button. Then, add the content of the configuration file:
{
  "type": "mongodb",
  "options": {
    "url": "{{MONGODB_URL}}",
    "bucketName": "filesbucket"
  }
}
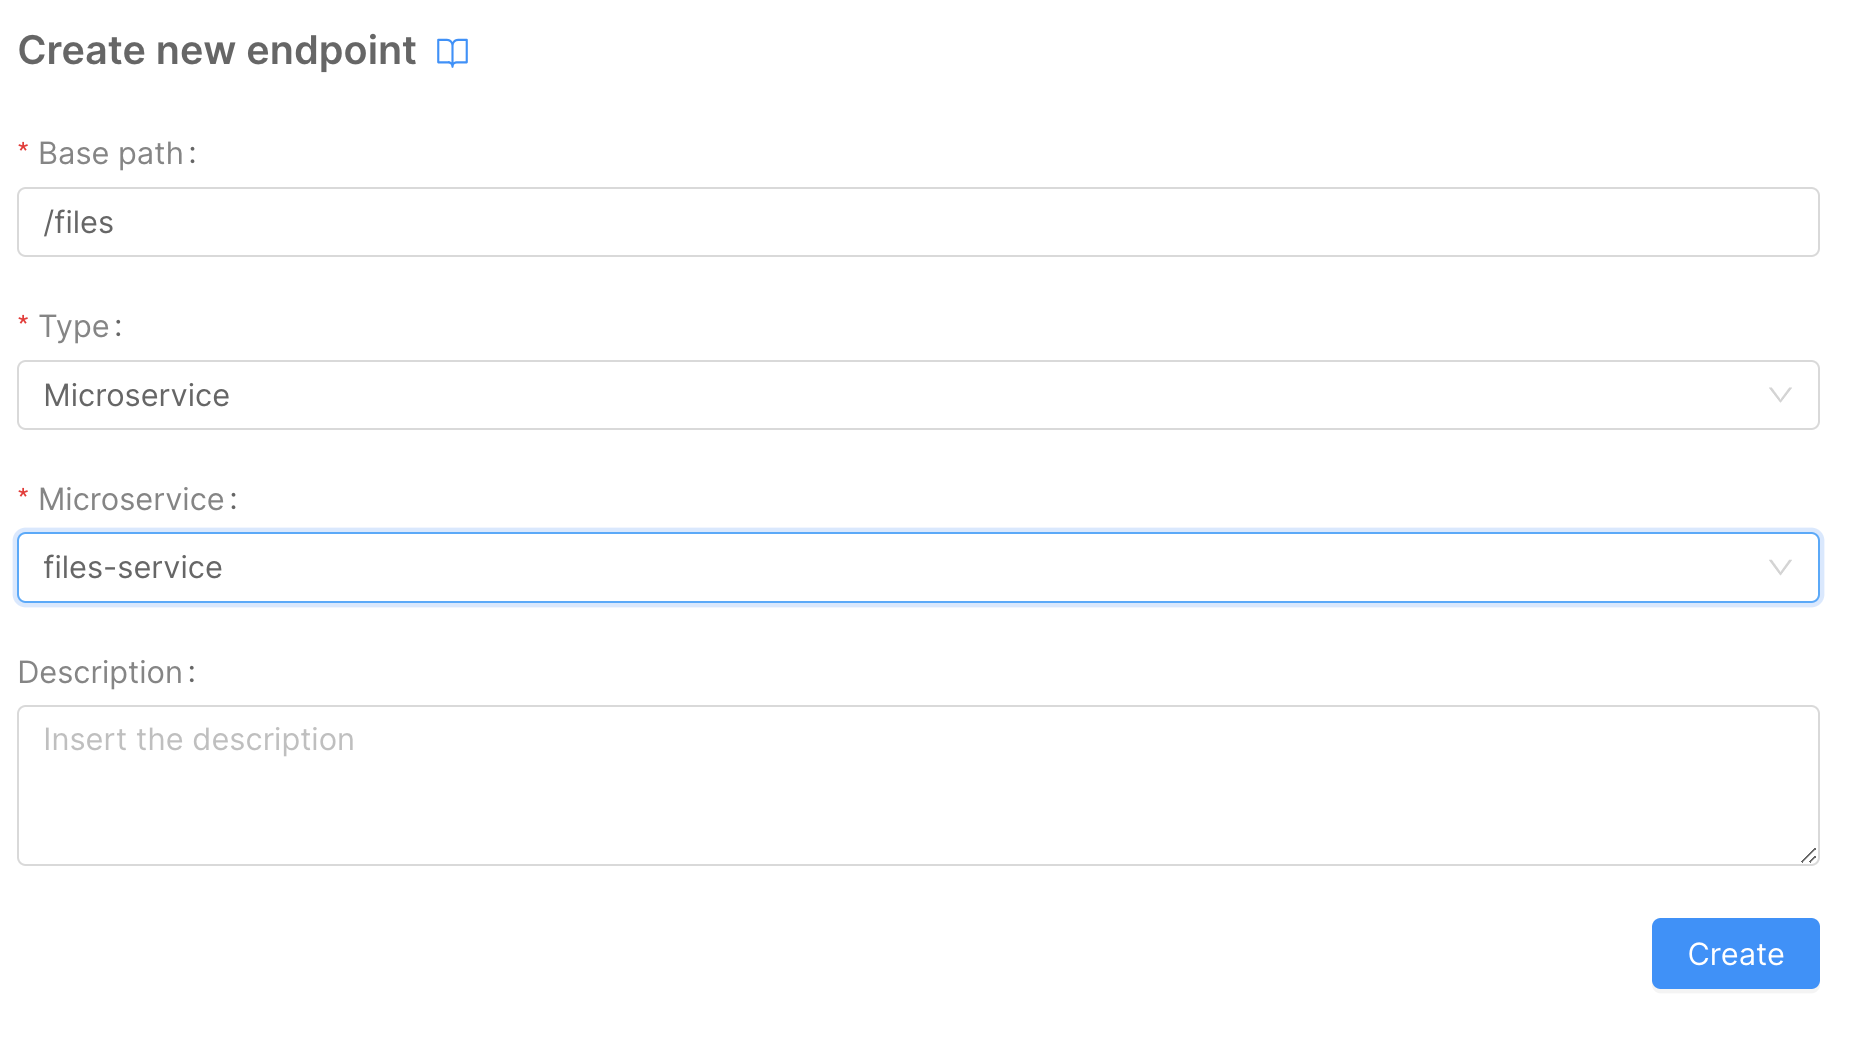
Next, we need to expose this microservice using an endpoint called files. To do this:
- Navigate to the
Endpointssection in the Console. - Click on the
Create a new Endpointbutton. - Create a new microservice endpoint with the following details:
Base path:/files;Type:Microservice;Microservice:files-service.
Configure the Gallery Page
To create a new Microfrontend Composer page using the Microfrontend Composer Picture Gallery Template, follow these steps:
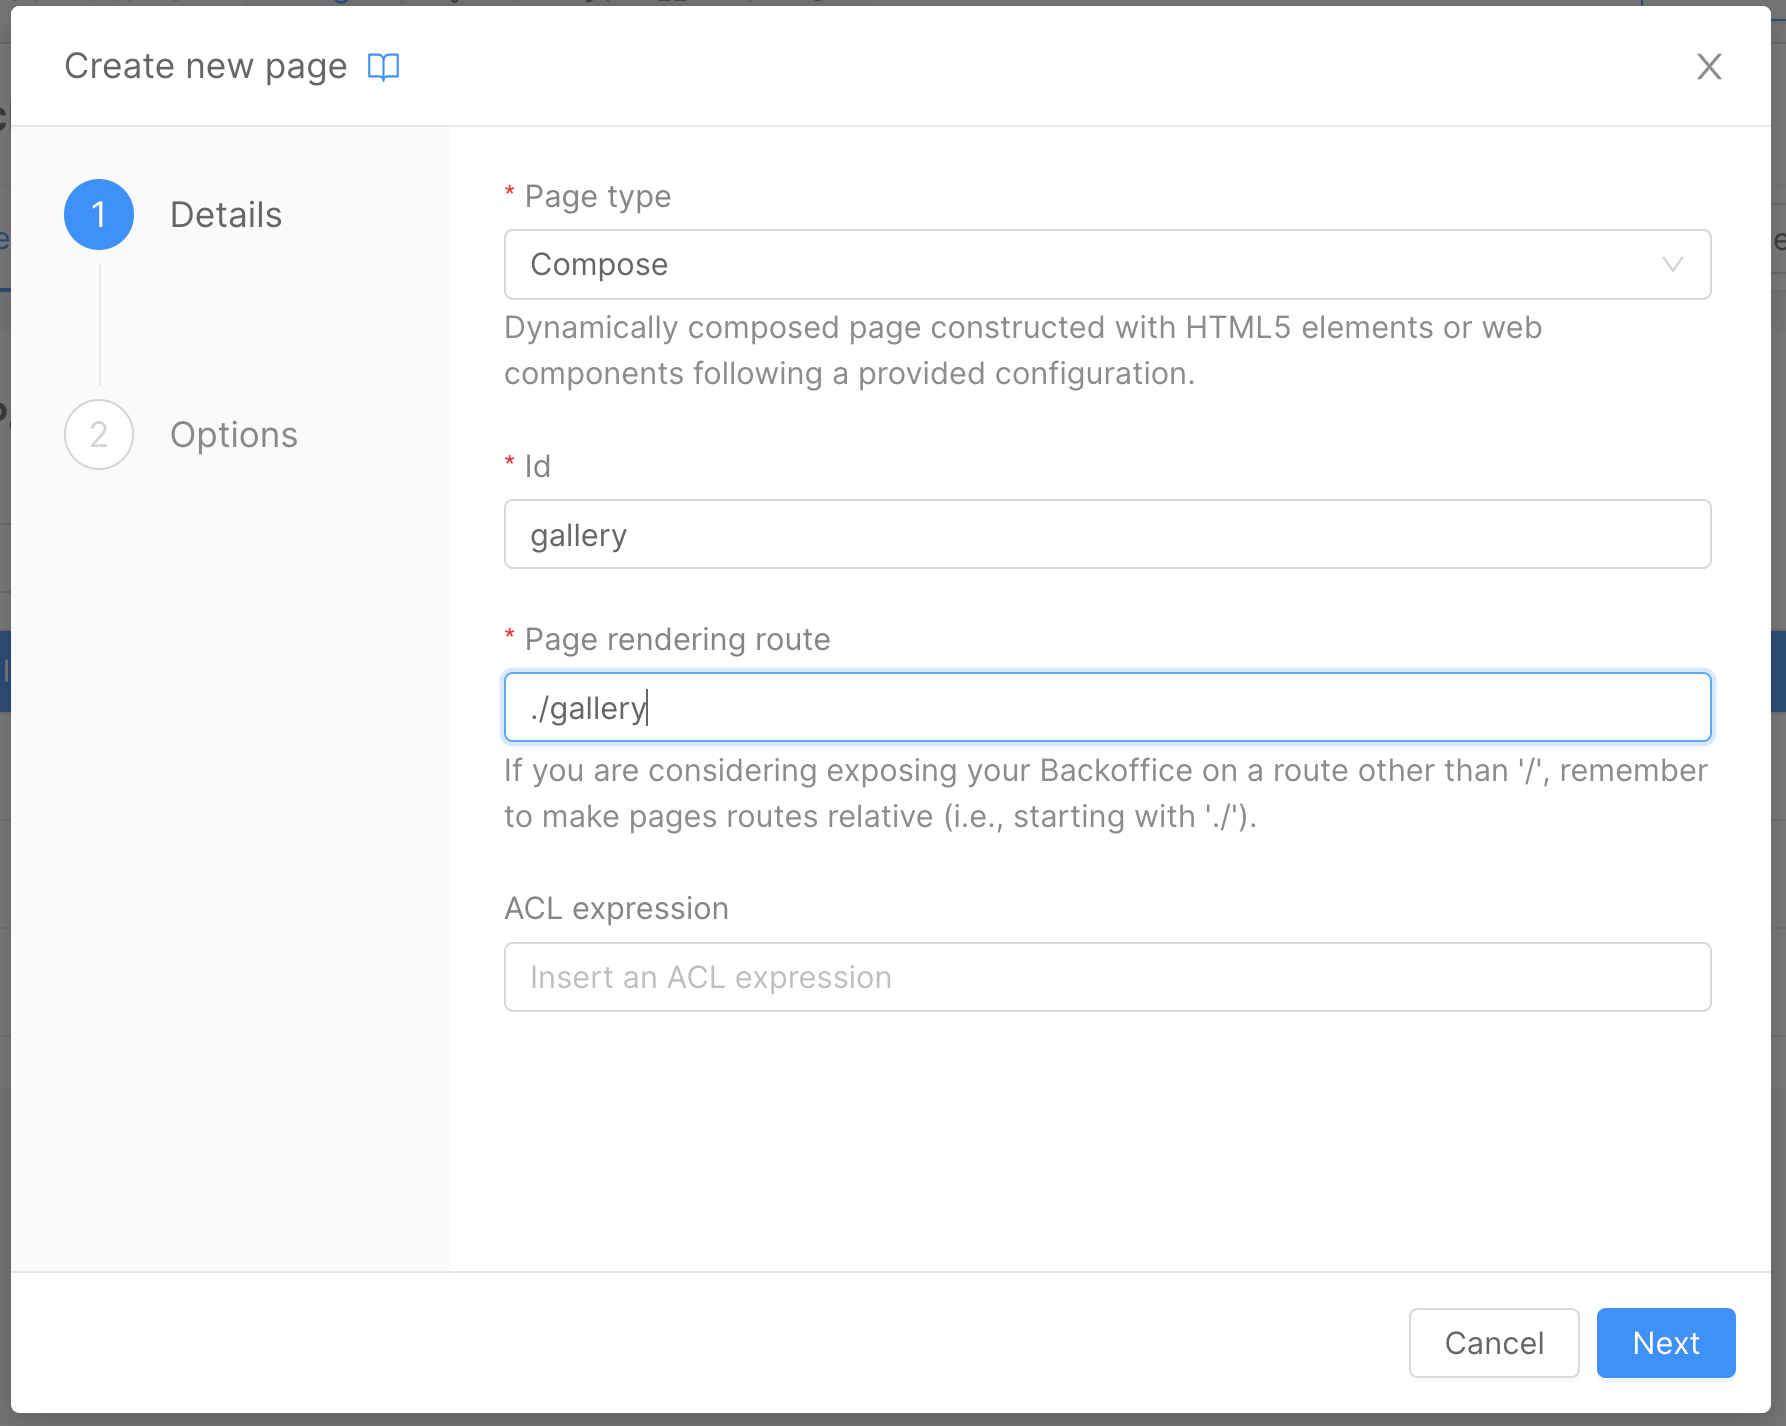
- In the Microfrontend Composer Configuration, go to the
Pagestab and click on theCreate New Pagebutton. - In the first wizard step, choose the
Page type:Compose. - Provide an
idfor the page, e.g.,gallery. - Set the
Page rendering routeto./gallery.
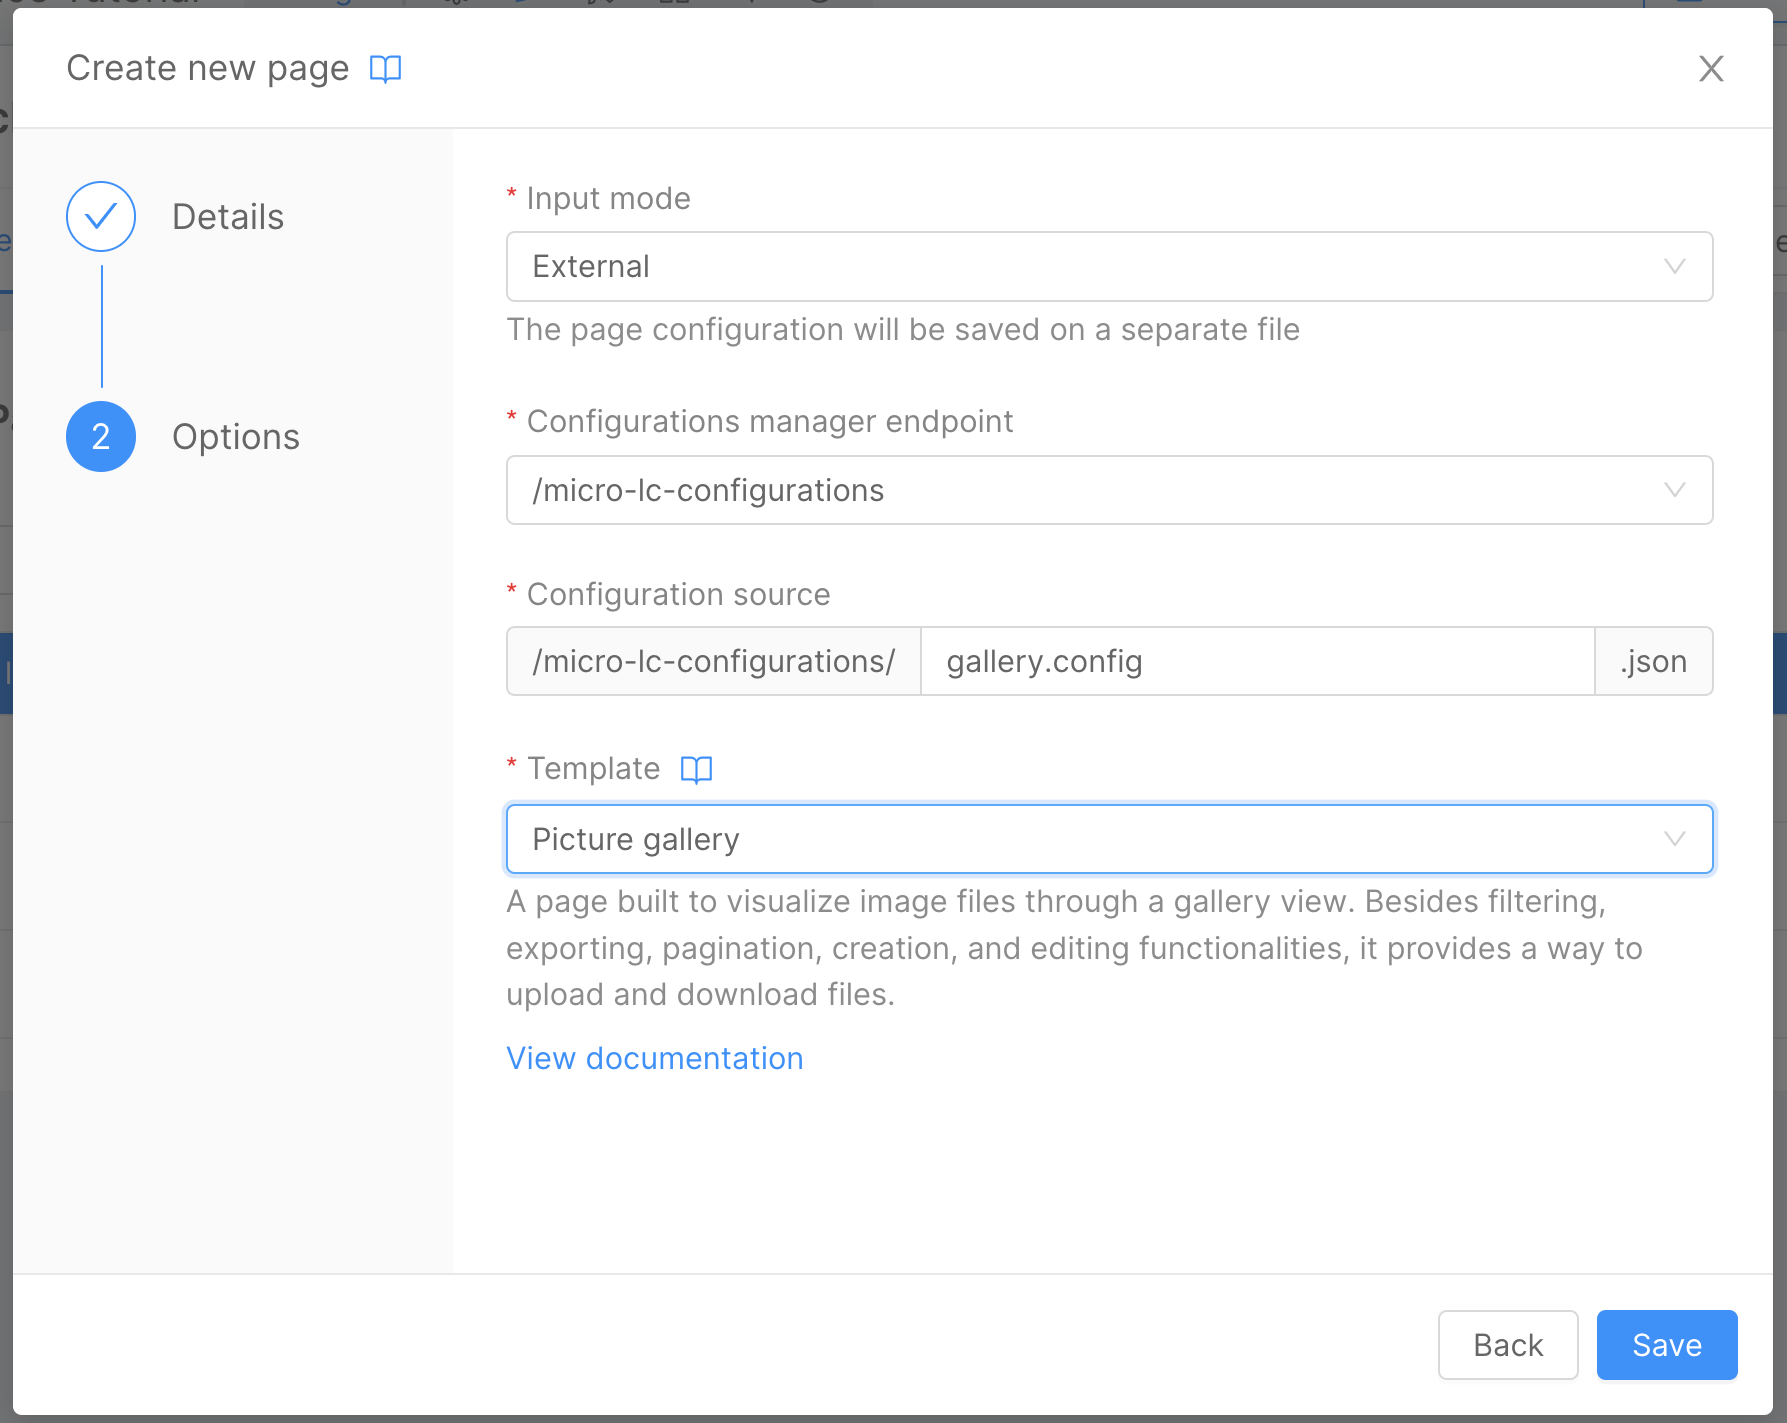
- In the second wizard step, choose the
Picture Gallerytemplate.
In the Pages tab within the Microfrontend Composer section, you will see the newly created Gallery page. Click on the Compose button to open the page composer.
Configure the page as follows:
- Update the
Page TitletoGallery. - Update the tab Label to
Allusing the same steps from the Microfrontend Composer Tutorial Basics. - Remove the
Exportbutton from the page using the steps from the Setup the Calendar View Page section of this tutorial.
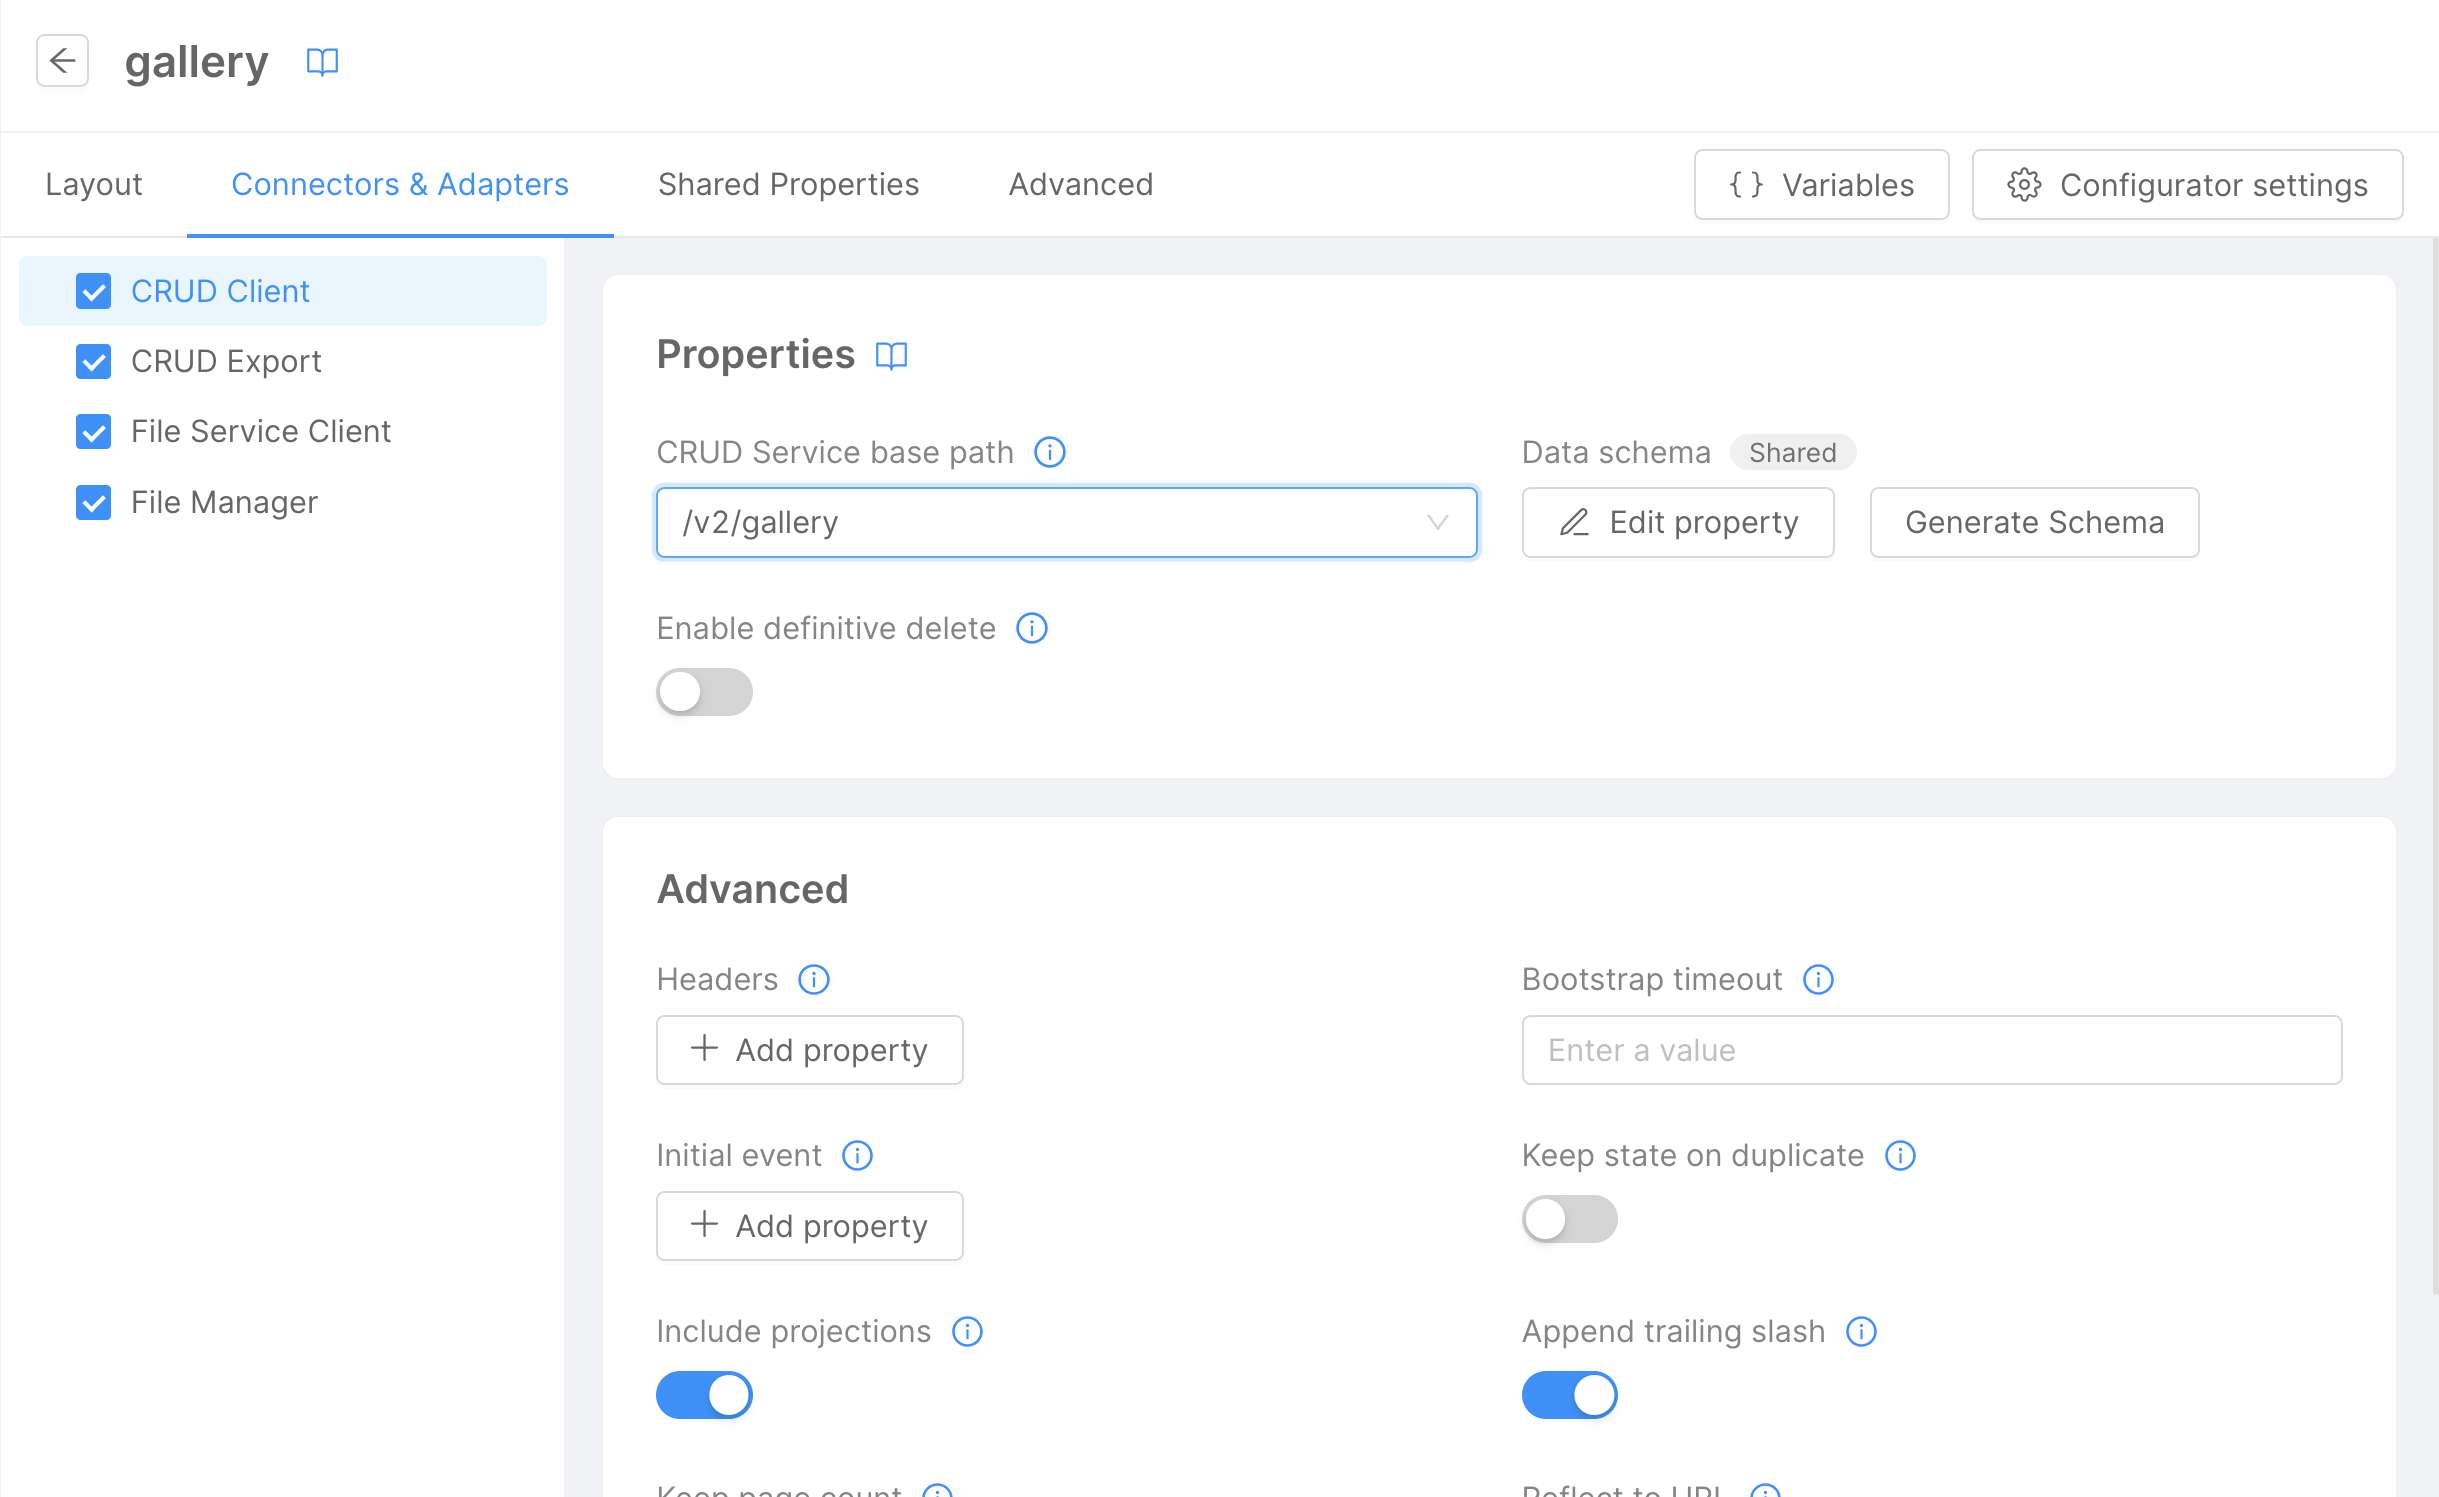
In the Connectors & Adapter tab, configure the Gallery connector:
- In the left panel, click on
CRUD Client. - Select the
/v2/galleryCRUD collection endpoint. - Click on
Generate schema.
As in previous steps, keep only the file, title, and description fields.
Refer to the Microfrontend Composer Tutorial Basics for detailed instructions on configuring the Gallery connector.
Next, configure the file service connector:
- In the left panel, click on
File Service Client. - Use the
/filesURL in theFile Service base pathfield.
Now, proceed to configure the layout page. In the Layout tab:
- Click on
Mainin the left panel. - Click on the
Gallerybutton. - In the right panel, edit the basic properties of the
Gallerycomponent:
Thumbnail source: typestringand valuefile.location;Title source: typestringand valuetitle;Subtitle source: typestringand valuedescription.
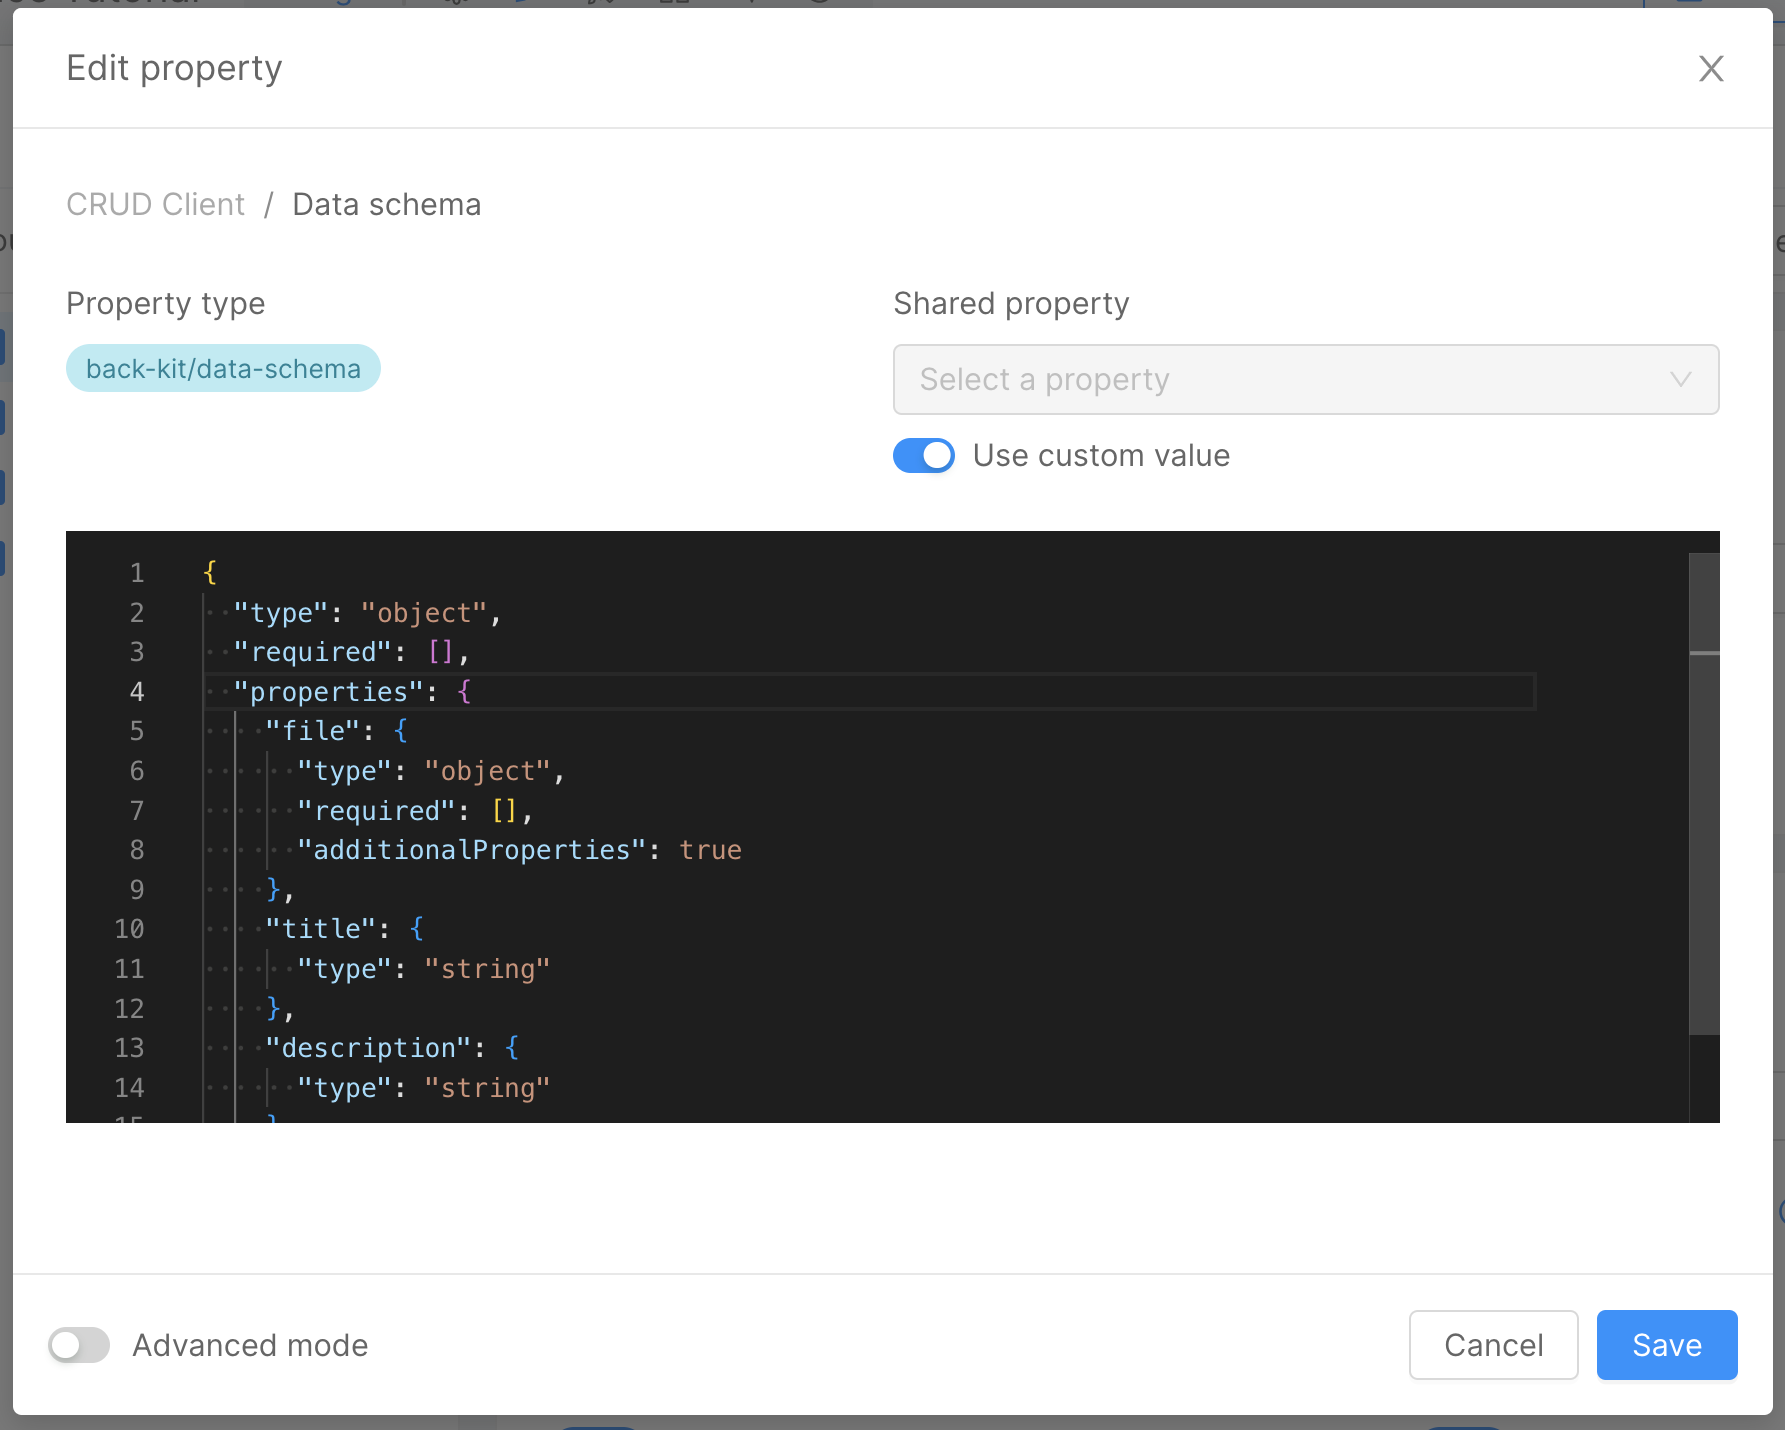
Finally, configure the Data Schema for the Form Modal component:
- In the left panel, under
Main, click onForm Modal. - In the right panel, enable
Use custom value. - Add the following JSON schema:
{
  "type": "object",
  "required": [],
  "properties": {
    "_id": {
      "formOptions": {
        "hiddenOnInsert": true,
        "readOnlyOnUpdate": true
      },
      "type": "string"
    },
    "file": {
      "type": "object",
      "required": [],
      "additionalProperties": true,
      "format": "file"
    },
    "title": {
      "type": "string"
    },
    "description": {
      "type": "string"
    }
  }
}
Now we can create a new menu item for the Gallery page. To do that, follow the same steps used in the Microfrontend Composer Tutorial Basics using the Gallery page id.
After that, save the configuration and deploy. Refer to the Console Handbook for more information about the deploy command.
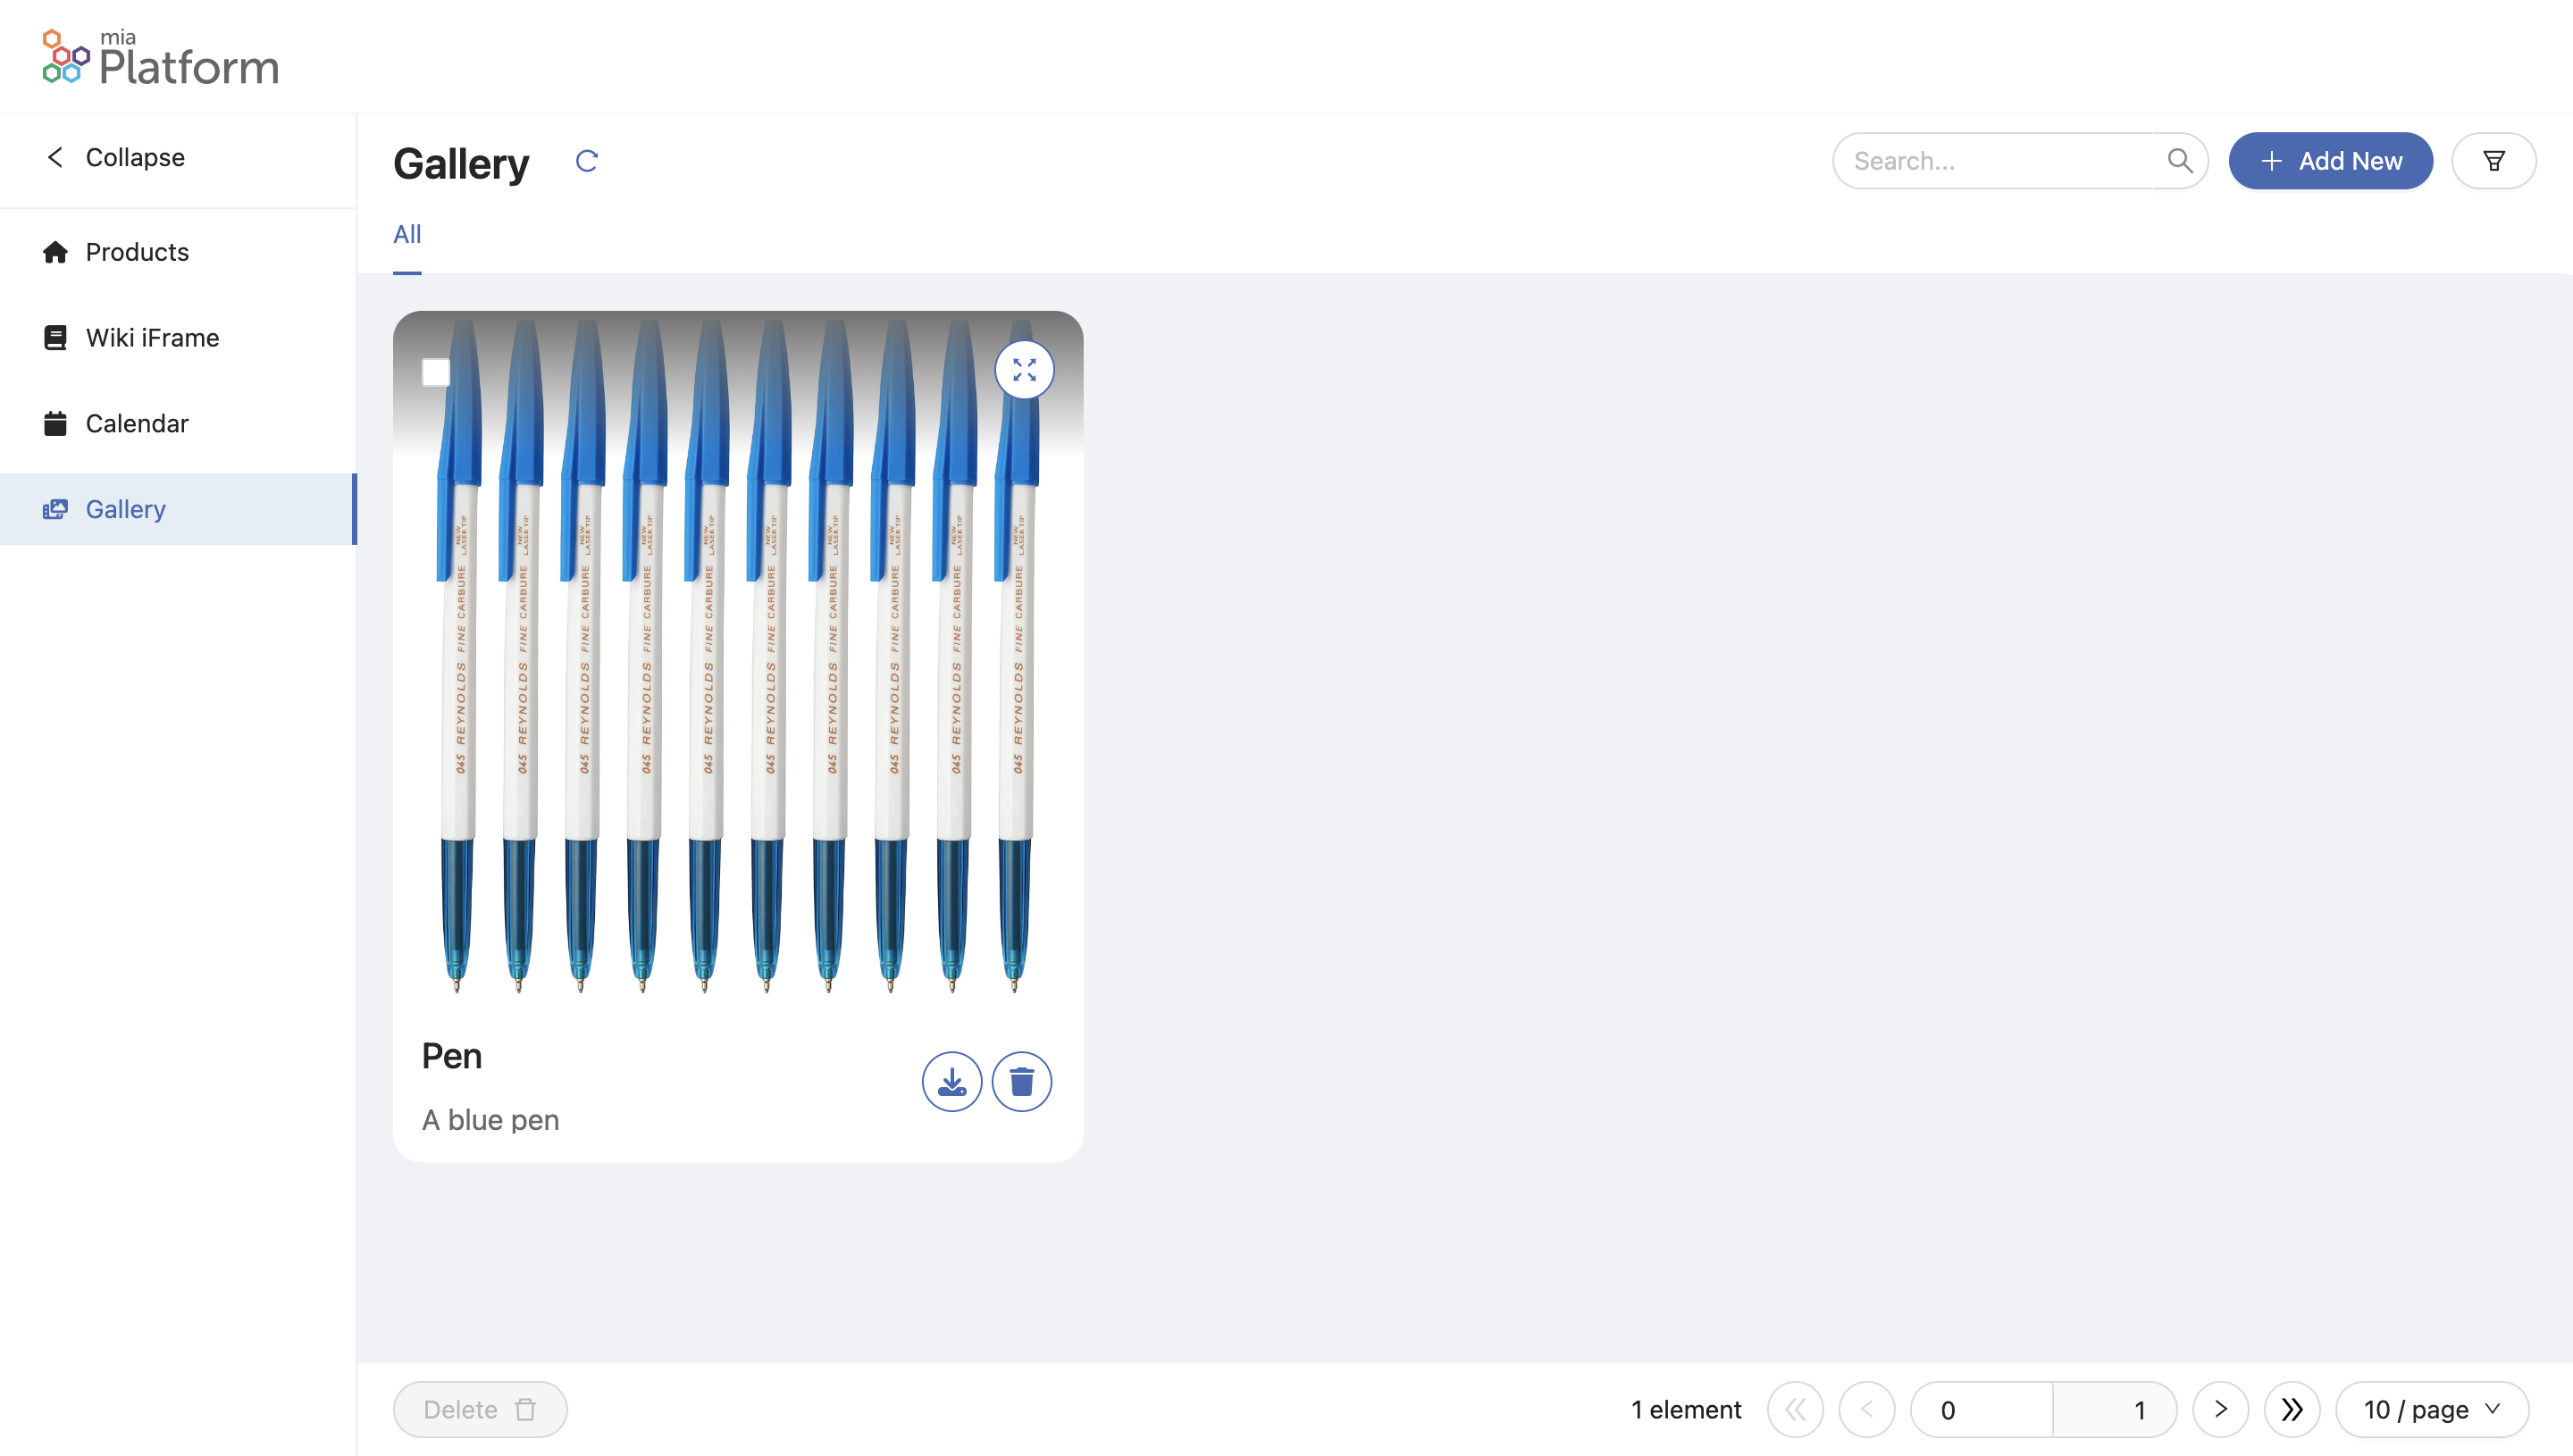
The output of the Gallery page should be similar to the following:
Setup Show Info/Details Page
To create a new Microfrontend Composer page using the Microfrontend Composer Show Info/Details Template, follow these steps:
- In the Microfrontend Composer Configuration, go to the
Pagestab and click on theCreate New Pagebutton. - In the first wizard step, choose the
Page type:Compose. - Provide an
idfor the page, e.g.,detail. - Set the
Page rendering routeto./detail.

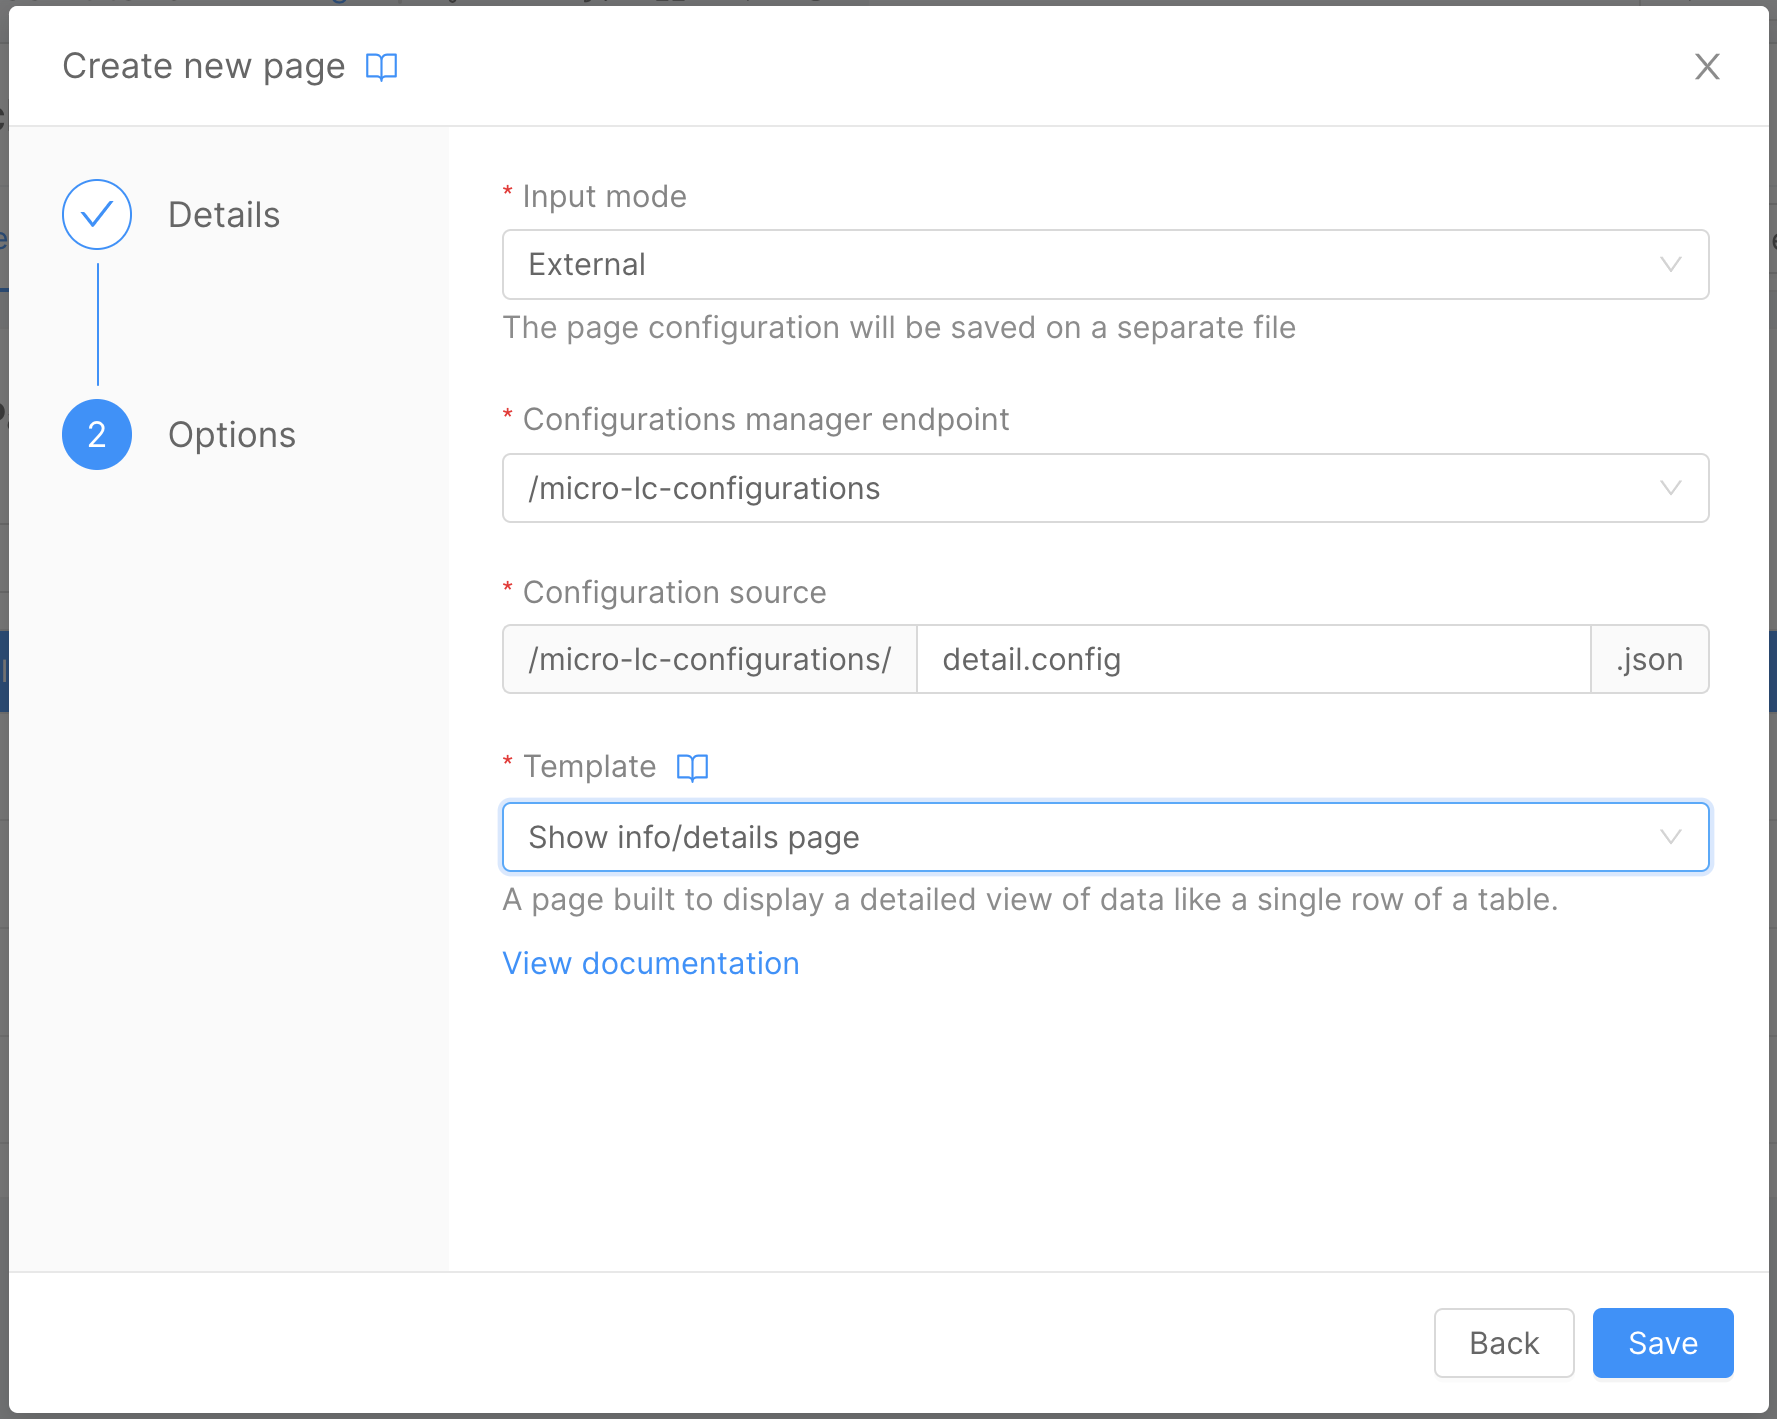
- In the second wizard step, choose the
Show Info/Detailstemplate.
In the Pages tab within the Microfrontend Composer section, you will see the newly created detail page. Click on the Compose button to open the page composer.
Configure the page as follows:
- Update the
Page TitletoDetailusing the same steps from the Microfrontend Composer Tutorial Basics.

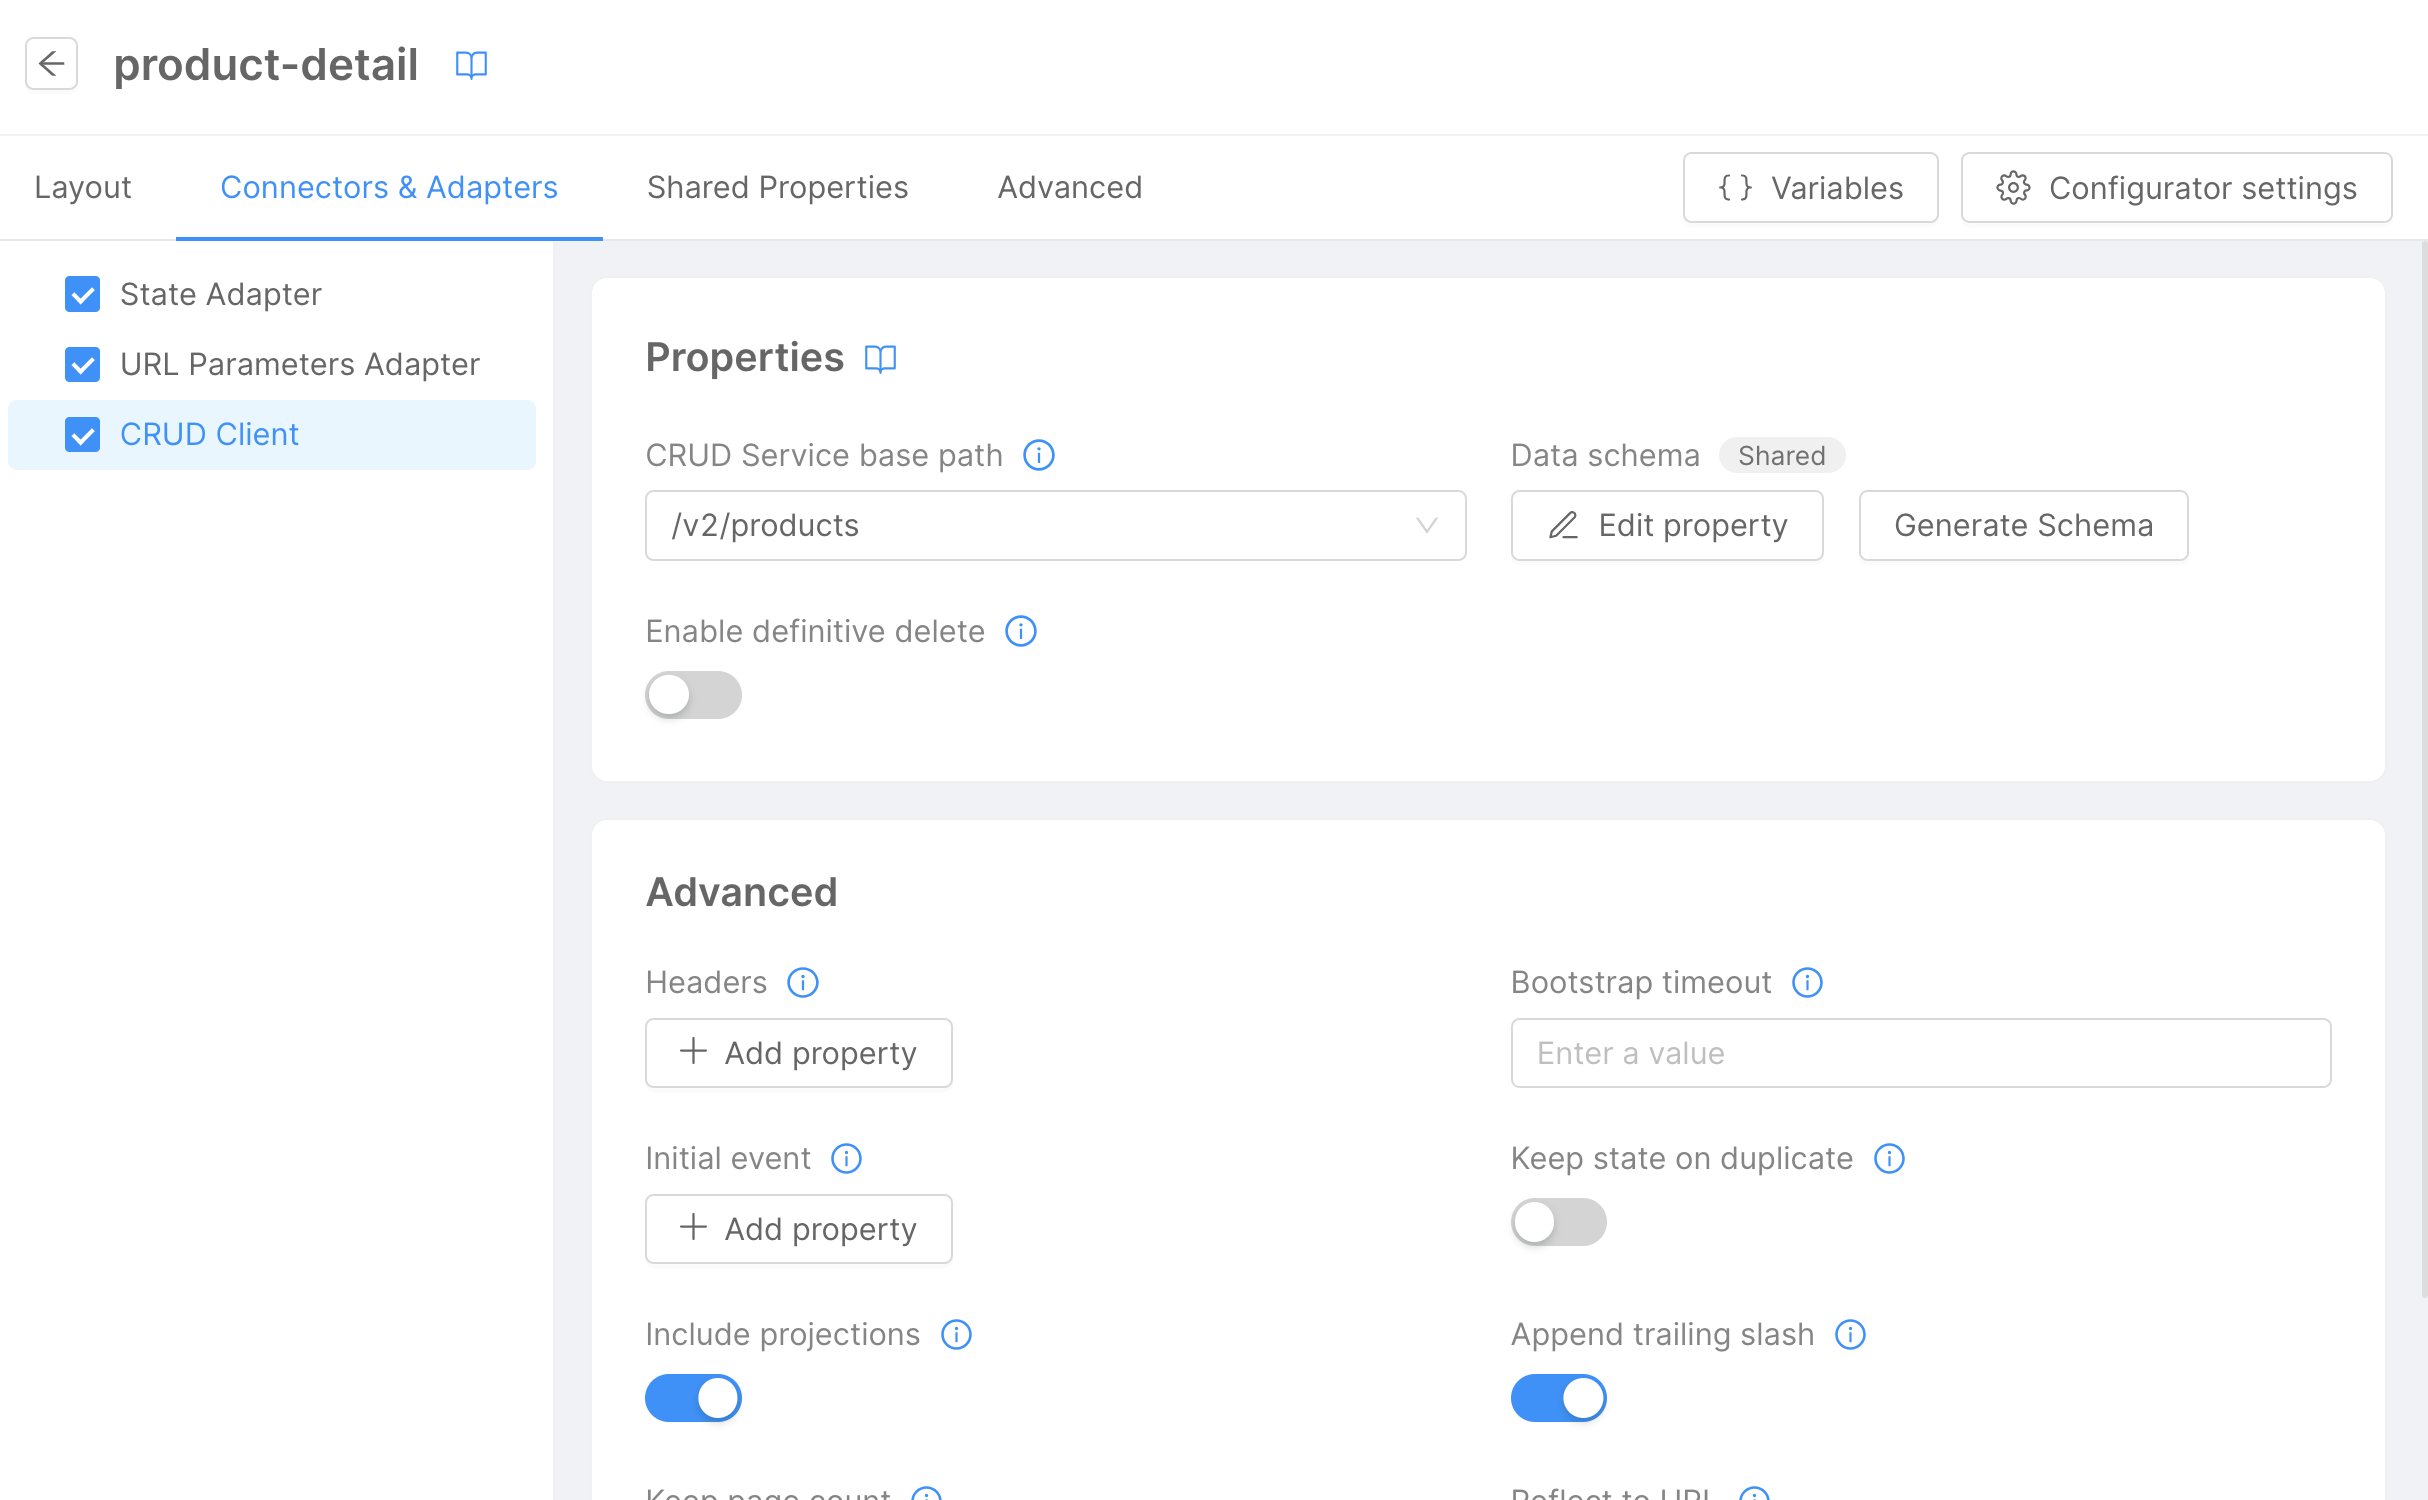
In the Connectors & Adapter tab, configure the Detail connector:
- In the left panel, click on
CRUD Client. - Select the
/v2/productsCRUD collection endpoint. - Click on
Generate schema. In this case, we want to leave all the fields, so we don't need to edit the schema.
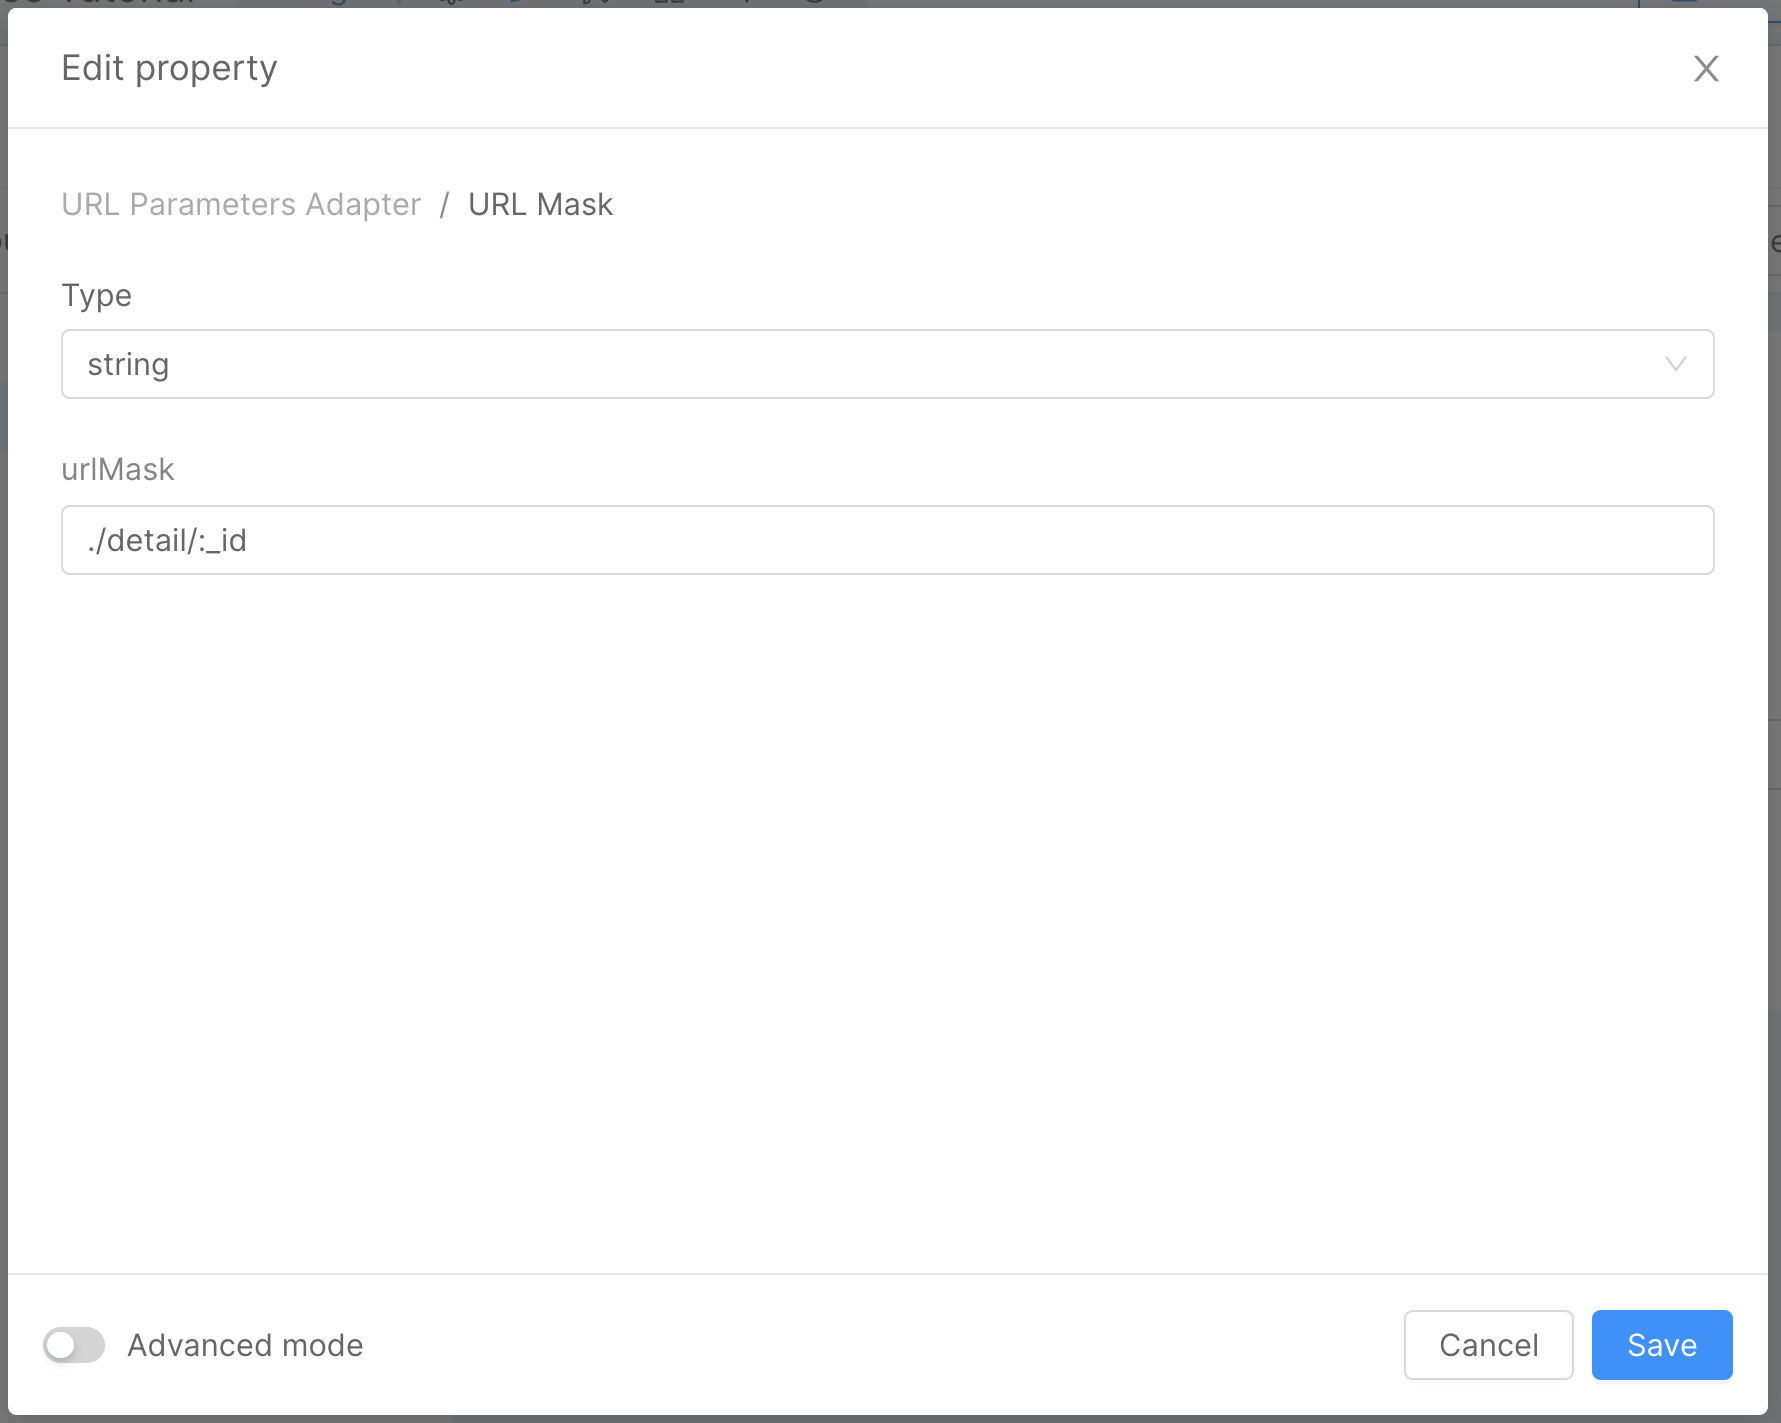
Next, configure the URL Parameters Adapter:
- In the left panel, click on
URL Parameters Adapter. - Modify the URL Mask by clicking on the
Edit Property. - Use the following URL Mask:
/detail/:idwithstringas the type.
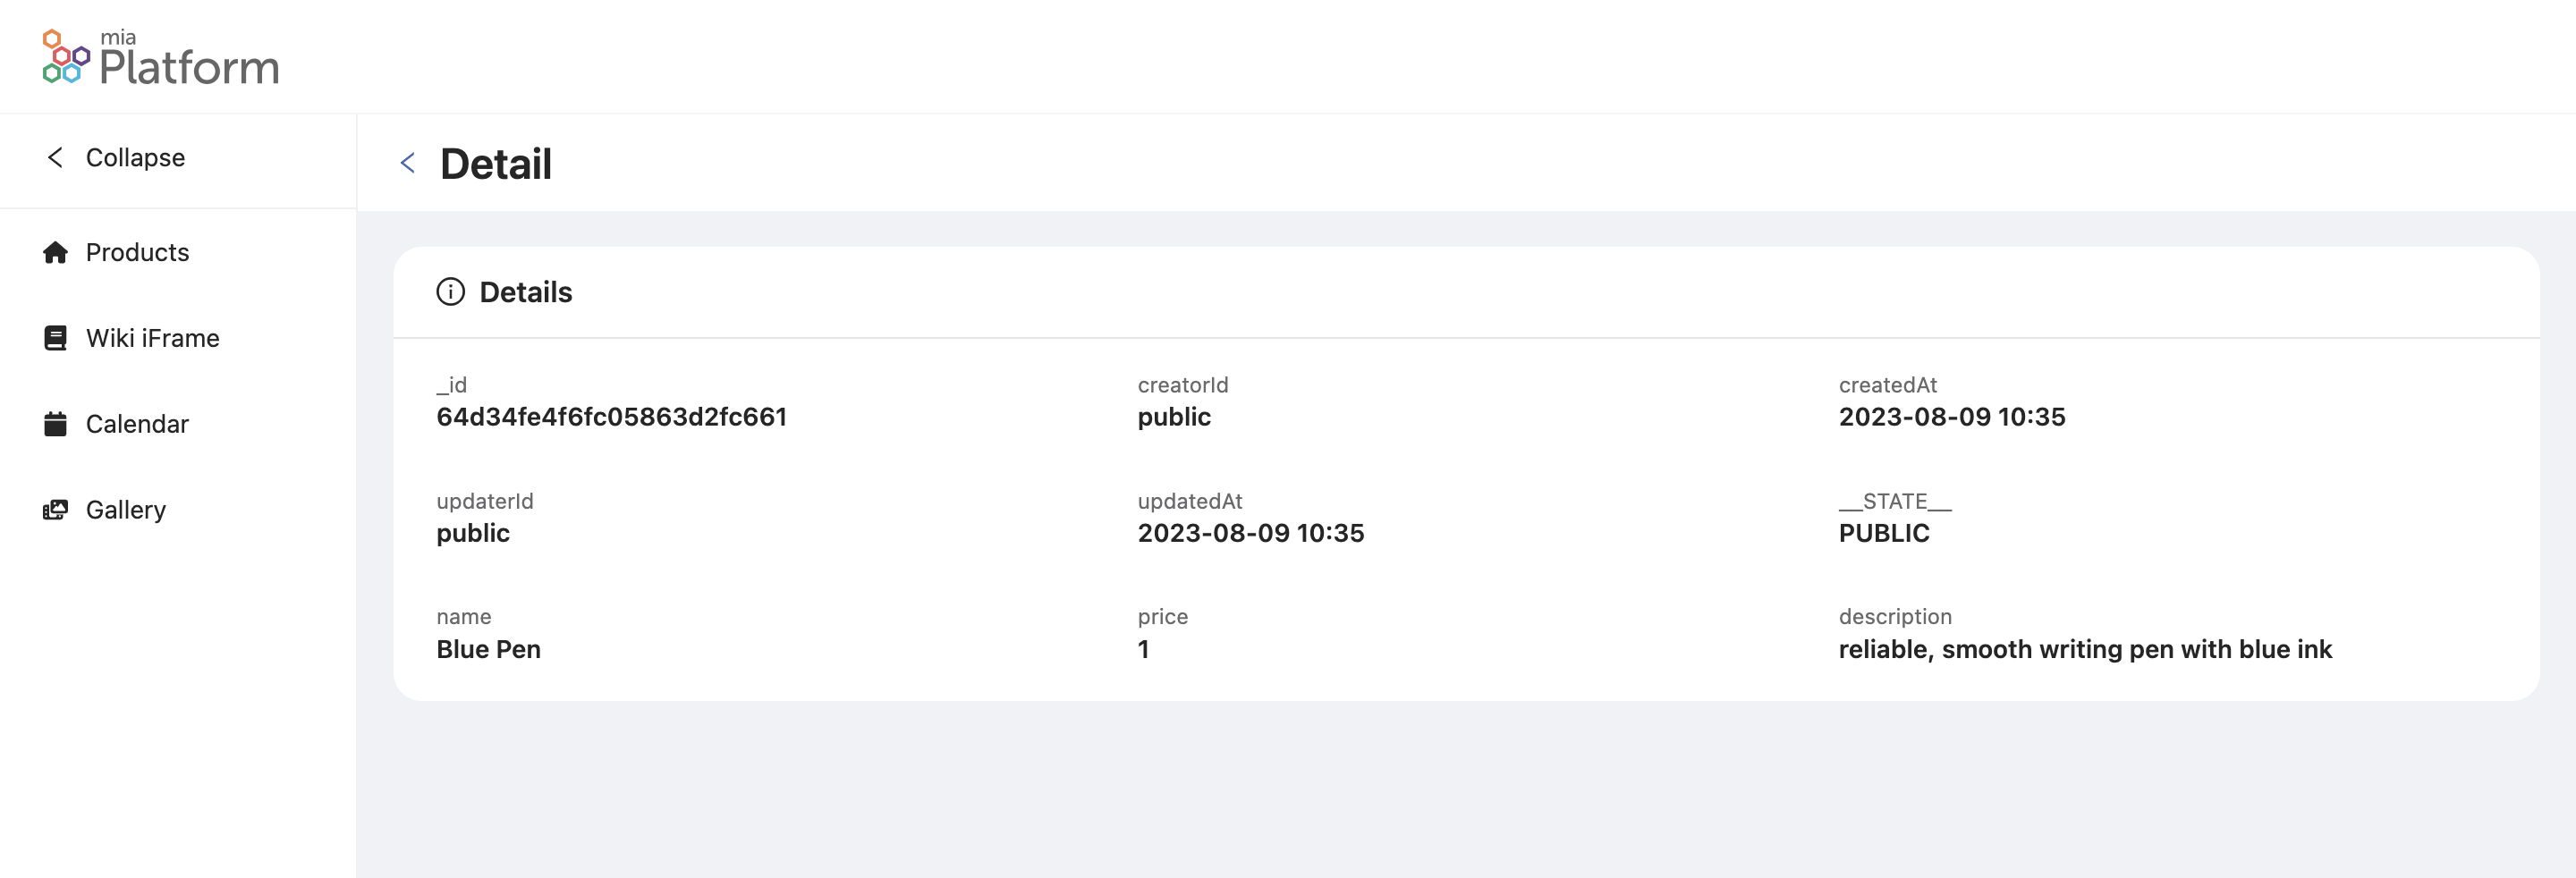
After saving the configuration and deploying (refer to the Console Handbook for more information), you will see the Detail page in the Microfrontend Composer menu.
To navigate to the Detail page, use the URL /microfrontend-composer/detail/{{id}}, where {{id}} is the _id of the product you want to see the details for.
Here's how the Detail page looks:
Connect the Detail Page with the Products Page
To connect the Detail page with the Products page, follow these steps:
- Ensure the
Productspage is configured as done in the Microfrontend Composer Tutorial Basics. - In the
Pagestab, click on theComposebutton for theProductspage. - In the left panel, click on
Mainand then click on theTablebutton. - In the right panel, open the
Advanced Propertiesand click on theEdit Propertyunder the labelCustom Actions. - In the modal that opens, select
arrayas Type. - Click on the
Add Itembutton to add a new item. - In the new item, click on the
Editicon and configure as follows:
{
  "tag": "bk-button",
  "properties": {
    "content": "Detail",
    "action": {
      "type": "push",
      "config": {
        "url": "./detail/{{args.[1]._id}}"
      }
    }
  }
}
Now we can save the configuration and deploy. Refer to the Console Handbook for more information about the deploy command.
Now you can navigate to the Products page. Here's the output:
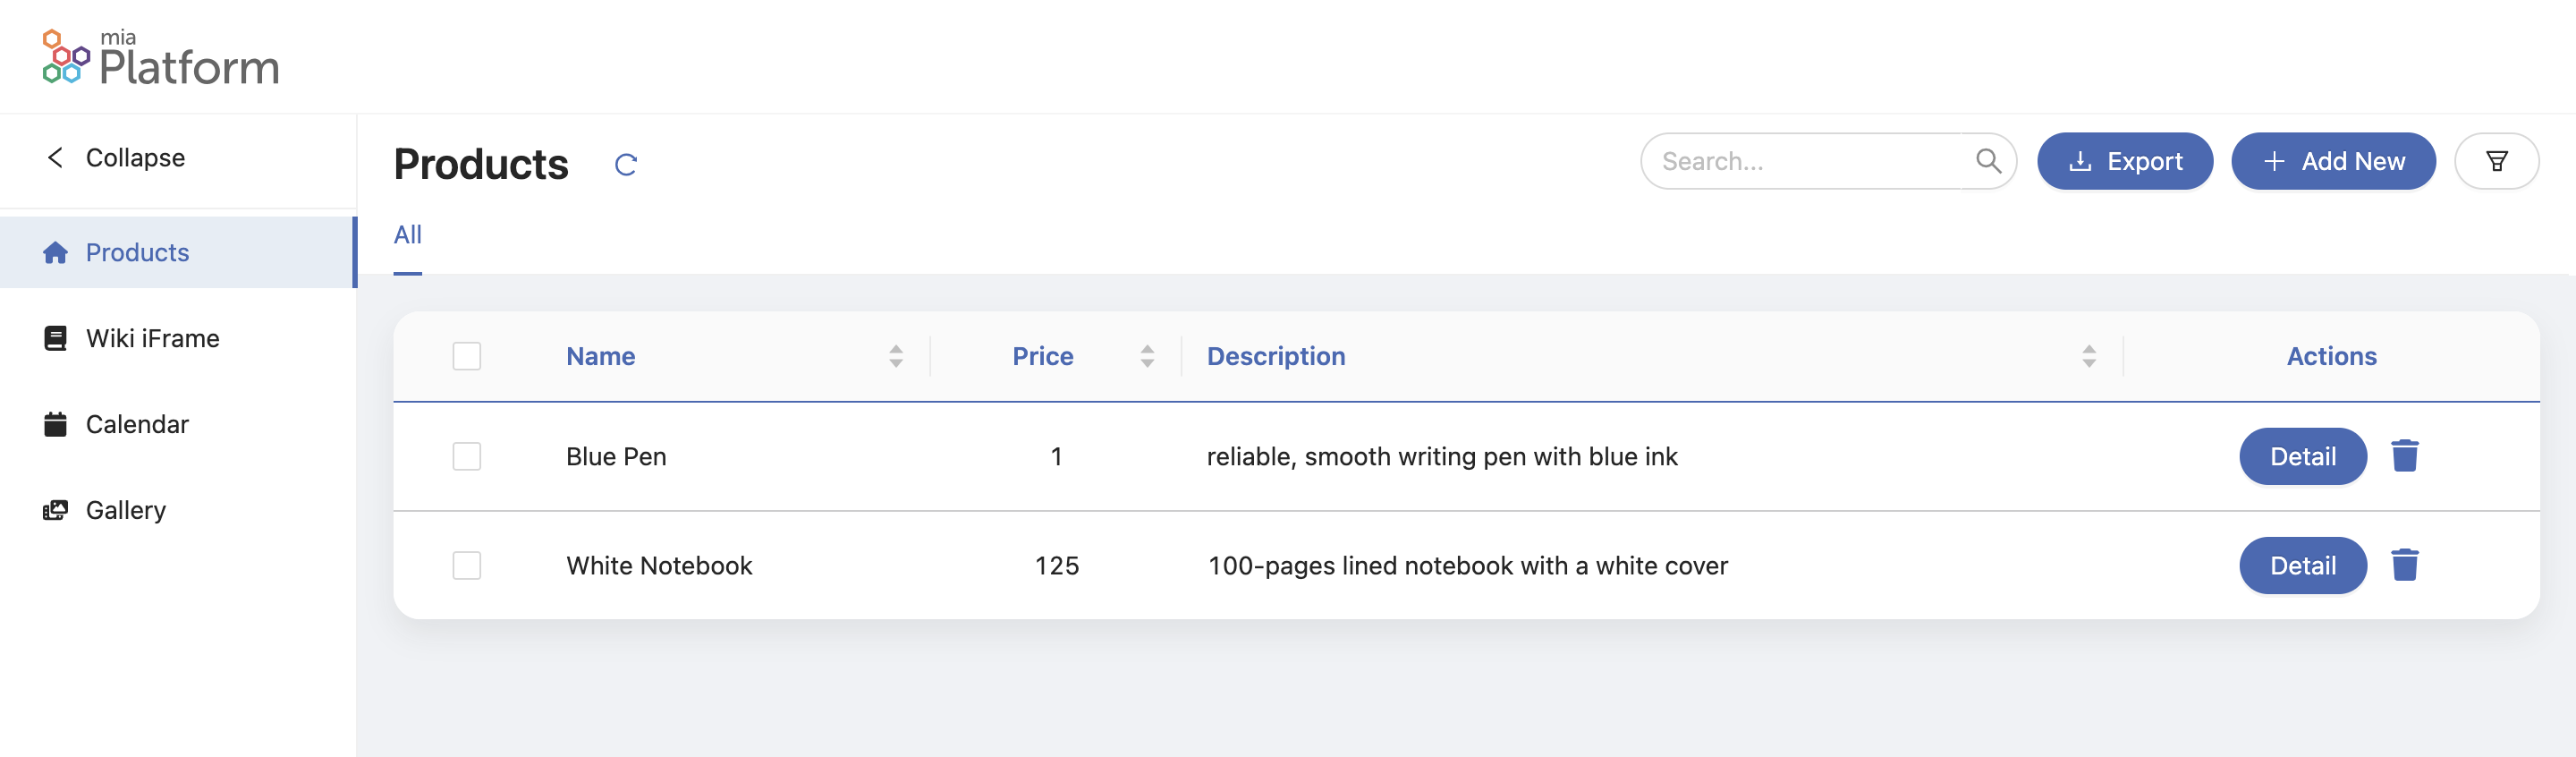
Clicking on the Detail button in one of the rows of the table will redirect you to the Detail page.
Microfrontend Composer Tutorials
In this tutorial, we learned how to create new Microfrontend Composer Pages using the Microfrontend Composer Compose Template or an iFrame.
Also, make sure to check out:
- The Microfrontend Composer Microfrontends Tutorial, where you can learn how to configure a Microfrontend with Angular or React and how to use it in the Microfrontend Composer.
- The Microfrontend Composer Basics Tutorial, which covers how to create a new Microfrontend Composer and how to create a new Microfrontend Composer Page using the Microfrontend Composer Table Template.