Usage
This guide provides comprehensive instructions for using the Excel Add-in to interact with the Data Catalog, import assets, enrich metadata, and synchronize updates.
Authentication
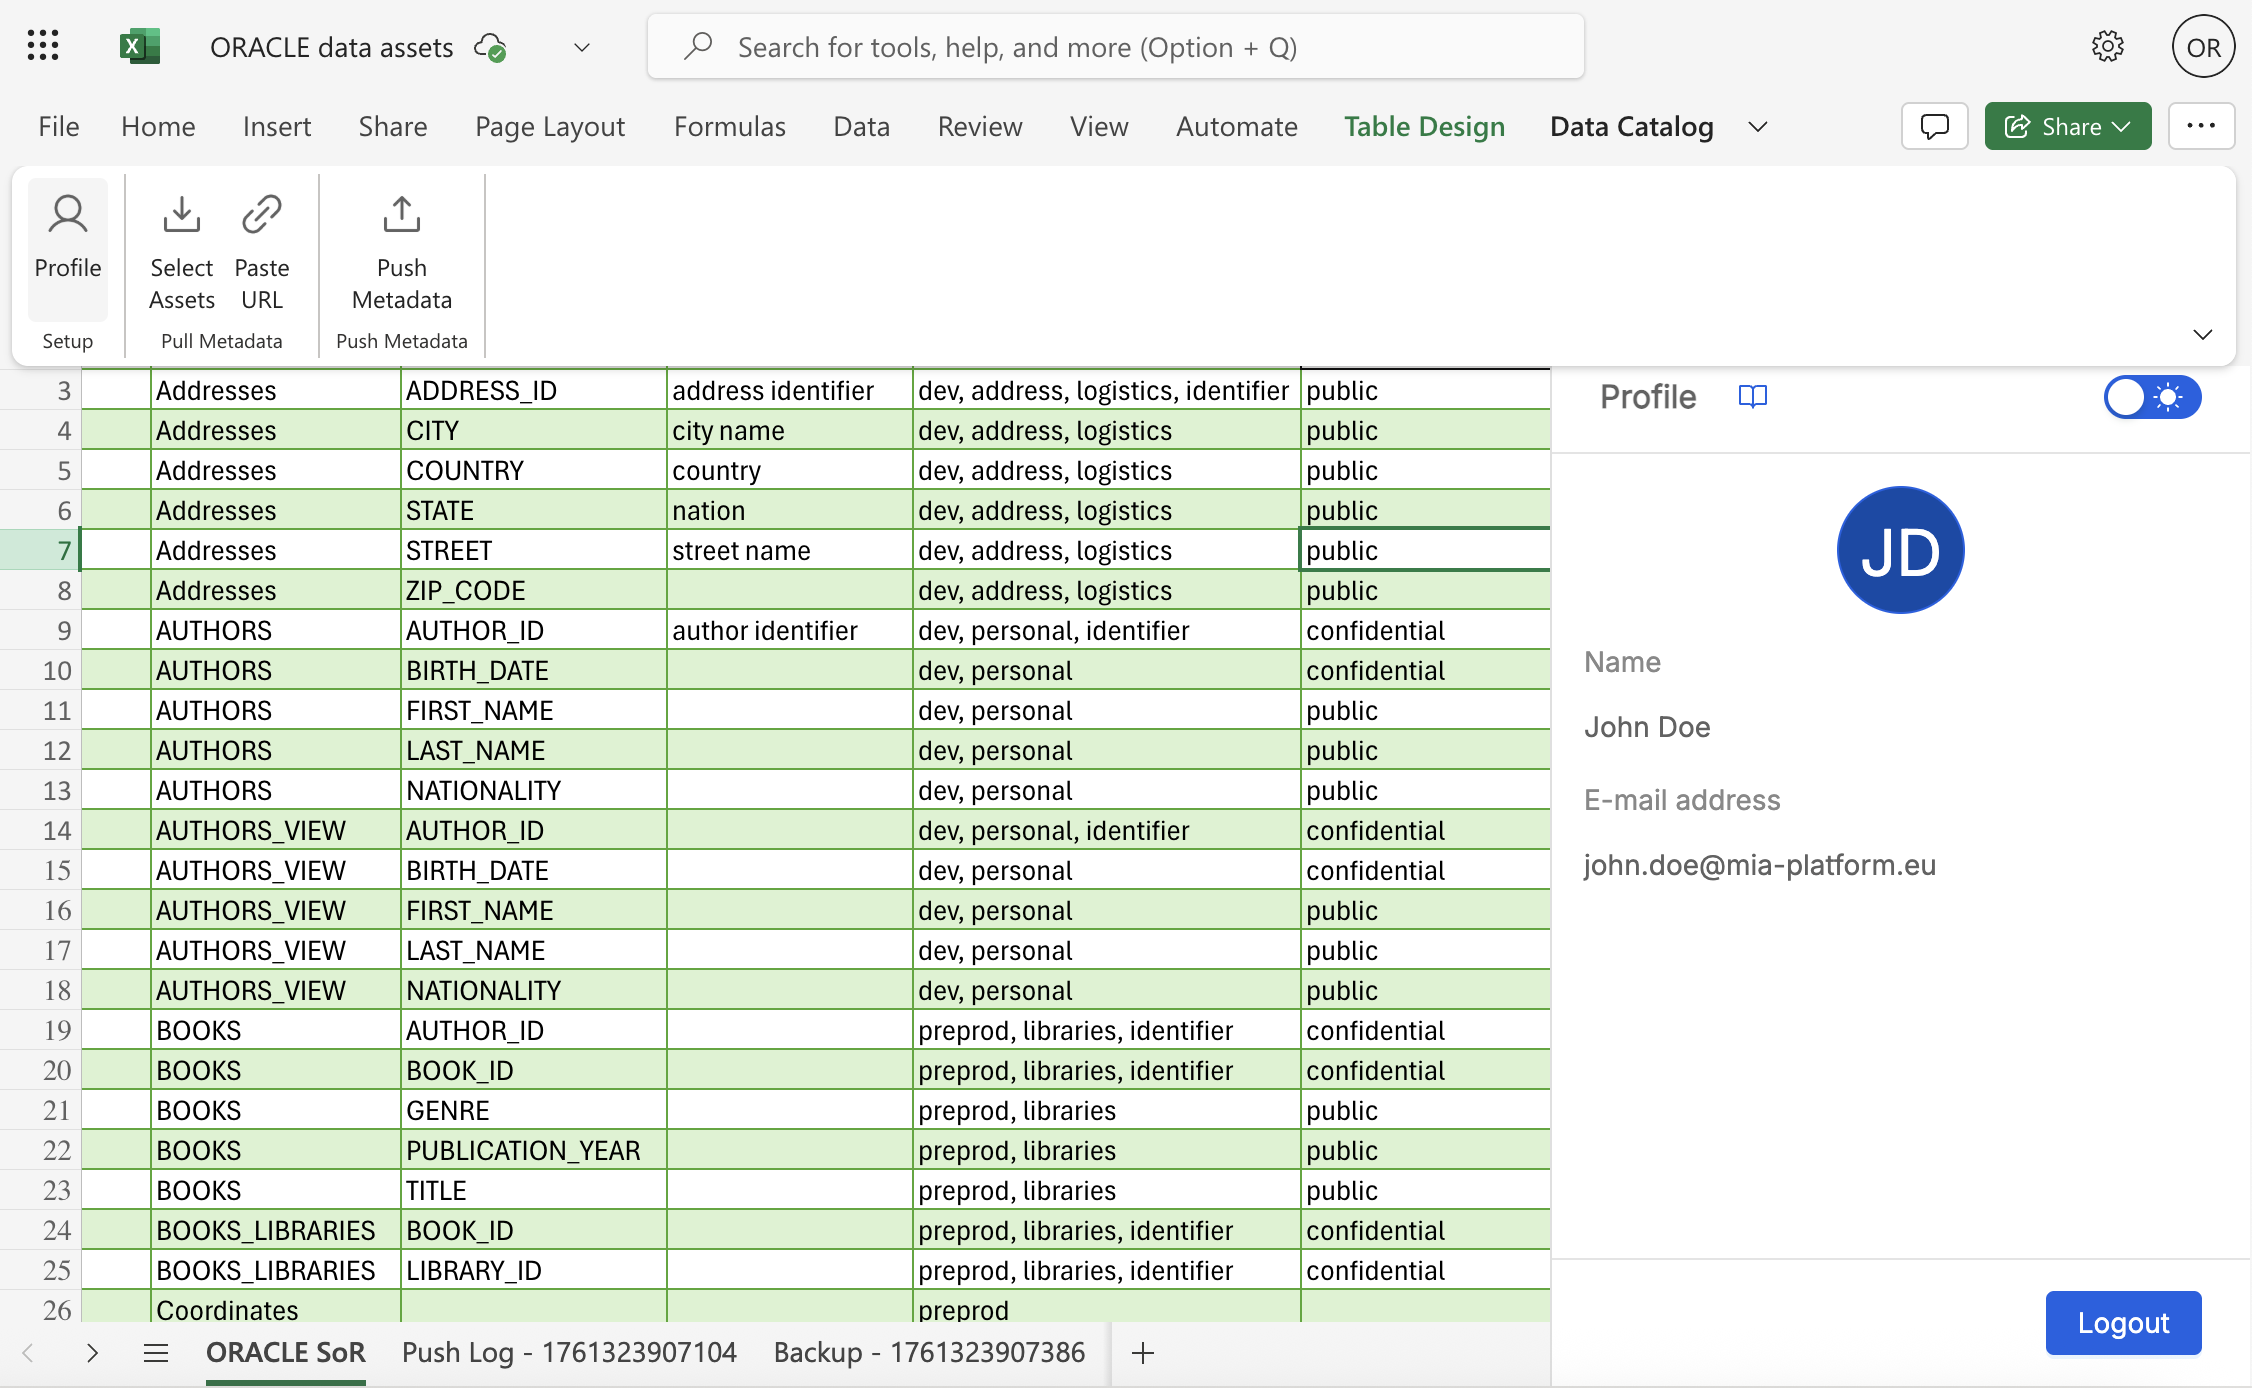
Once the add-in has been properly configured and installed (see Installation Guide), access the Data Catalog Excel Add-in and perform login by entering the Data Catalog credentials. Upon successful login, you'll see your profile information in the Profile page.
You can logout at any time from this panel.
Pull Assets Metadata
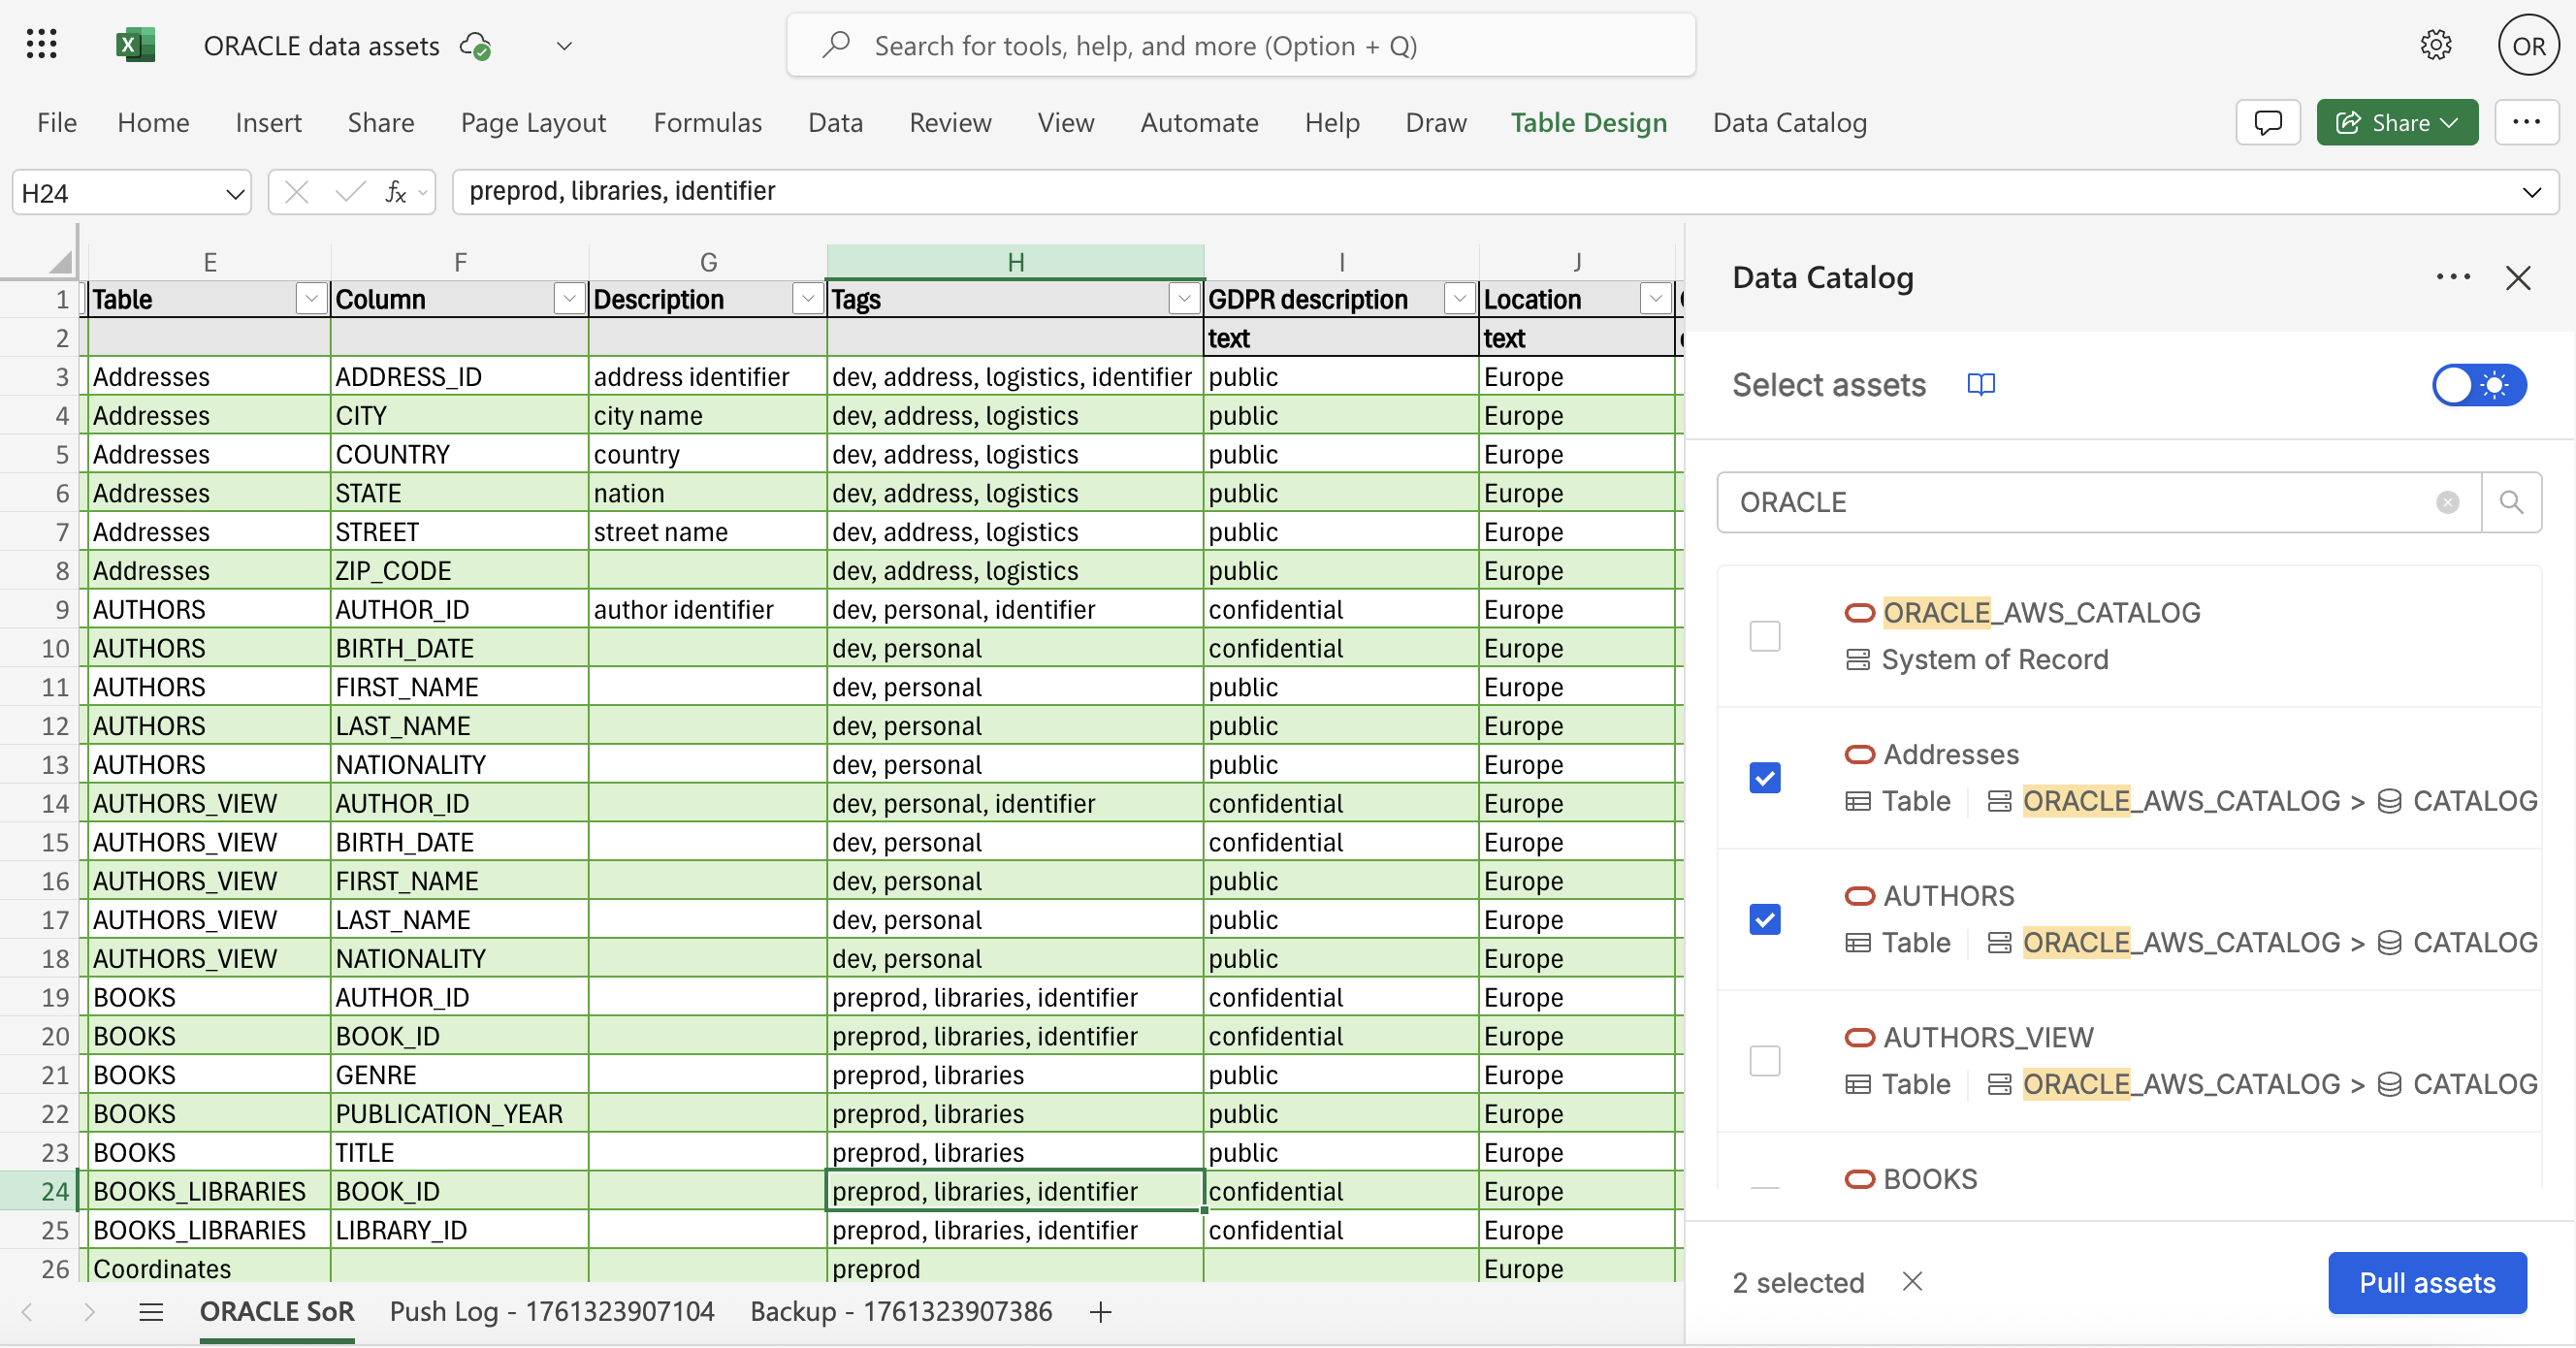
The Pull Assets page allows you to import metadata from the Data Catalog into your Excel worksheet.
Search and Import
- Search Bar: Use the search functionality to find specific assets in the Data Catalog. The search returns System of Records (SoRs) and Tables present in your Data Catalog. Enter keywords in the search bar to find relevant assets.
- Checkbox Selection: Select individual assets or multiple assets using checkboxes
- Import: Click the Pull Assets button to import selected metadata. Each asset appears as a row in your Excel worksheet with all associated metadata
Worksheet structure
Once imported, each row that represents an asset contains various metadata fields as columns.
Read-Only Fields (Values in these columns cannot be modified):
assetType- Type of asset (SoR, Table, Column)catalogName- Data Catalog name (if present, depending on the provider type of the asset)schema- Database schema name (if present, depending on the provider type of the asset)sorName- System of Record nametableName- Table namecolumnName- Column name
Editable Fields (Values in these columns cannot be modified):
description- Asset descriptiontags- Asset tags- Custom properties (
customProp1,customProp2, etc.) - Each custom property configured in the Data Catalog appears as a separate column in the worksheet, maintaining its specific data type as defined in the Data Catalog. For more information about custom properties, see the Custom Properties documentation.
Asset Navigation
Once navigating in the Pull Assets page, it is possible to click on an element of the search list in order to enter its detail page.
System of Records Details:
- Click on any SoR to view detailed information
- General Tab: Shows basic information and metadata
- Tables Tab: Lists all tables within that SoR
- Import Options:
Pull all tables: Imports all tables within the SoRPull all columns: Imports all columns within the SoRPull tree: Imports the SoR, all its tables, and all columns within those tables
Table Details:
- Click on any table to view detailed information
- General Tab: Displays table-specific information
- Columns Tab: Shows all columns within the table
- Import Options:
Pull all columns: Imports all columns within the tablePull tree: Imports the table, and all columns within the table
Paste URL
For advanced use cases, you can import assets based on Data Catalog search URLs:
- Perform an advanced search in the Data Catalog interface
- Copy the URL from your browser
- Paste the URL in the Paste URL section of the add-in
- Click Pull to import all assets matching that search criteria
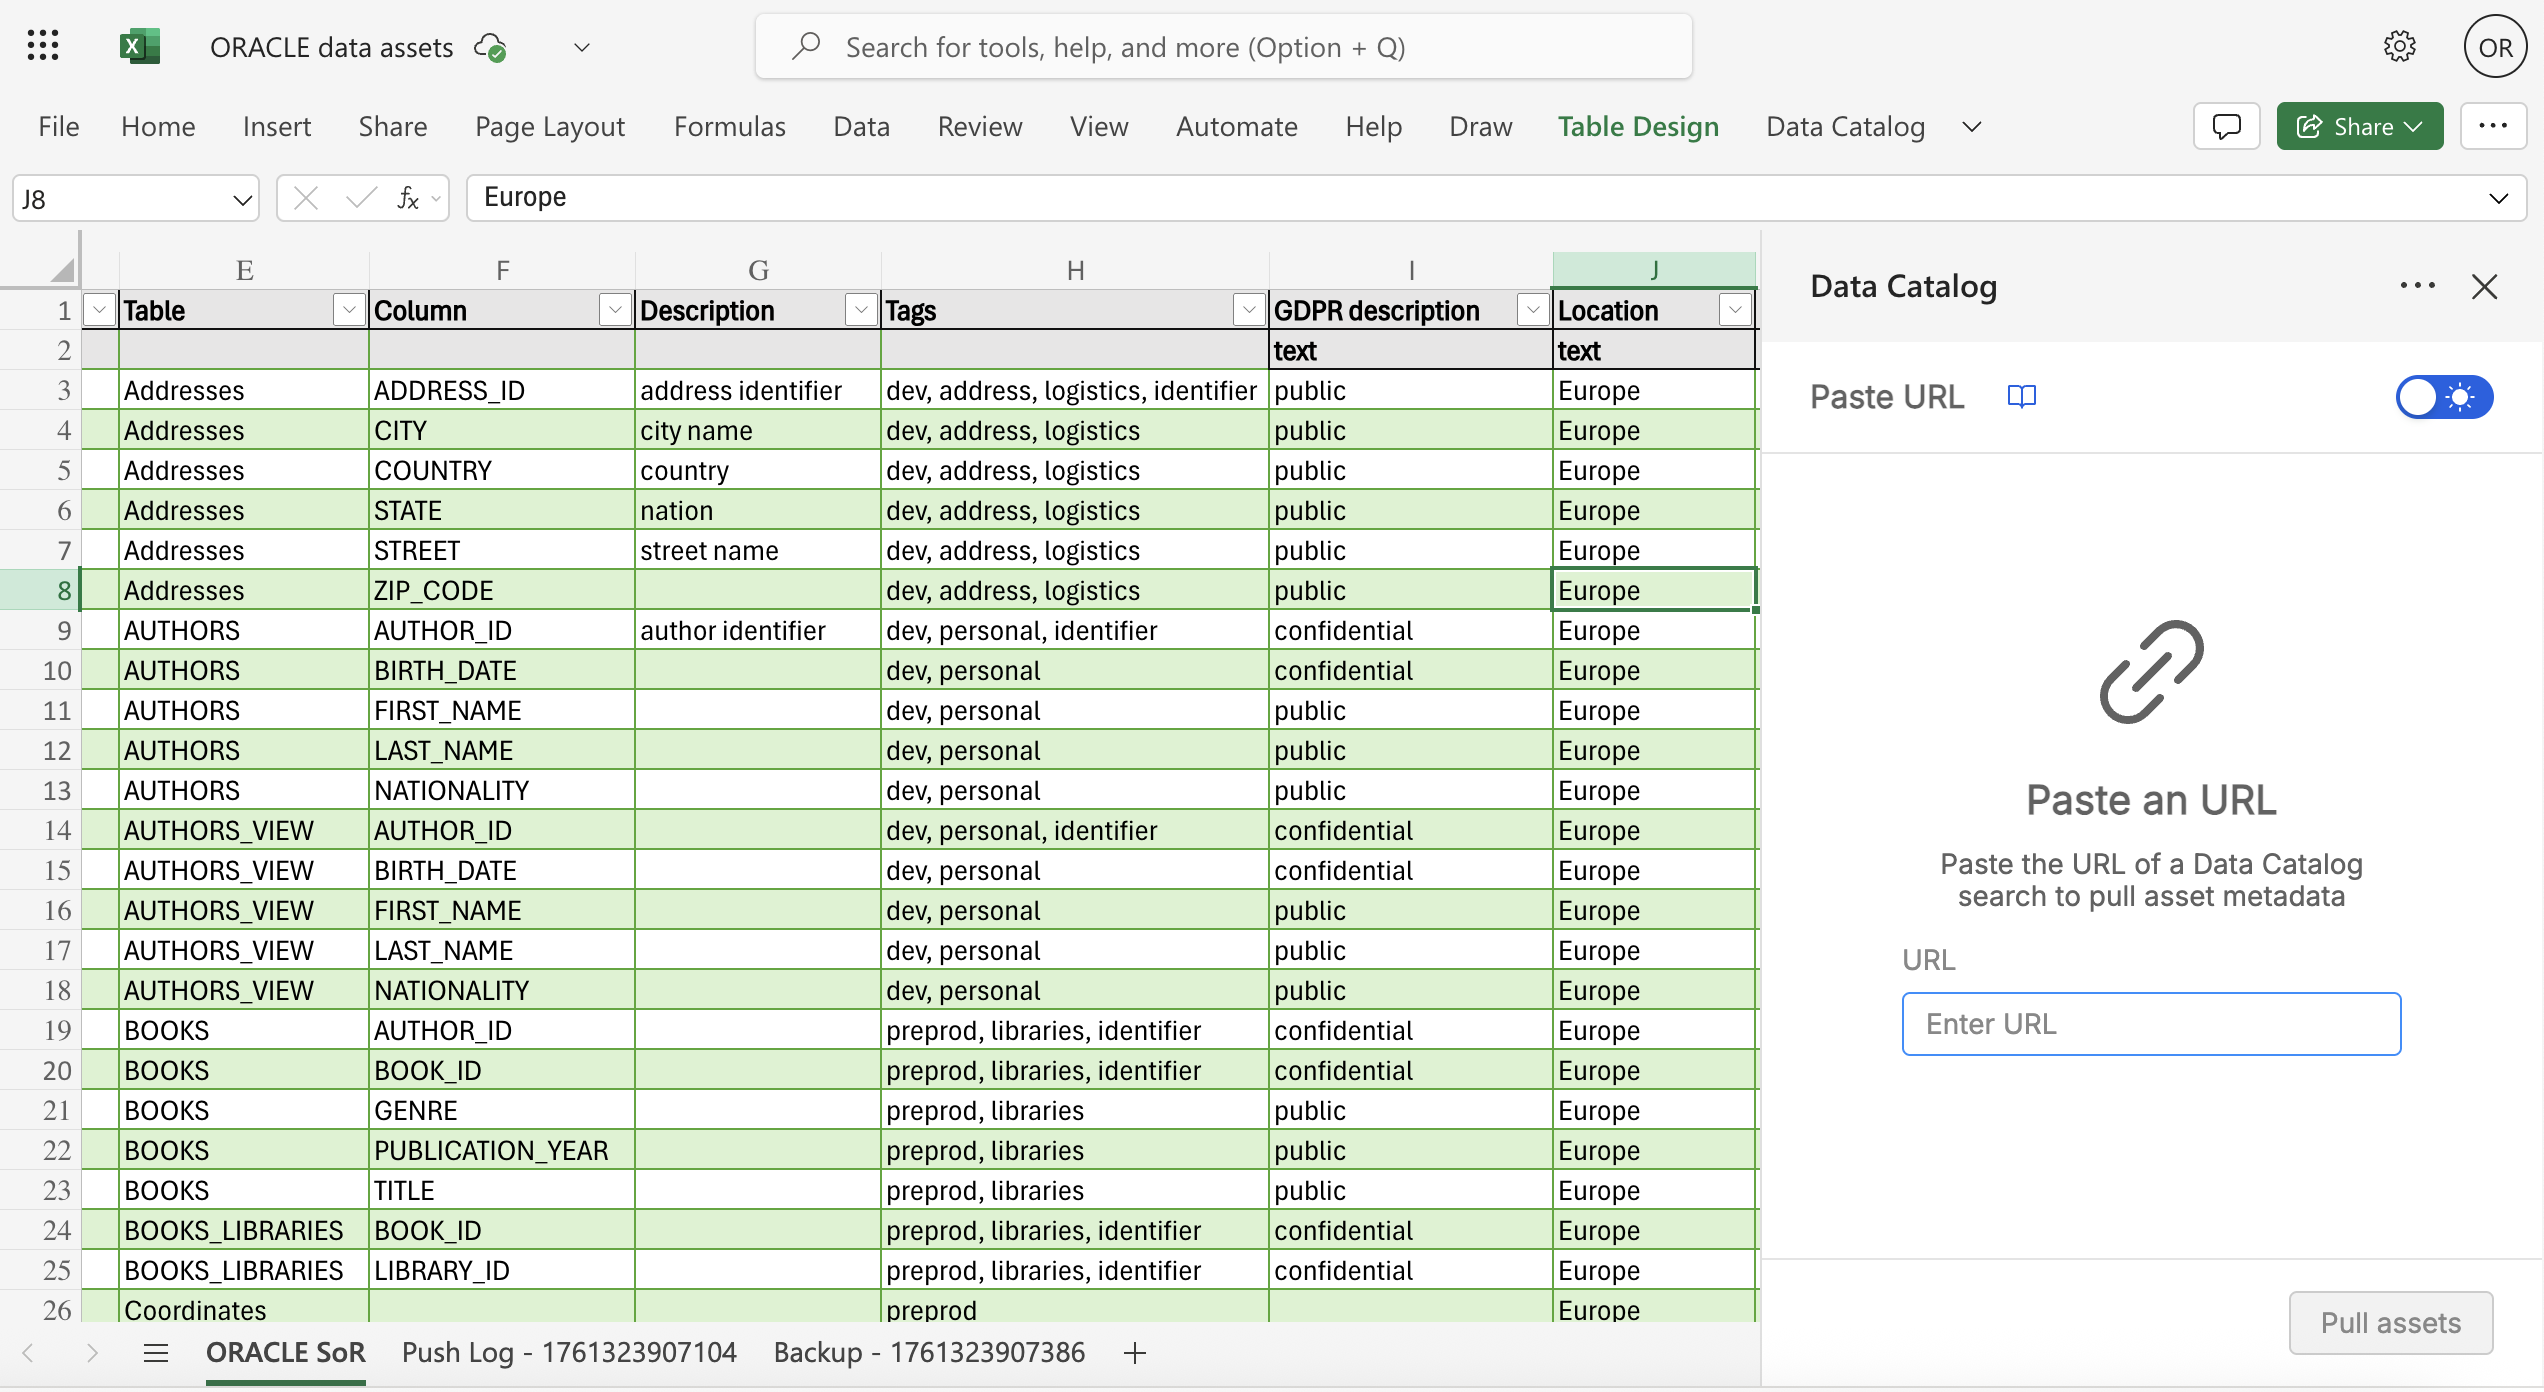
This feature is particularly useful for importing assets with specific metadata, tags, or other advanced search conditions.
Push Assets Metadata
The Push Assets functionality synchronizes your enriched metadata back to the Data Catalog.
Pre-Push Configuration
Rows Selection
- Select specific rows if you only want to sync a subset of assets
- Leave unselected to sync all rows in the worksheet
Columns Selection
Once the rows have been chosen, you can also select which metadata to synchronize back to the Catalog. The column selection feature allows you to choose which metadata columns will be synchronized, with hidden columns in Excel being automatically unchecked. You have the flexibility to manually deselect any columns you want to exclude from the synchronization process.

Validation Process
Once the Push Assets action is triggered from the proper button, the add-in begins a pre-push validation process that ensures data integrity before synchronization. The system performs structure validation by verifying column names and formats, checking for required asset identifiers, and validating custom property types and values to ensure compatibility with the Data Catalog schema.
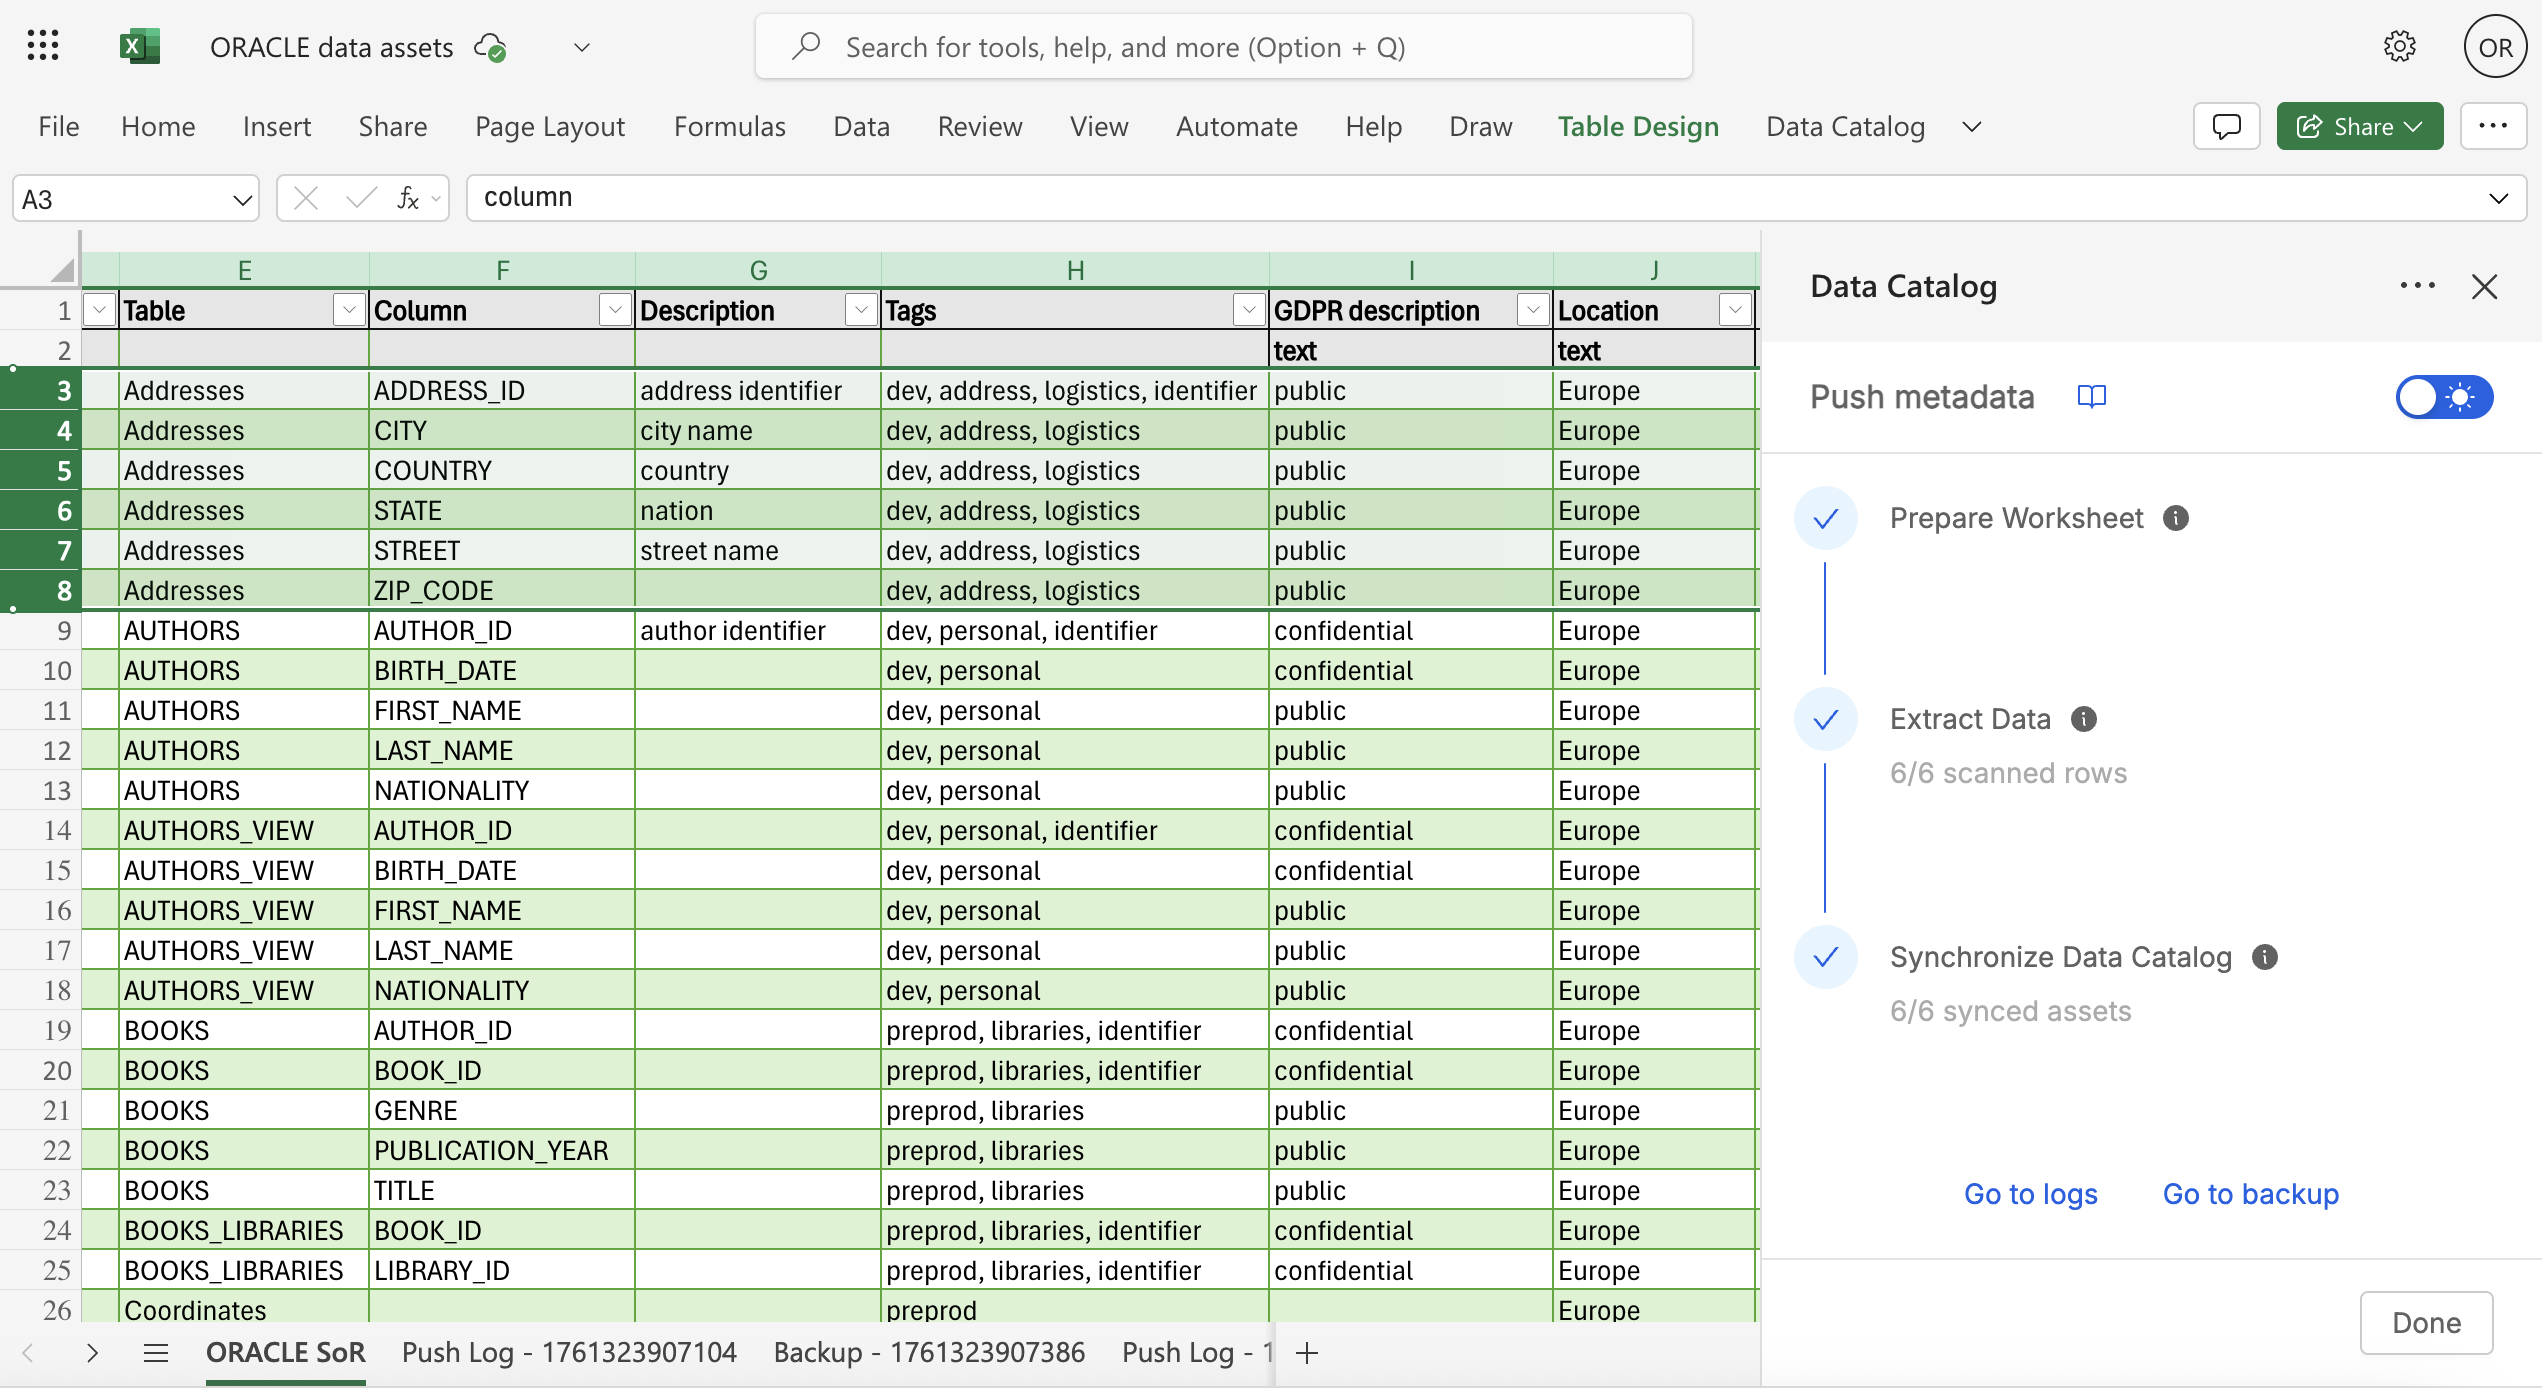
Synchronization
Once validation passes, row-by-row the synchronization begins. A progress feedback is provided throughout the process, and a completion notification confirms successful synchronization.
Generated Errors and Backup Sheets
During the push process, two additional sheets are automatically created:
Error Logs Sheet: The Error Logs Sheet documents all errors encountered during synchronization and provides specific row references with detailed error descriptions. This guides users toward resolution of any issues that may arise.
Backup Sheet: The Backup Sheet contains the original state of assets before synchronization, serving as a valuable reference for comparison and rollback purposes if needed. This sheet helps users identify what changes were made during the synchronization process.
Working with CSV Exports
The add-in is fully compatible with CSV files previously exported from the Data Catalog see Export documentation. Thus, in case stakeholders need to work offline or prefer to use CSV files for metadata enrichment, they can follow this workflow:
- Import CSV: Load previously exported CSV files into Excel
- Compatible Format: The CSV structure matches the add-in's pull format
- Enrich Data: Perform bulk enrichment on the imported data
- Push Updates: Use the add-in to synchronize changes back to the Data Catalog
When offline work is complete, ensure you follow the data integrity rules to allow push validation to pass when synchronizing back to the Data Catalog from the Excel add-in.
Best Practices and Recommendations
During Import
- Avoid making changes to the worksheet while assets are being imported
- Wait for the import process to complete before beginning enrichment
Data Integrity
- Never modify read-only columns - Changes will not be synchronized and may cause errors
- Don't add extra columns - This will cause synchronization failures
- Avoid empty rows - Remove any blank rows from your worksheet
You can reorder rows, but avoid leaving gaps
During Synchronization
- Don't start multiple sync processes simultaneously
- Avoid worksheet changes while synchronization is in progress
- Review error logs carefully if synchronization fails
Custom Property Management
- Ensure custom property types match the values you're entering
- If changing custom property types, update them in the Data Catalog first
- Use the Data Catalog interface to modify custom property definitions before bulk updates
Troubleshooting Common Issues
Synchronization Errors
Asset Not Found:
- Occurs when read-only identifier fields are modified
- Solution: Restore original asset identifiers or remove invalid rows
Type Mismatch:
- Happens when cell values don't match custom property types
- Solution: Correct the cell value or update custom property type in Data Catalog
Invalid Format:
- Cell format does not comply with expected data type
- Solution: Adjust cell format to match custom property requirements