Data Catalog Connections Management
Introduction to Connections
Connections represent the source of truth of the Data Catalog. By retrieving their metadata, is possible use their assets to perform actions such as Asset Discovery and Lineage.
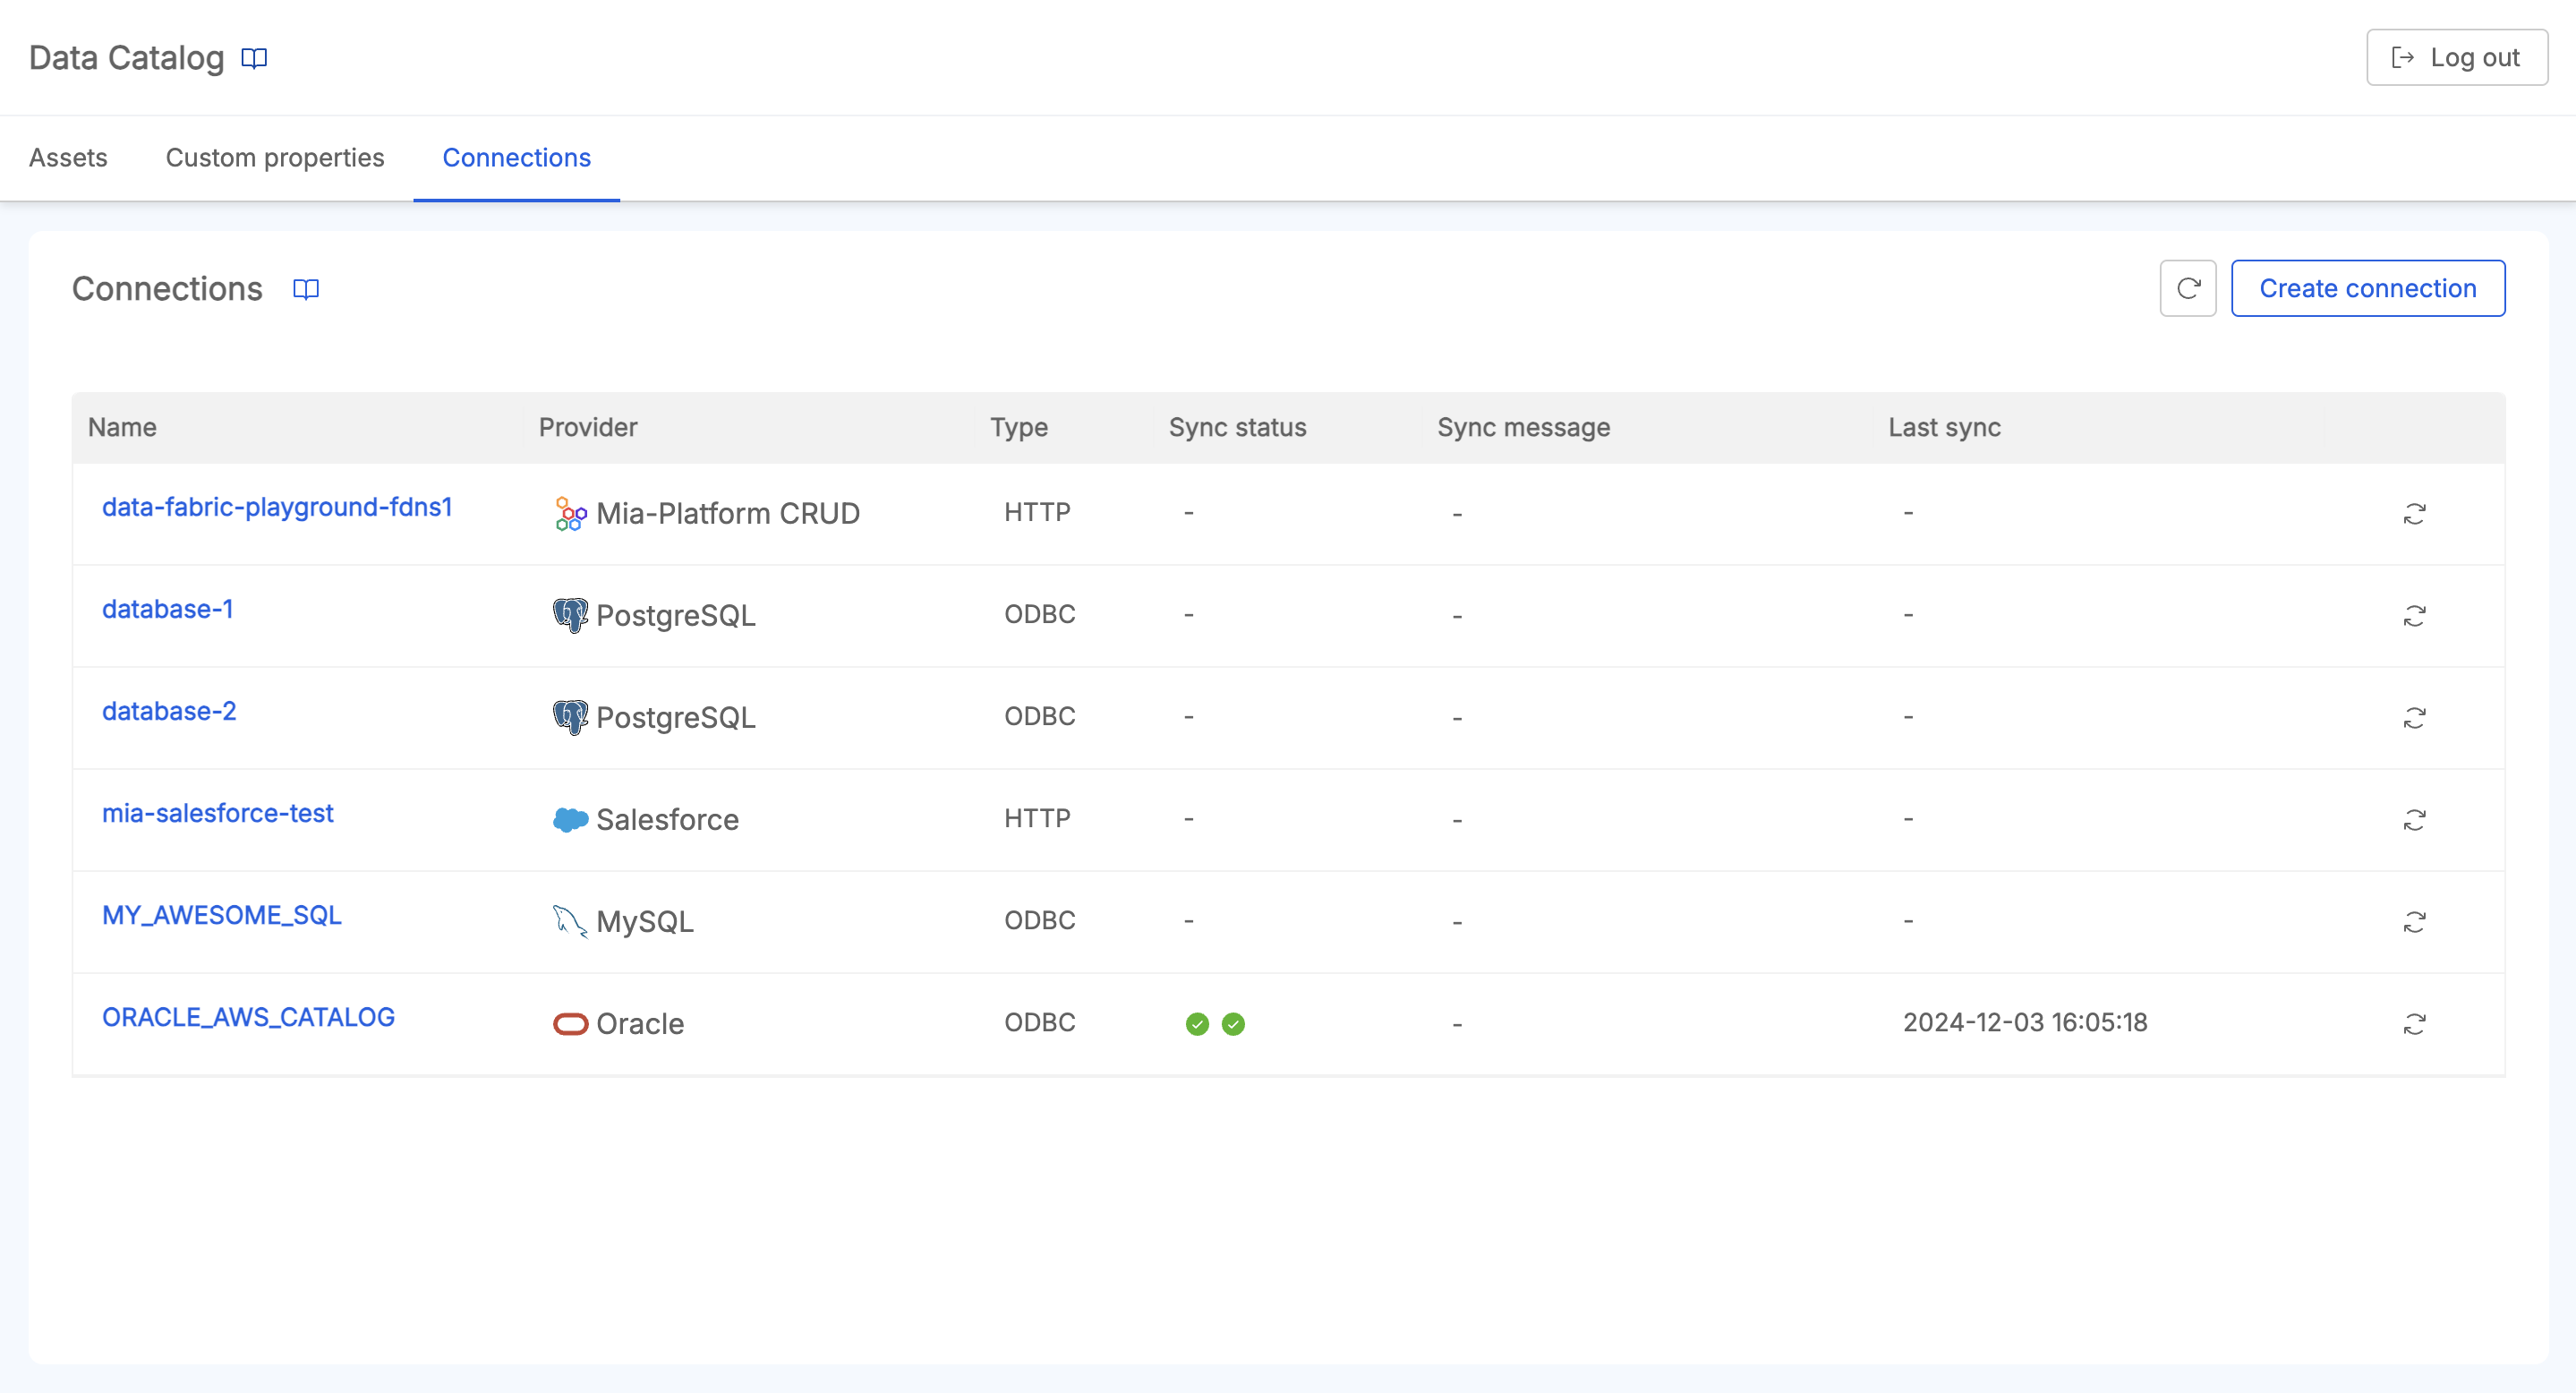
The Connections Panel provides the following features:
- View and Access Connections details: an overview lets user to provide the list of connections, including detailed information for each (identifier, resource type, connection type, settings, and configuration).
- Create and Update Connections: the UI provides a creation wizard that lets users define a new connection that contributes to Data Catalog assets; one created, it is possible to access its details and to update them if necessary;
- Delete Connections: delete existing connections that are no more needed; this action brings also to the deletion of all the retrieved assets belonging to that specific connection;
- Import Data Assets from a Connection: users can trigger a Data Catalog Sync Job from the Job Runner, to import connections assets in the Data Catalog.
This section of Data Catalog should be accessible only by administrators that have access to the connection credentials of external sources.
For such reasons, the Data Catalog application will give the permissions admin:connections to the underlying endpoints of the Connections Panel.
See the Secure Access section to learn more about the authorization process.
Input Management
The information useful for properly defining and configuring a connection can be of two types:
-
Plain Text: the field is a regular text field;
-
Secret Name: the field will be a text referencing a secret name defined within the Job Runner service (see the Secrets Name Configuration paragraph for more details). A dropdown can provide a list of suggestions containing existing secret names retrieved from the service itself. If a secret name that does not appear in the list is provided, the service will try to read that name from the environment variables of the service.

Since a connection requires usually to provide sensible information (such as passwords, connection strings, etc...), some fields can only be filled with Secret Names.
Create a Connection
By clicking on the Create Connection button, users are guided through a creation wizard that defines the parameters to properly establish a connection.
Connection Providers
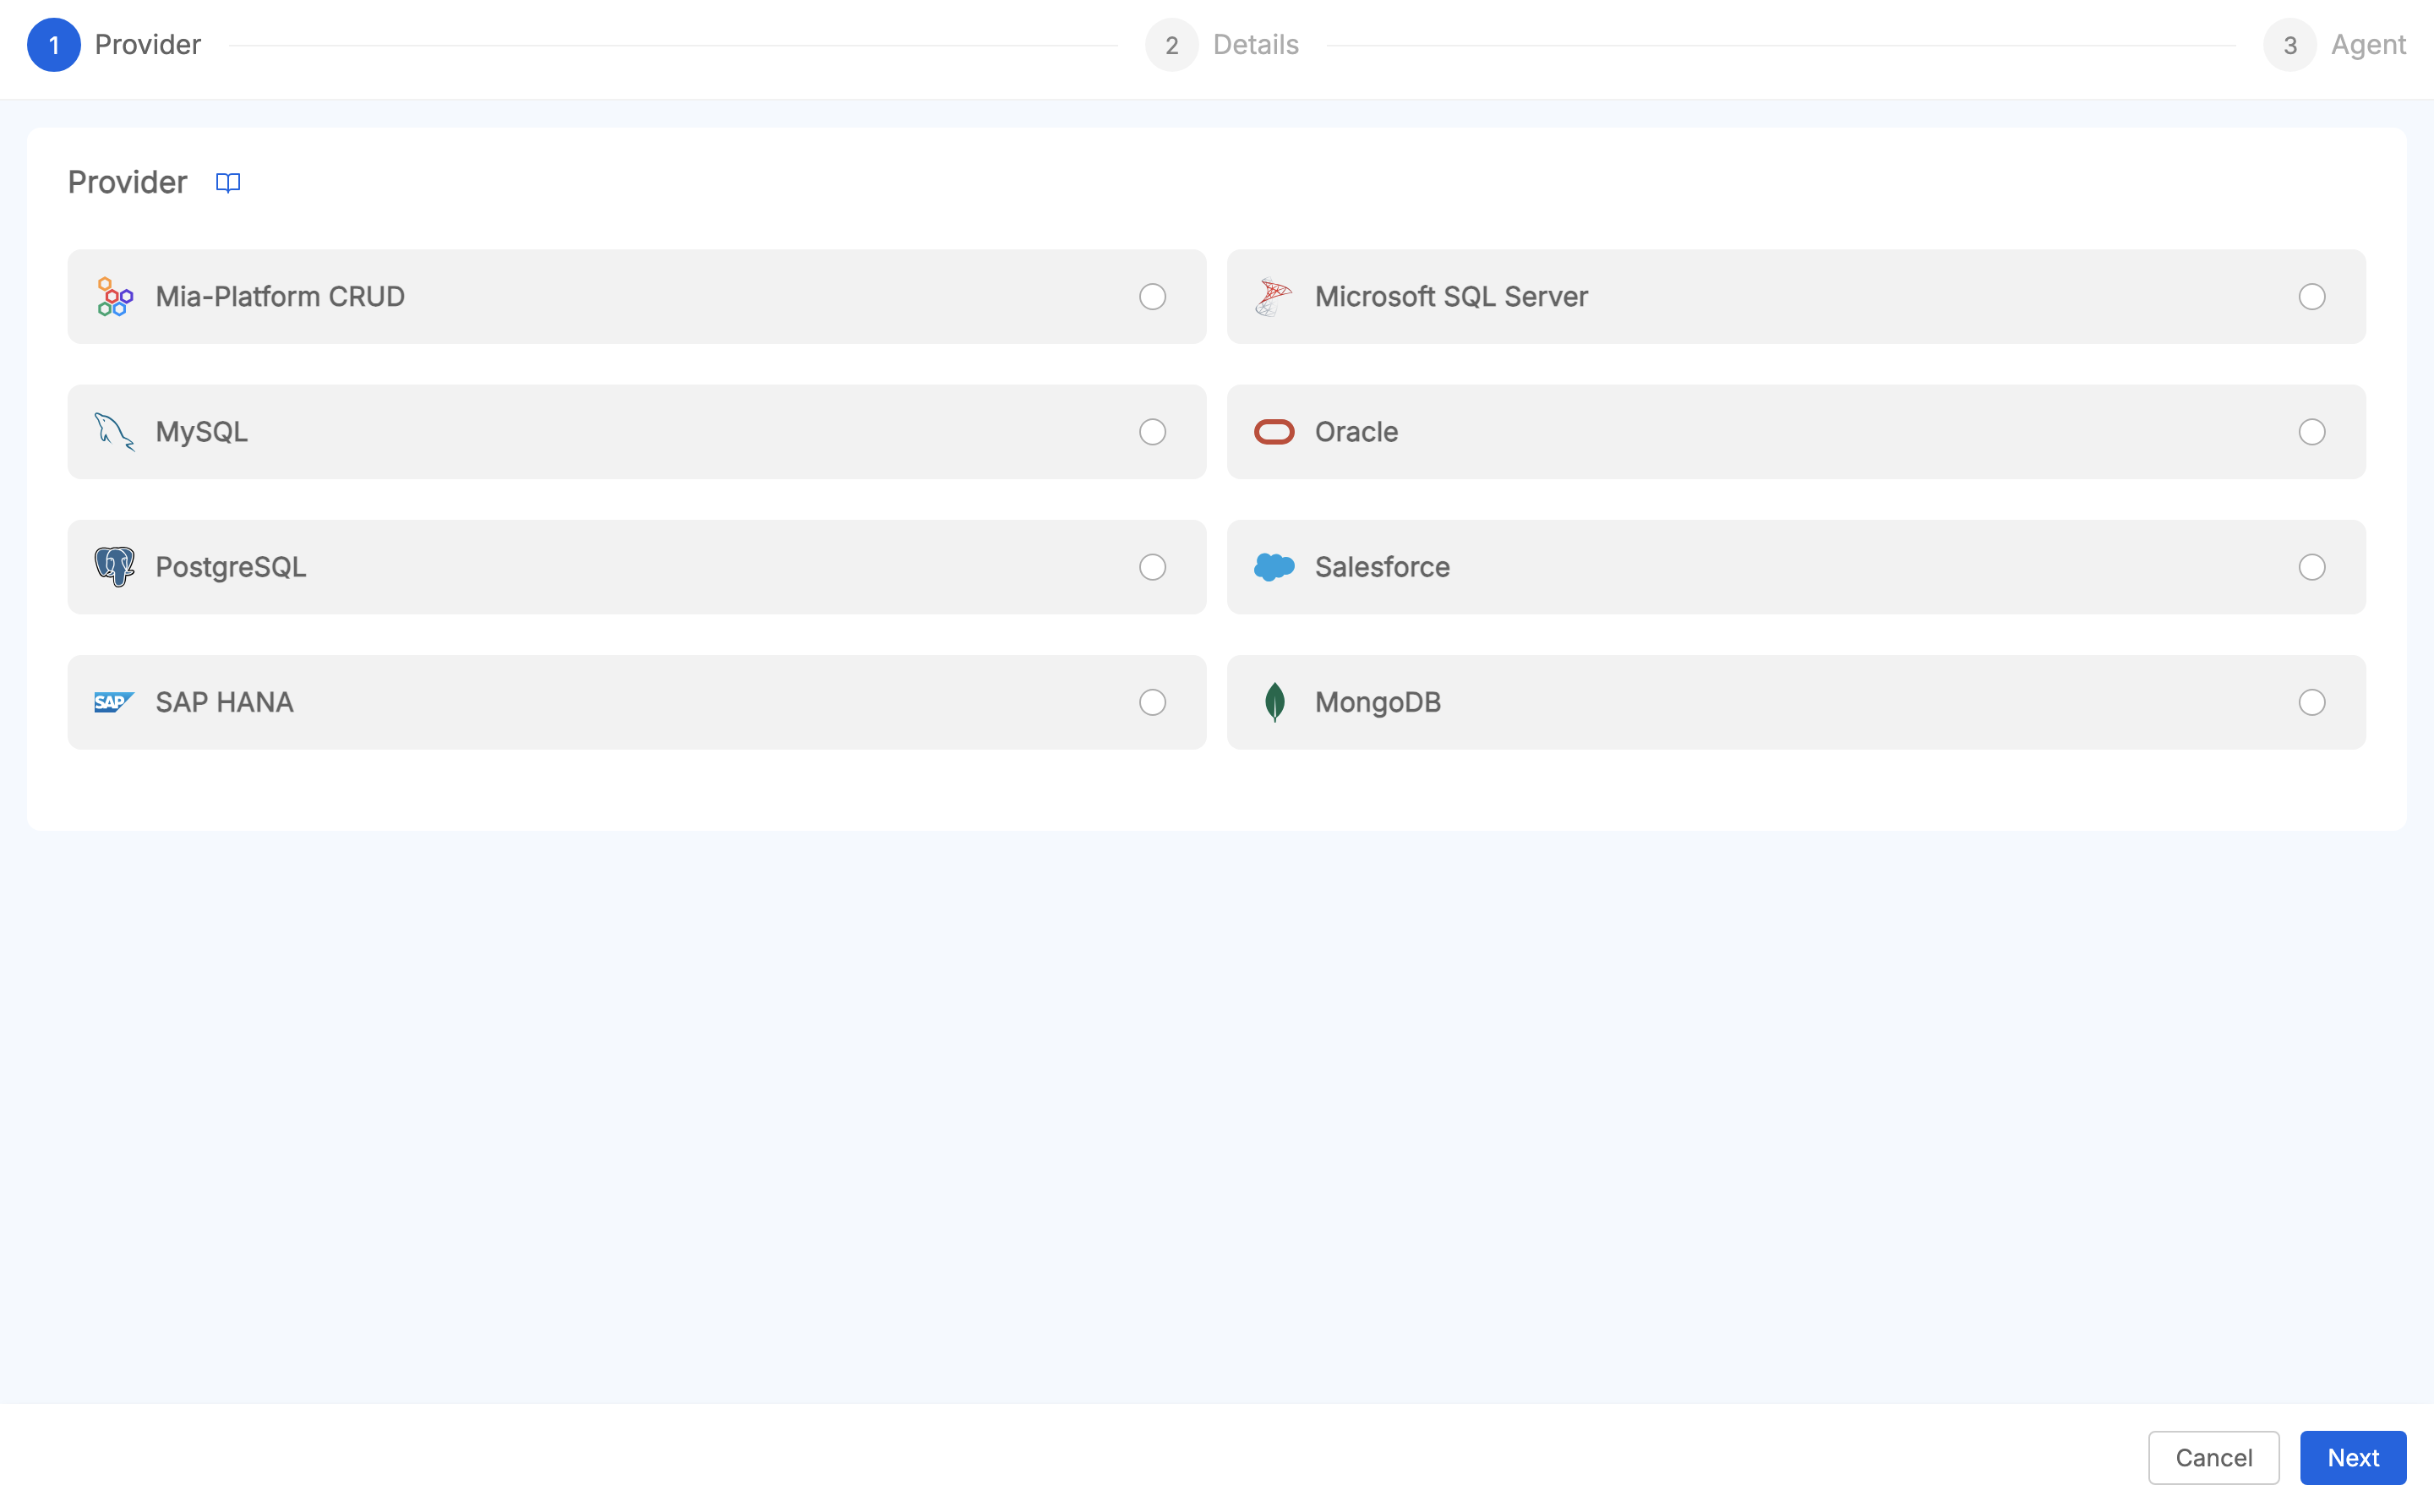
First of all, users need to choose the provider they want to access from Data Catalog. The following providers are supported, which can be grouped into the following categories:
- ODBC Connections: storage layer that can be reached using Open Database Connectivity (ODBC). The following providers are supported:
- Oracle DB
- PostgreSQL
- MySQL
- Microsoft Server SQL
- SAP Hana
- HTTP Connections:
- Salesforce SObjects: storage layer provided by Salesforce;
- Mia-Platform CRUD: data layer on MongoDB provided by Mia-Platform Console.
- Native: databases that can reached using their native driver, such as:
- MongoDB
Connection Details
The Connection Details step will show the connection accordingly to the chosen provider. Regardless of the provider, users have to provide a unique name for the connection, which will correspond to a System of Record inside the Data Catalog.
The name of a connection is an information that cannot be modified once the connection has been created.
Now we explore all the details for each provider Data Catalog provides support.
ODBC Connections
Before configuring an ODBC Connection, be sure that the Job Runner Service has been configured properly for ODBC Connections.
For more details, see the dedicated section.
ODBC Providers can have two types of mode to perform the connection.
-
Connection String: users need only to pick a secret name referencing a connection string in the Job Runner Service.

-
Data Source Name (DSN): users can choose between the available DSN configured in the Job Runner Service. Users can also configure the DSN's username and password if those information are not available inside the DSN. Be aware that username and password are mandatory for connections such as MSSQL or SAP HANA.

Oracle Query Settings
Oracle DB has also a section which can change the behavior of the underlying queries that the Data Catalog Sync will perform while retrieving assets information. The following parameters can be tuned:
-
Compatibility: if the data source is an
ORACLE 11gdatabase, this check should be active since the database does not support pagination viaOFFSET ? ROWS FETCH FIRST ? ROWS ONLY; -
Query Mode: based on this option, the Data Catalog Sync Job will perform the scan query on a different set of views provided by Oracle. Three options are available:
- User: tables
user_tables,user_viewsanduser_mviewswill be used. This represents the default mode if no option has been provided; - All: tables
all_tables,all_viewsandall_mviewswill be used. It is strongly suggested to add a comma-separeted list of schemas in the dedicated field to only pick the tables of interest; - DBA: tables
dba_tables,dba_viewsanddba_mviewswill be used. It is strongly suggested to add a comma-separeted list of schemas in the dedicated field to only pick the tables of interest.
- User: tables
Salesforce SObjects
To connect to Salesforce SObjects API, first you need the basic information of the Salesforce instance, such as its Url and API Version.

The range of supported
apiVersiongoes from31.0to59.0.
SObjects Permissions
Make sure the user configured in the Authentication card has the right permissions to retrieve all the SObjects you need.
If not all the SObjects are retrieved you will have to follow these steps to expose them through the API:
For custom SObjects
- Go to your Salesforce dashboard
- Access Setup
- Access the
Permission Setssection - Create a new Permission Set (e.g. API for Custom Objects) with license type
Salesforce API Integration - Click on
Object Settingsinside the new Permission Set, then, for each custom SObject, update the visibility in the desired way (e.g. View All, Modify All) - Assign the new Permission Set to the user with
Salesforce Integrationuser license andSalesforce API Only System Integrationsprofile
For standard SObjects
- Go to your Salesforce dashboard
- Access Setup
- Access the
Permission Setssection - Create a Permission Set (e.g. API for Standard Objects) without specifying a license type
- Click on
Object Settingsinside the new Permission Set, then, for each standard SObject, update the visibility in the desired way (e.g. View All, Modify All) - Assign the new Permission Set to the user with
Salesforce Integrationuser license andSalesforce API Only System Integrationsprofile
Authentication
To configure a Salesforce SObjects connection you can use two authentication methods:
-
Private Key, which configures the OAuth2 JWT flow with the following fields:
clientId: either plain or its secret name;username: either plain or its secret name;privateKey: represents the path where the certificate is stored inside the Job Runner, it can either be plain or a secret name
Enable JWT Authentication on Salesforce
To be able to connect to the Salesforce API using the JWT Bearer flow you will need to follow the next steps.
- Follow the steps one and two from this guide: https://help.salesforce.com/s/articleView?id=sf.connected_app_create_api_integration.htm&type=5
- Then you'll need to upload your self-signed certificate in PEM format (step 5 from the guide). If you do not have a certificate follow these instructions:
- Generate a rsa key with the command
openssl genrsa -out tls/key.pem - Then create a request to sign the certificate with this command
openssl req -new -key tls/key.pem -out tls/sf_connect.csr - Sign the request with you private key with
openssl x509 -signkey tls/key.pem -in tls/sf_connect.csr -req -out tls/sf_connect.crt - Upload the generated certificate (
tls/sf_connect.crt)
- Generate a rsa key with the command
- Now you need to enable the OAuth2 mechanism following the 10th step from the guide, creating a connected app and all.
- Finally you need to enable the JWT access with the step 14 of the guide.
Now you should have everything you need to fill out the configuration parameters.
-
Credentials, which configures the deprecated OAuth2 username-password flow, with the following fields:
clientId: either plain or its secret name;clientSecret: can only be a secret name;username: either plain or its secret name;password: can only be a secret name;securityToken(optional): can only be a secret name.
You also need to provide the Login Url of your Salesforce instance (by default is set to https://login-salesforce.com).
For example, if you are using a testing instance, you'll need to set this field to https://test.salesforce.com/.
Mia-Platform CRUD
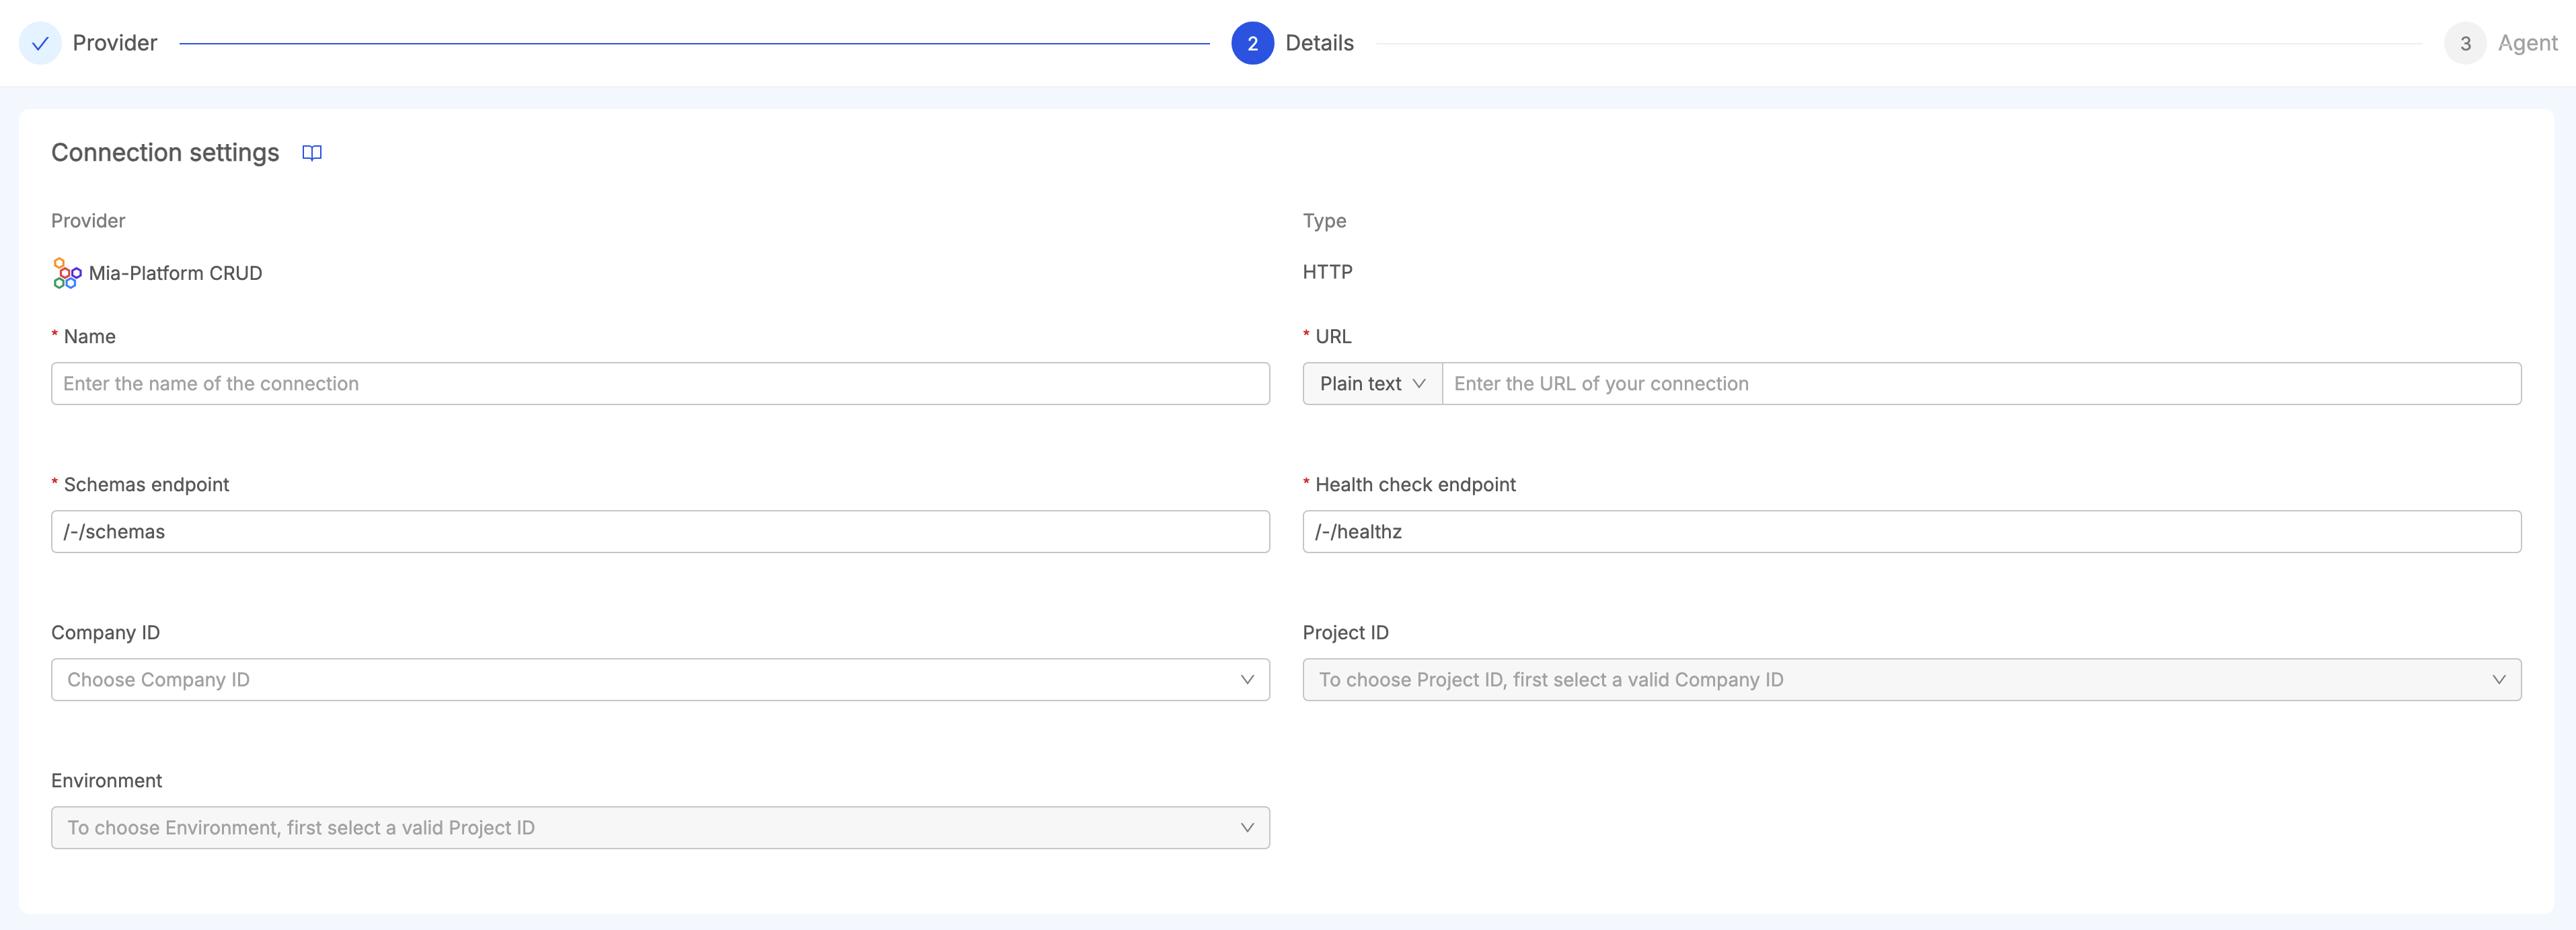
Mia-Platform CRUD connection enables to retrieve assets from Mia-Platform Console projects having data models stored on MongoDB and managed through Crud Service.
The required information to setup the connection are:
- the Url where the CRUD Service is located;
- the Schemas Endpoint (usually
/-/schemas) to retrieve the collections assets; - the Health Check Endpoint (usually
/-/healthz) to retrieve the version of the CRUD Service.
Additionally, it is possible to define the project and the environment where the CRUD Service is located in a Mia-Platform Project by choosing a Company.
If a Company has been configured, this connection can be read by the Fast Data Jobs Sync from the Job Runner, to generate Open Lineage Jobs from Fast Data Pipelines of the Control Plane. This means that the selected CRUD Service must be deployed in a project having Control Plane configured.
To choose a Company, be sure that Fabric BFF has Console communication enabled. See here for a detail explanation on how to setup this feature.
If Console communication has not been enabled or the Company you want to set is in a different Console, you can provide a custom Company identifier.
Headers
Users can also add additional headers to the request that will be executed by the Connection to retrieve assets.
To do so, click on the Add Header button to choose a key-value pair to add to the headers list. The value can also be a secret name reference.
There is no need to add the header "accept": "application/x-ndjson" since it's managed internally by the Job Runner service.
TLS
In case the CRUD Service needs a custom root CA or an insecure HTTPS connection,
it's possible to set the connection as insecure and set a custom certificate if needed.
MongoDB
Users can create a connection directly to MongoDB using the dedicated provider, where the user needs to define the connection string used to connect to the database instance.
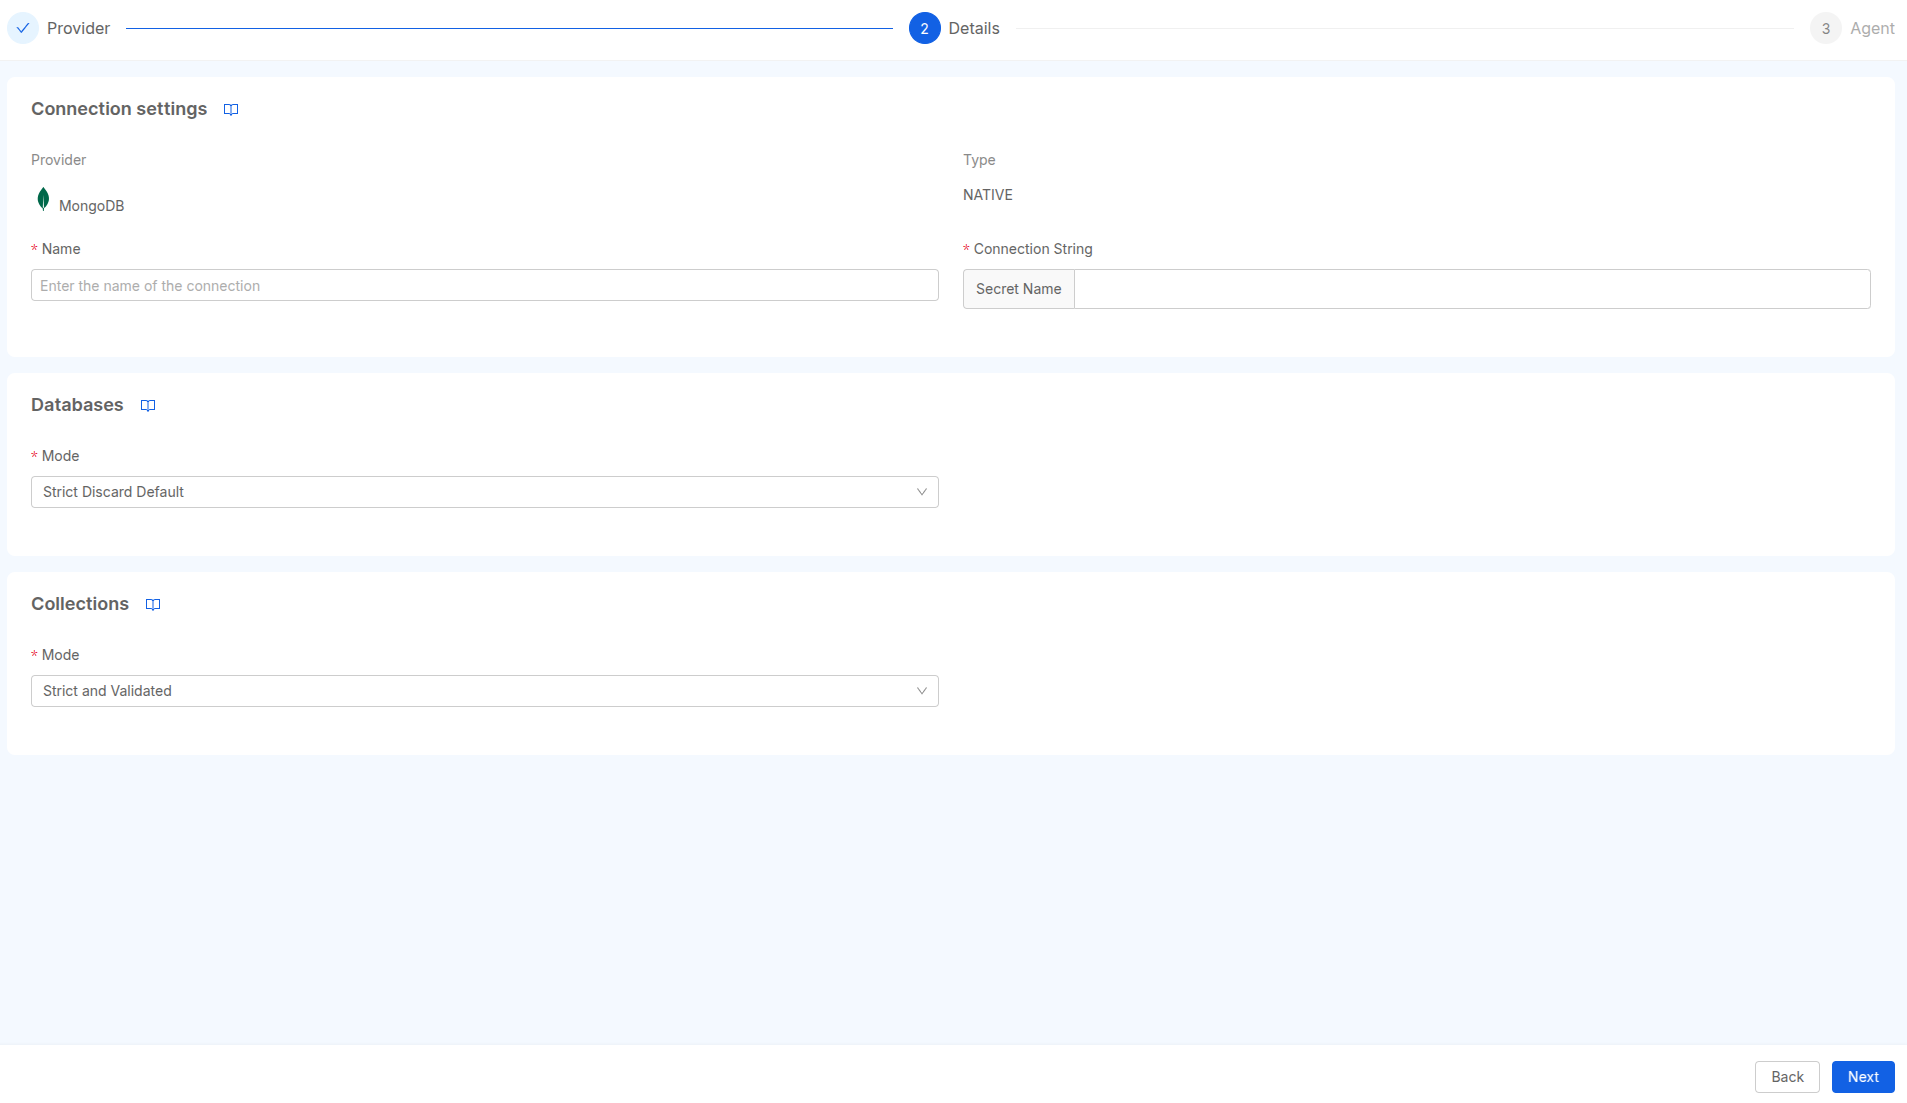
Since MongoDB is a NoSQL database there is no concept of schema for a collection. However when a JSON Schema validation is available it may make sense to detect fields and types for a collection.
Types from MongoDB are directly picked from the BSON Type specification.
During the retrieval phase, the agent follows these rules to parse the validation object:
-
when BSON and JSON schemas overlap (please refer to this table for a comparison list used by the inner library), then the JSON schema is included;
-
when the form of the validation is, at first level, written as:
{
  "type": "object",
  "properties": {
    // a list of fields
  }
}
then fields are extracted, since it is possible to determine column assets for each document in the collection;
-
if the validation schema contains
anyOf,allOf, oroneOfat the first level, the schema won't be parsed.
In addition to the connection settings, it is also possible to tune both databases and collections retrieval.
MongoDB Databases Settings
To define which databases the agent will retrieve when scanning models, the following options are provided:
- Strict Discard Default (default option): the agent will try to retrieve the assets from any non-admin database;
- Strict: the agent will try to retrieve assets from the database specified in the connection string;
- All: the agent will try to retrieve assets from every available database the user has access to;
- Whitelist: the user can specify a comma-separated list of databases from which the agent will try to retrieve assets.
MongoDB Collections Settings
Similarly, the collection retrieval can be tuned with the following options:
- Strict and Validated (default and recommended option): the agent will retrieve only collections that have a
validator.$jsonSchemacreation option; - Strict: the agent will try to retrieve the assets of the collections except the system's collections;
- All: the agent will try to retrieve any collection of the databases;
- Whitelist: the user can specify a comma-separated list of collections from which the agent will try to retrieve assets.
Agent Settings
These settings can be configured for all connections excepts Mia-Platform CRUD and MongoDB.
Once the main details of a connection has been defined, you can also tune runtime parameters of the Agent Dataset Scan Job from the Job Runner. Here you can choose:
- the Batch Size, a number that defines the number of assets that can be paginated in a query;
- the Column Batch Size, a number that defines the amount of columns that are expected to be processed by each batch iteration.
This section comes already with the values that will used by default in the Job Runner.
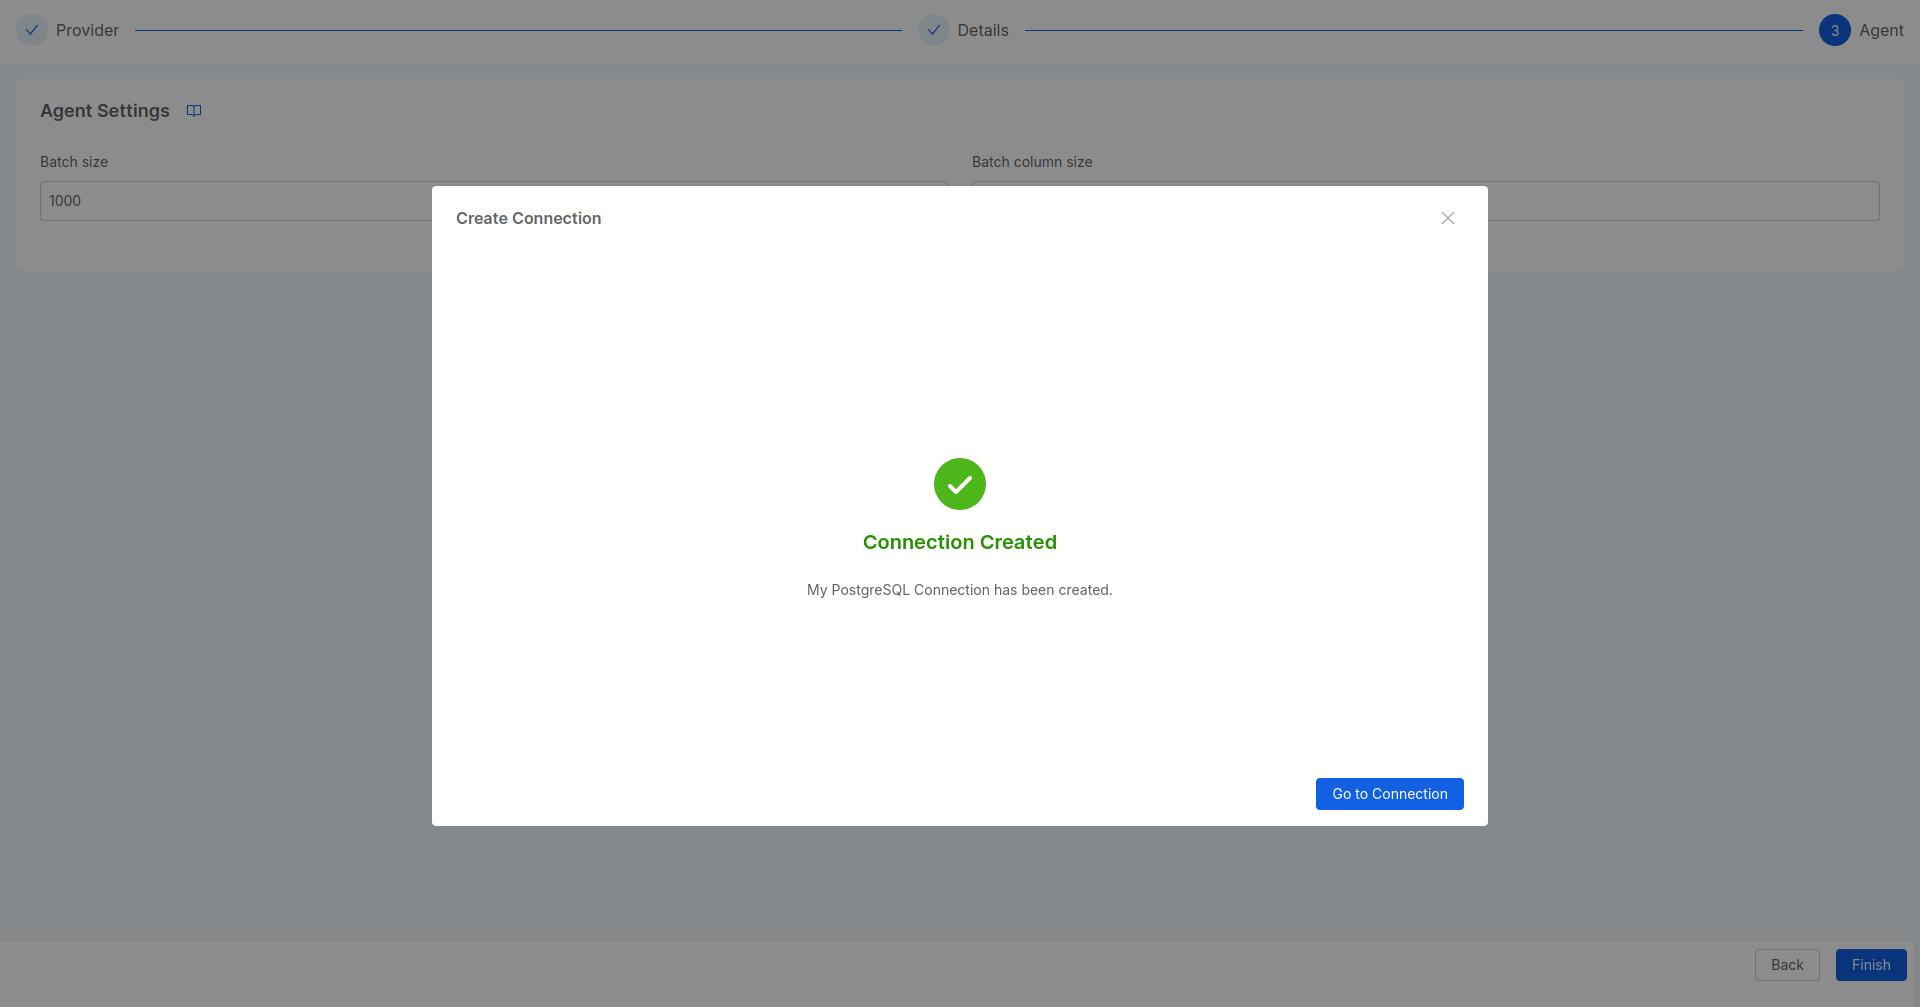
Once you have clicked on the Finish button,
a success message will redirect you to the Connection Overview of the newly connection.
Access Connection details
After having created the connection, it is reachable inside the list of connections displayed in the Connection Panel. Then it is possible to access its Details page.

Here, you can edit both Connection Details and Agent Settings by choosing the appropriate tab: when a field is changed correctly, the connection will be updated accordingly and the next execution of the Job Runner will use the latest parameters provided by the user.
Delete Connection
From the menu button on the top-right corner of the page, it is possible to click Delete Connection
and start the procedure to remove a connection from the Data Catalog.
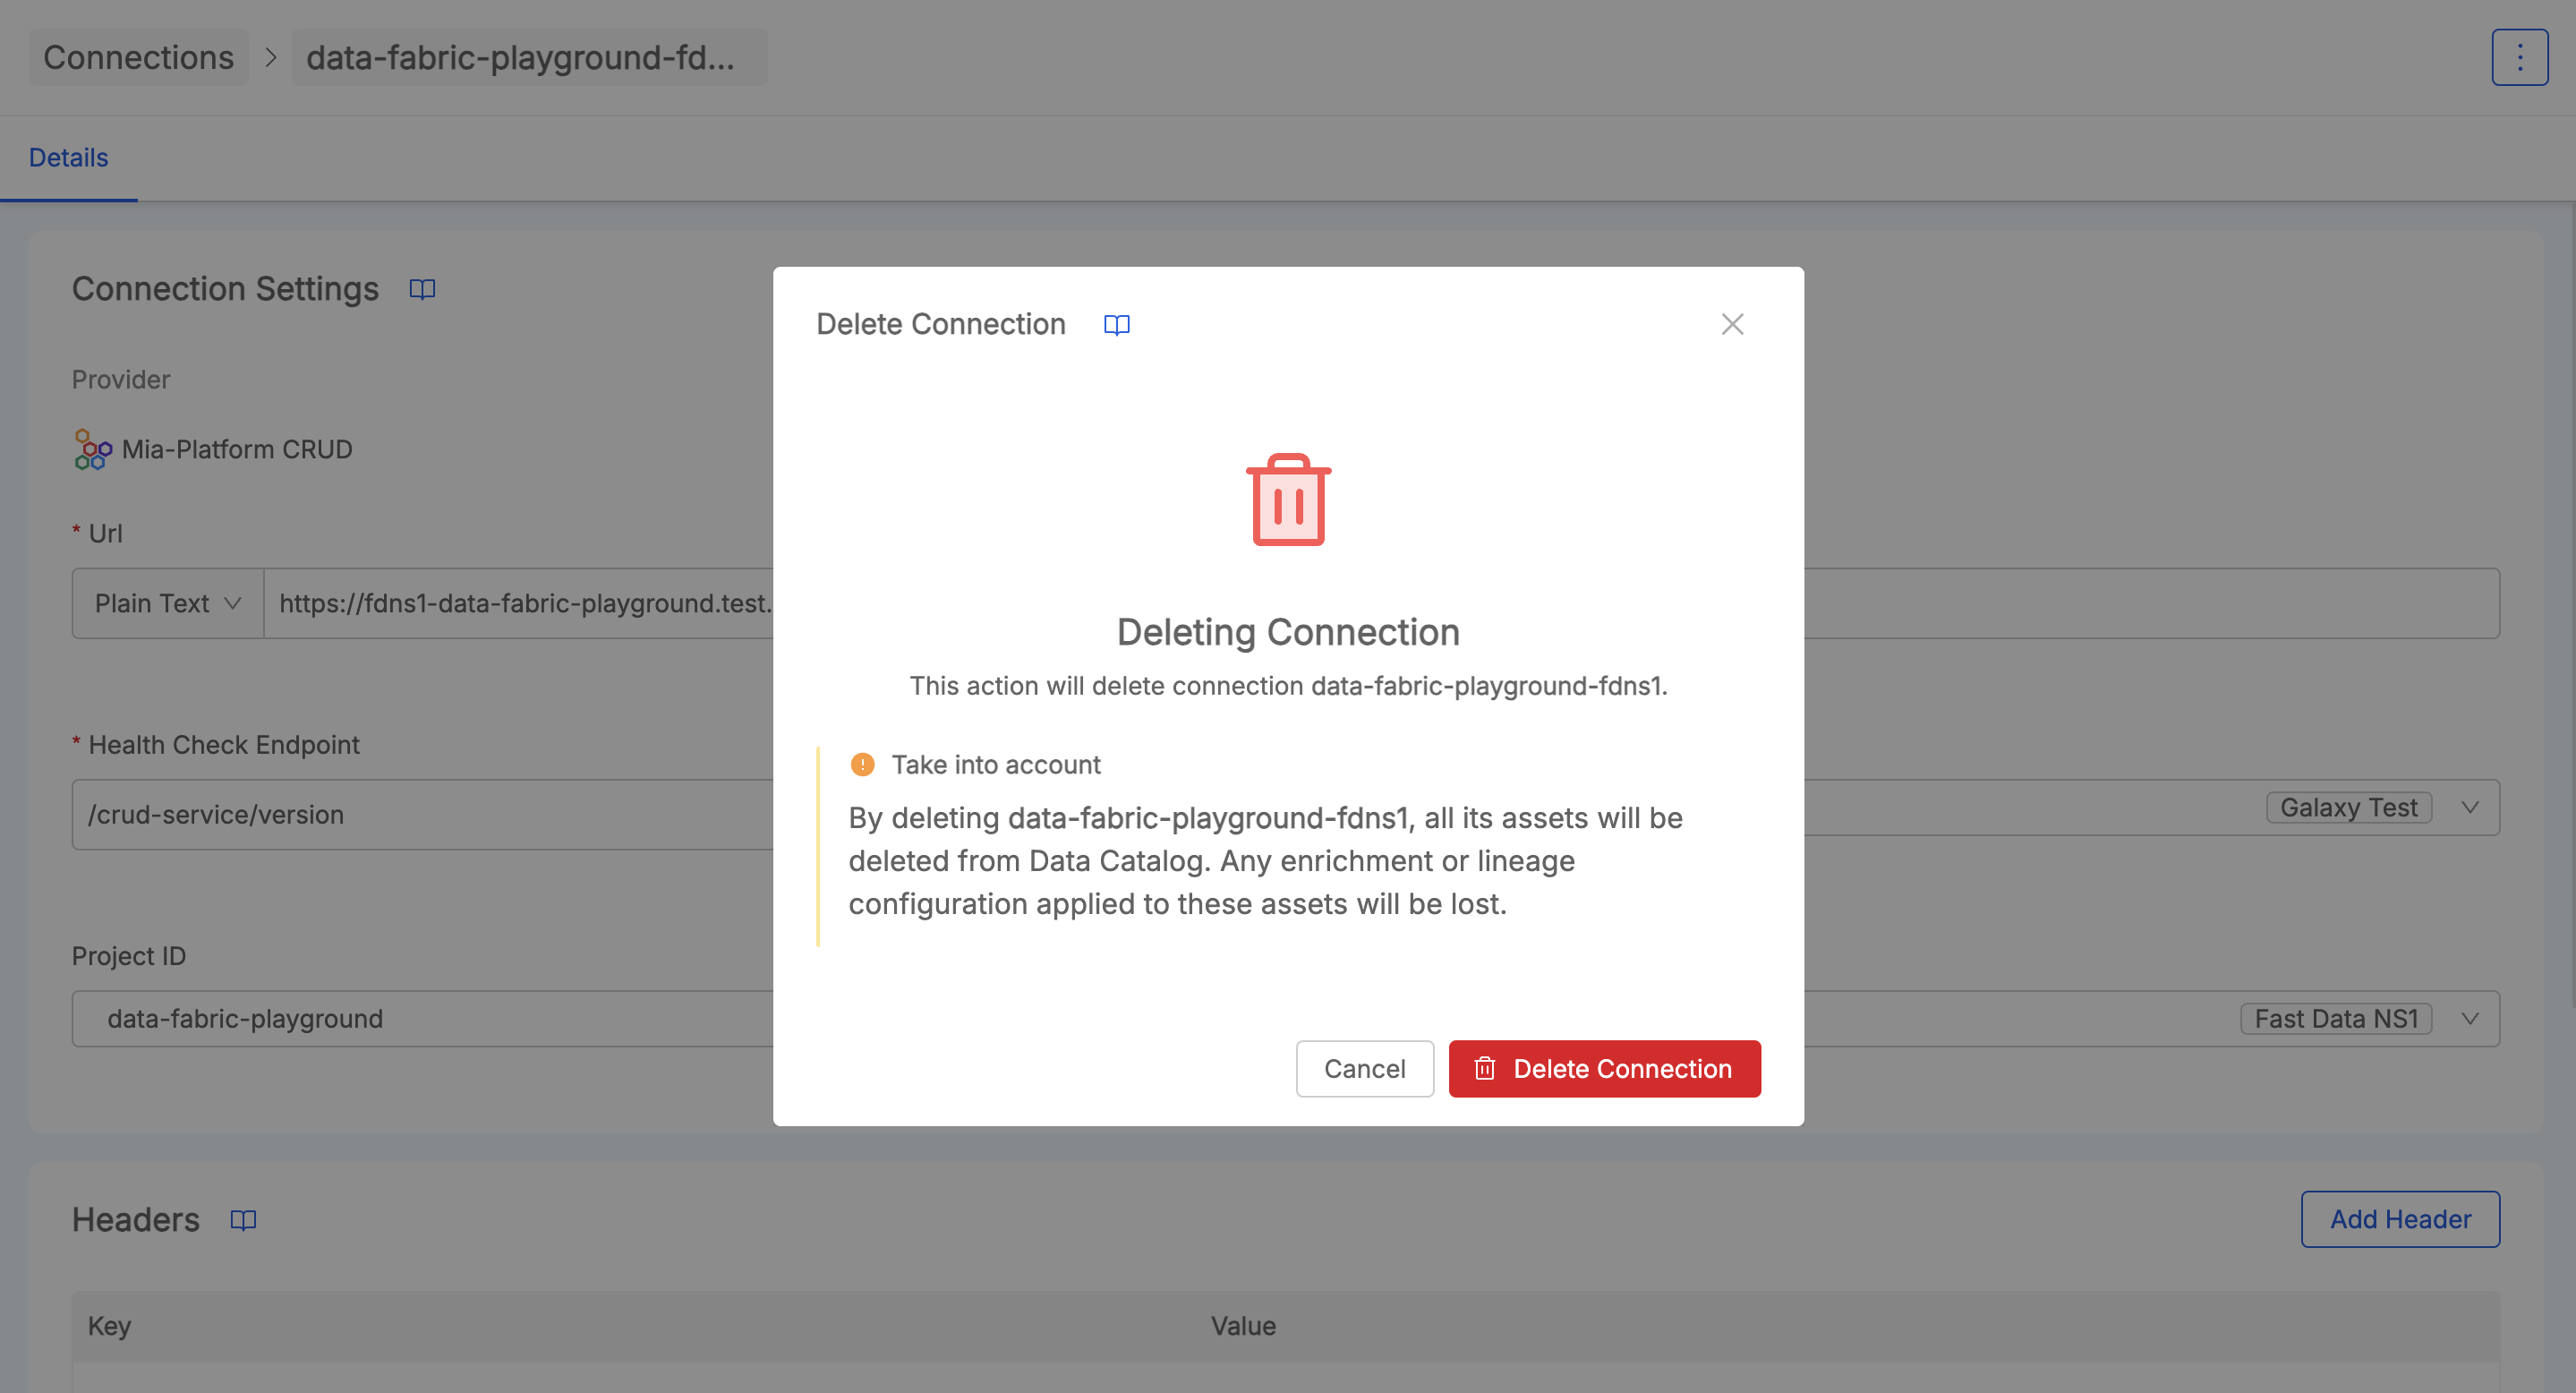
This action will remove any assets that has been imported from that connection in the Data Catalog, by leveraging the Connection Cleanup Job of the Job Runner. Please be careful when performing this action.
Import Data Assets from a Connection
Once a connection has been properly defined, the connection administrator can start importing its data assets into the Data Catalog.
In the overview of the Connections Panel where all available connections are listed, user can click the sync button and schedule an Agent Dataset Scan Job from the Job Runner.
Once the action has been executed, the table entry of that connection will be accordingly updated by the Job Runner with information about the triggered job status.

Once the Agent Dataset Scan Job is completed, a Data Catalog Sync Job will be executed automatically to store the assets retrieved from the data source into the Data Catalog.
Only one connection at a time will perform the synchronization. If more than one connection is synced at the same time, the ones that are still not executed will be in a Queue state.

You can also stop the synchronization process by clicking the Stop button. This action will cancel both Agent Dataset Scan and Data Catalog Sync jobs.
Once the synchronization has been completed, user has evidence about the Job completion. Moreover, it is possible to have evidence of the last sync time.
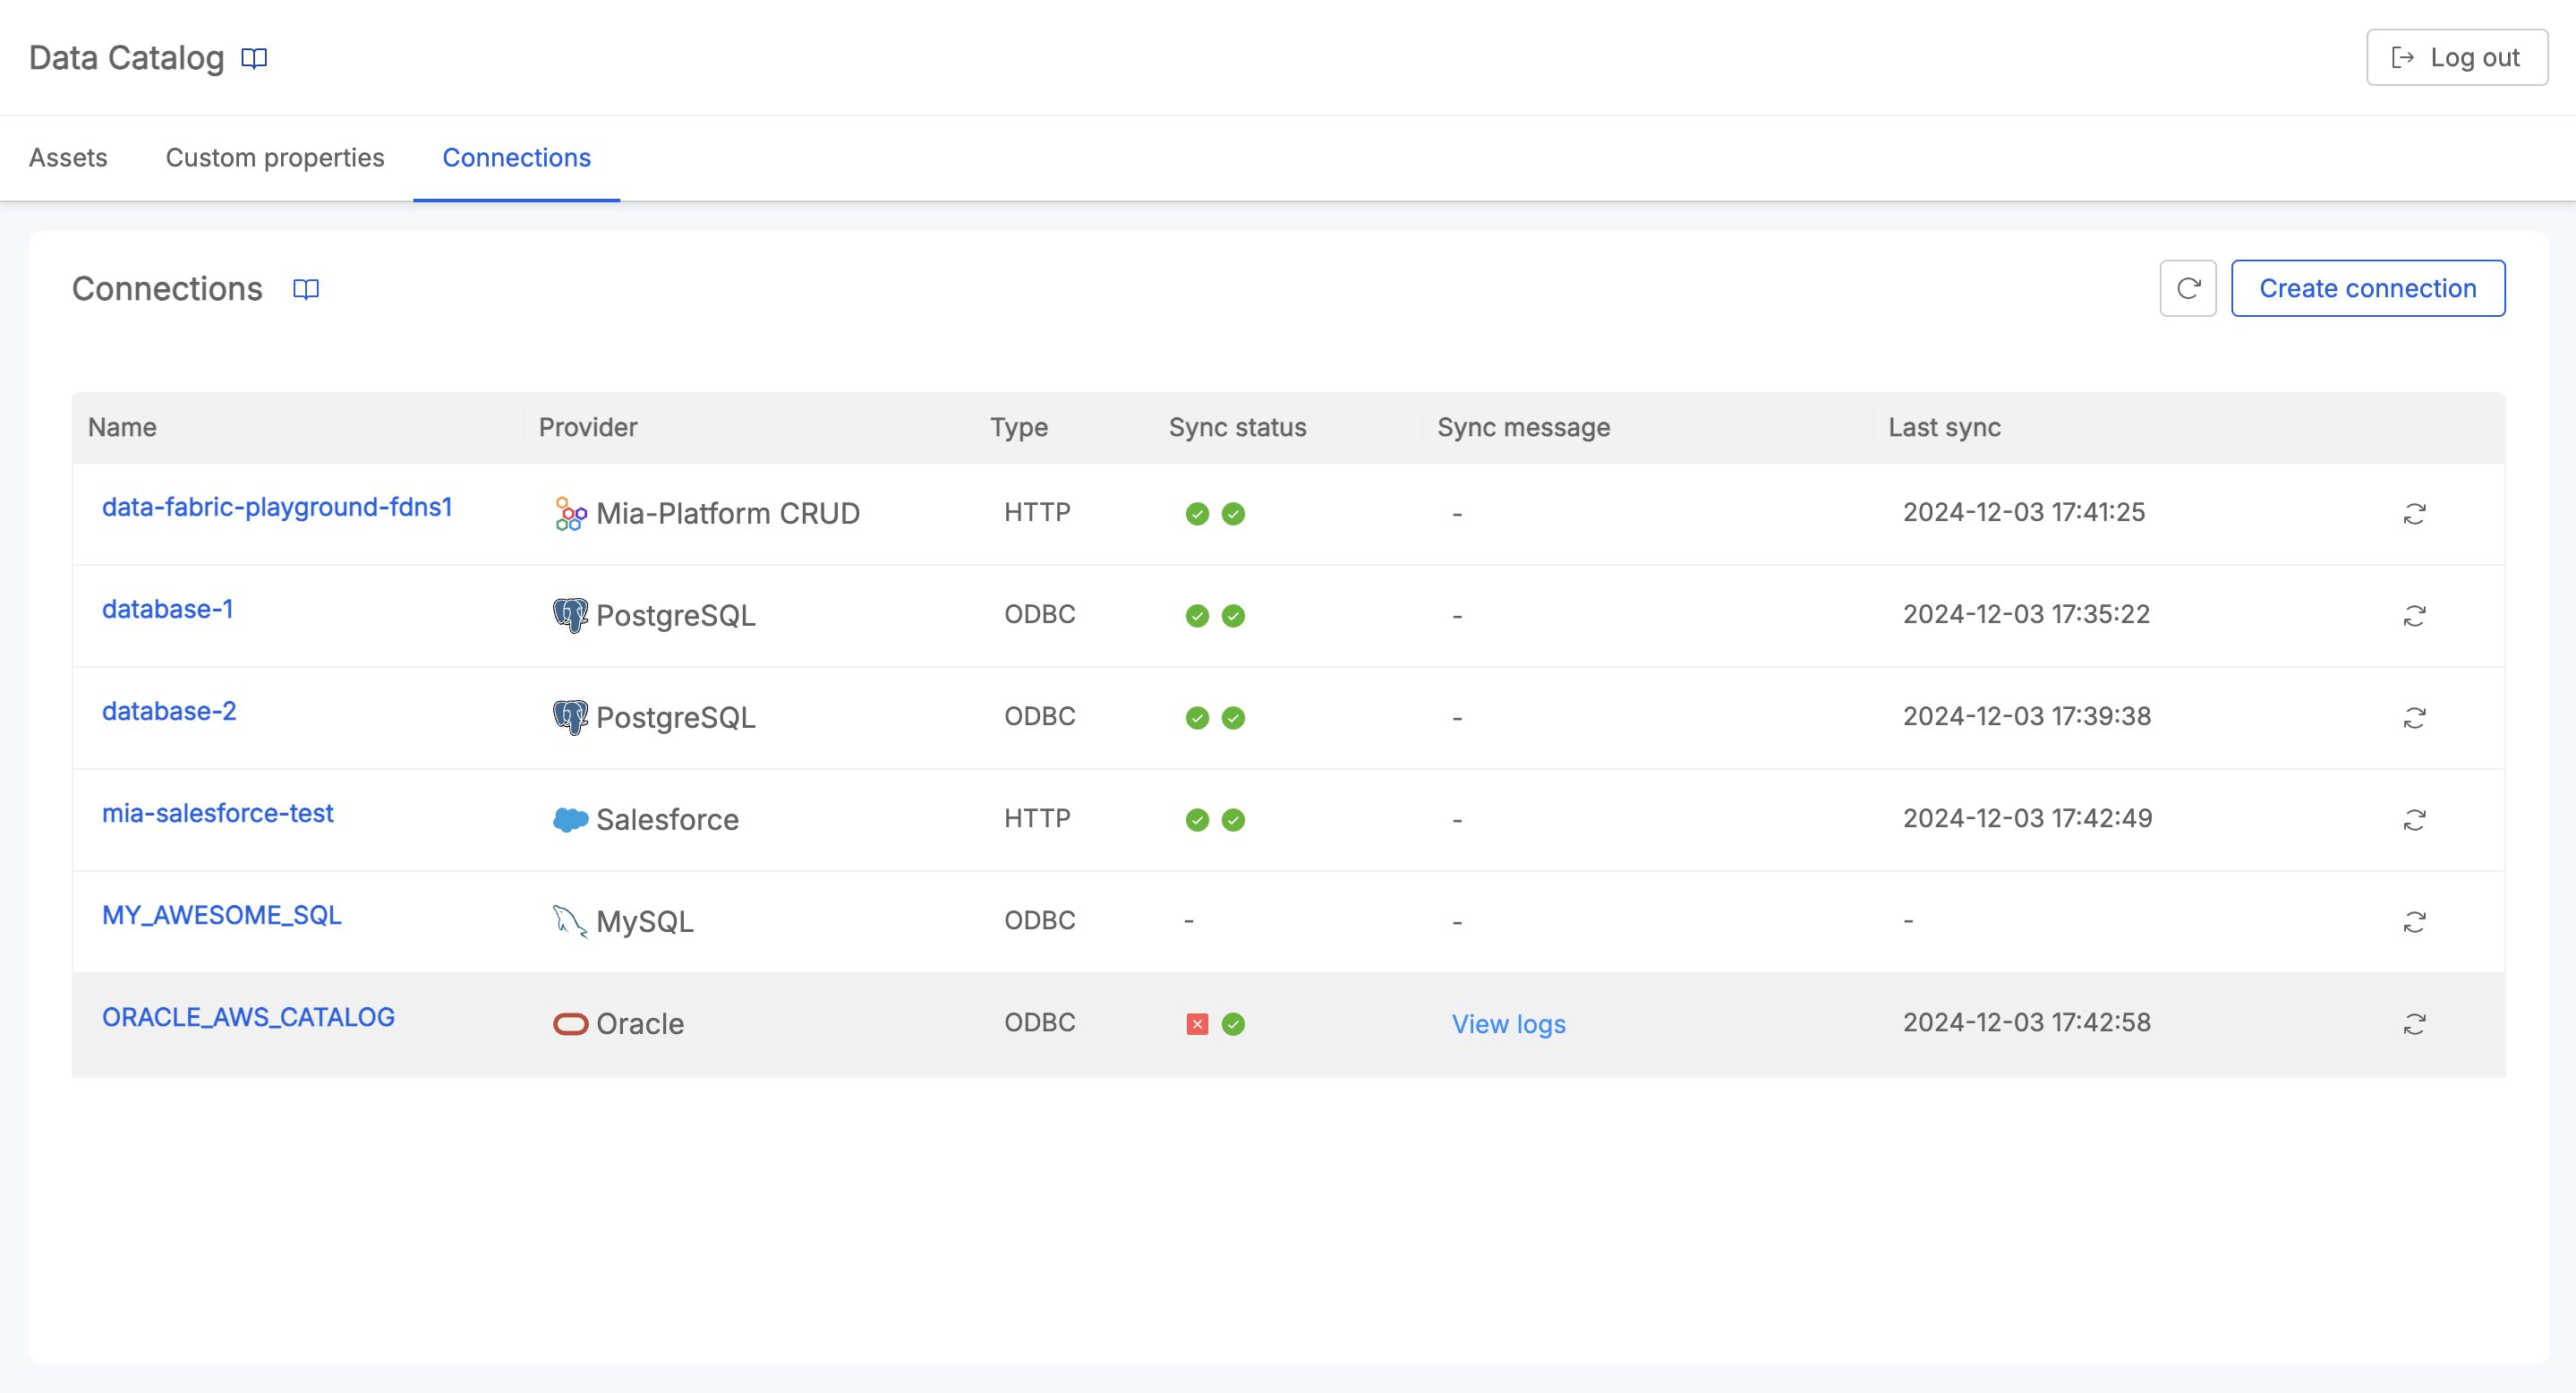
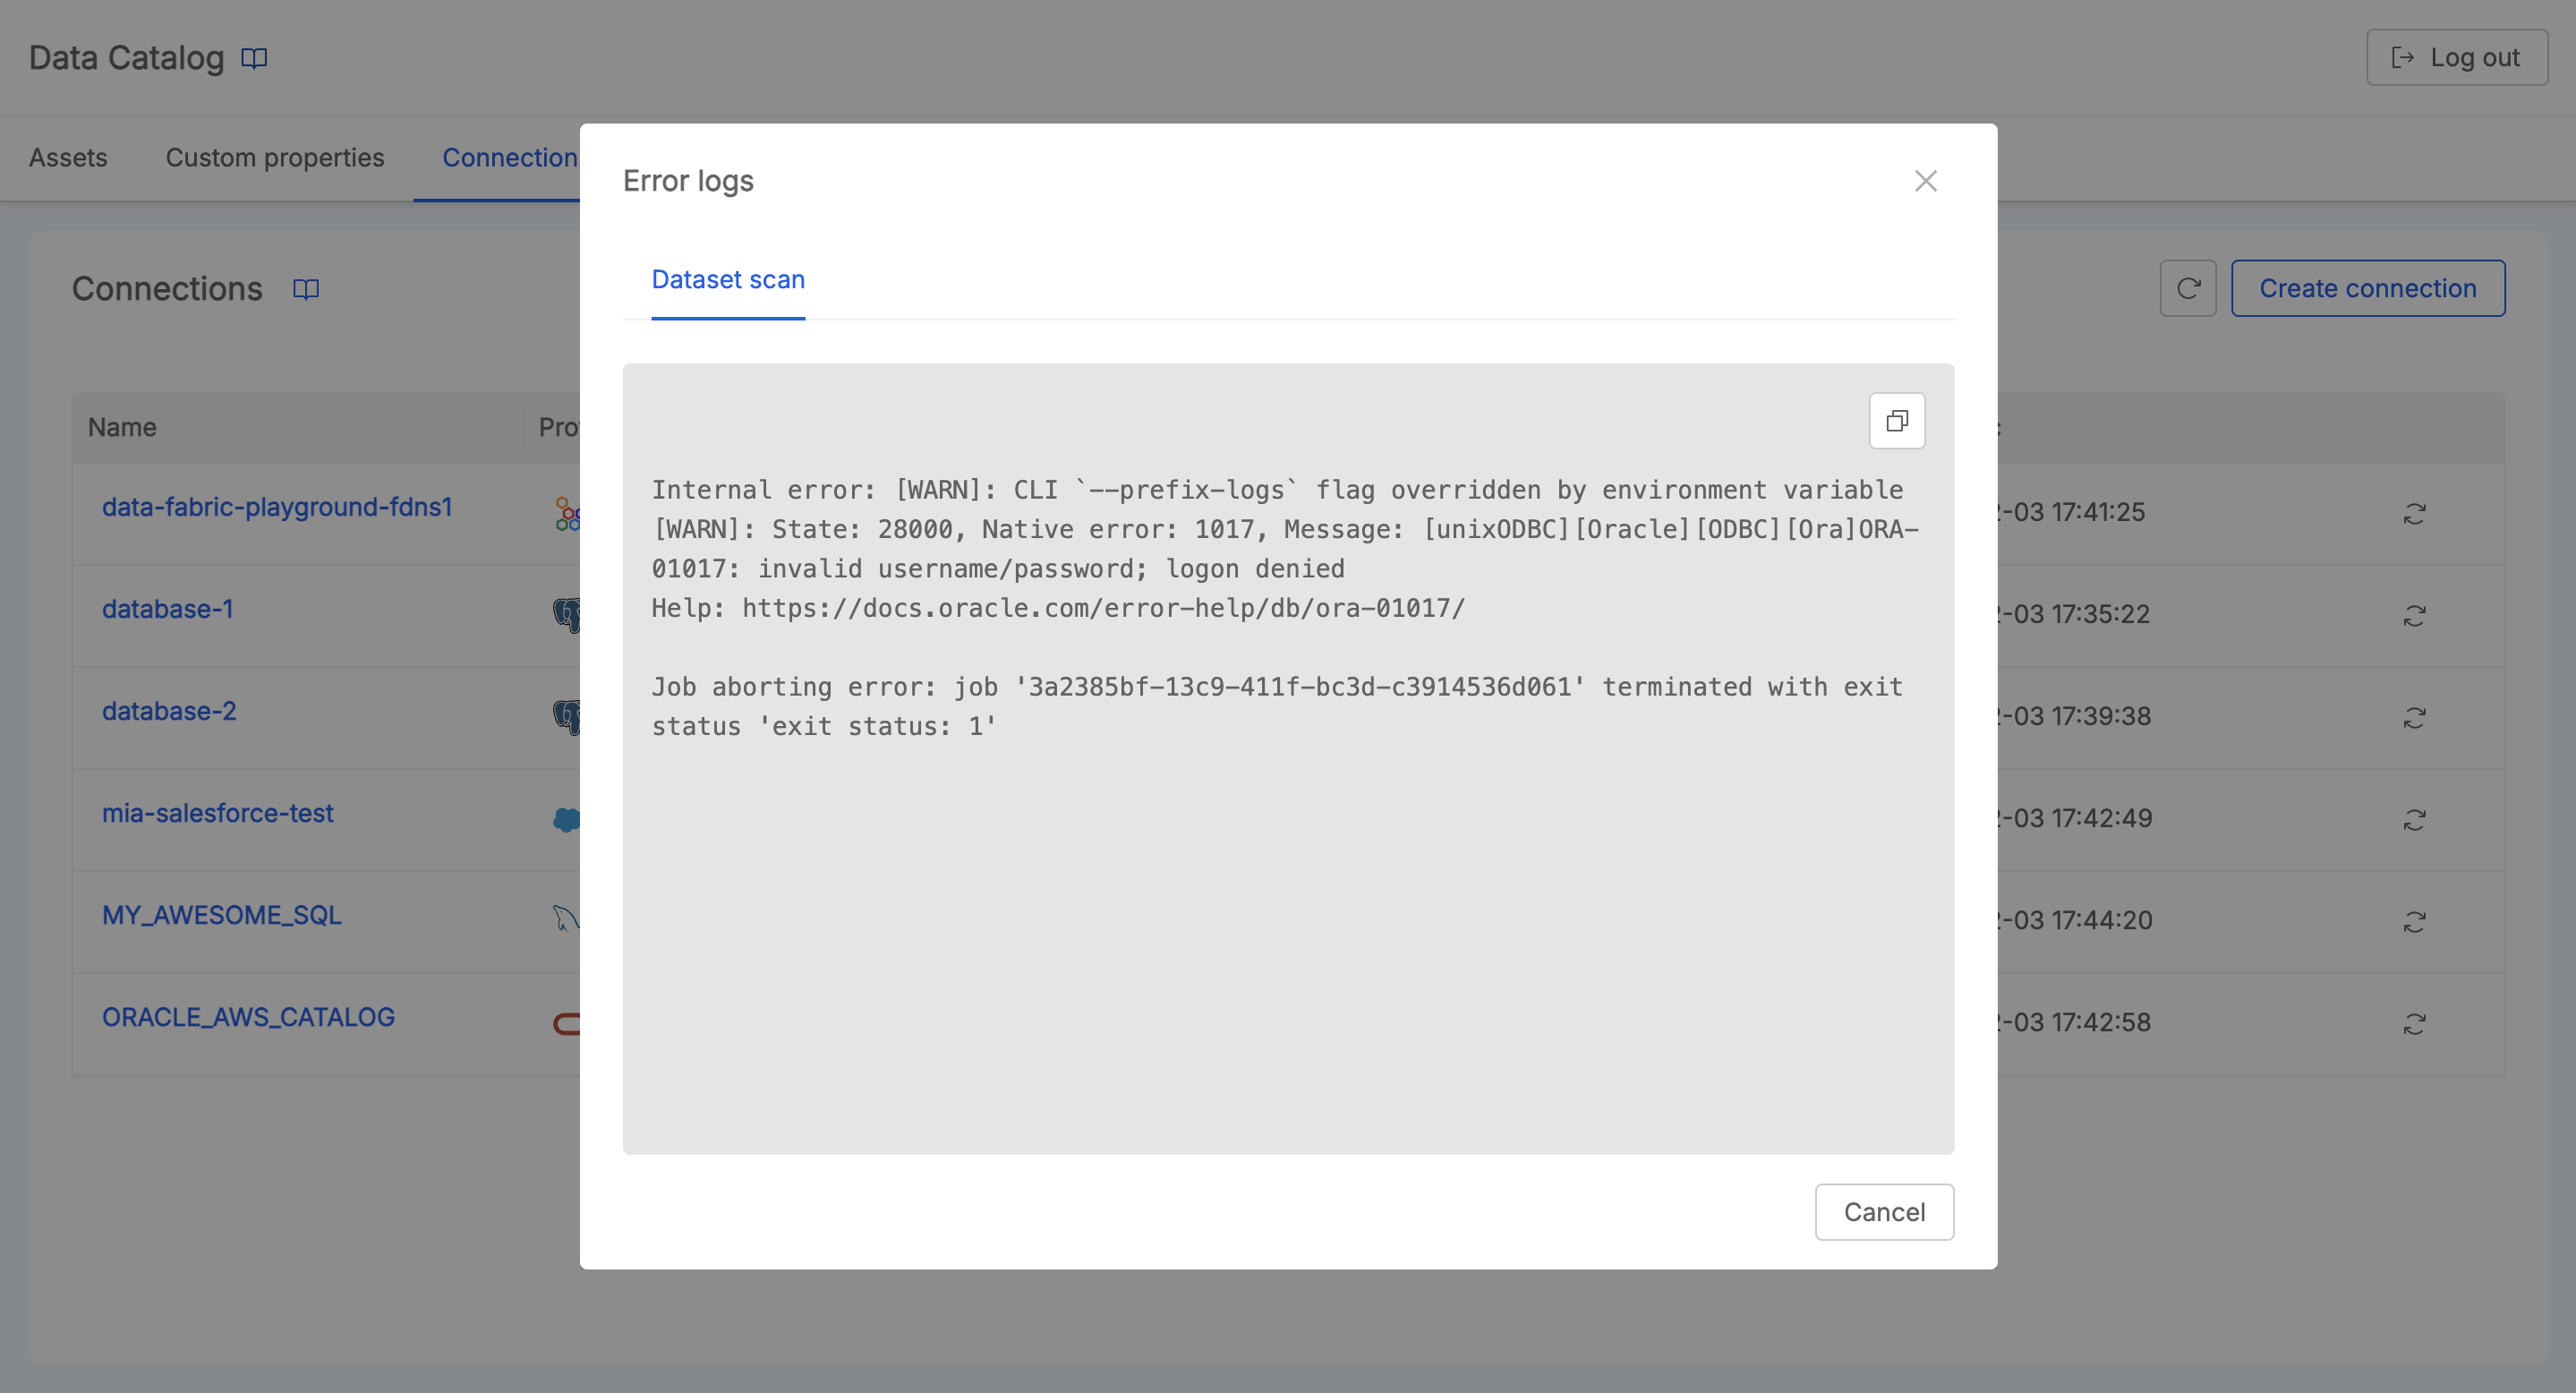
If an error occurs during the process, it will be possible to access the Job Runner logs to better inspecting the causes of the failure.
